In this article we are going to learn Download and Install Oracle Java 17 on Ubuntu 22.04 LTS, Update Java alternatives on Ubuntu 22.04 LTS,Verify Java Version on Ubuntu 22.04 LTS,Set the Java Environment Variables on Ubuntu 22.04 LTS.
Prerequisites
- Ubuntu Server 22.04 LTS
- SSH access with sudo privileges
To check Ubuntu version:
uname -a
Output:
ubuntu@ip-172-31-42-131:~$ uname -a
Linux ip-172-31-42-131 5.15.0-1028-aws #32-Ubuntu SMP Mon Jan 9 12:28:07 UTC 2023 x86_64 x86_64 x86_64 GNU/Linux
Table of Contents
Step #1:Download and Install Oracle Java 17 on Ubuntu 22.04 LTS
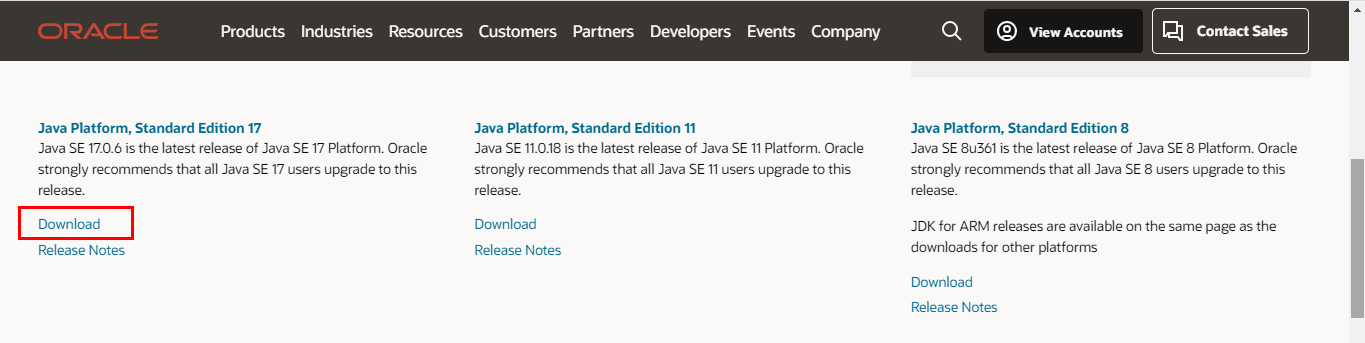
This link takes you to the Oracle home website Oracle Java JRE, go to Java SE 17 and Click on Download as shown below.
After clicking on Download copy the link address from here
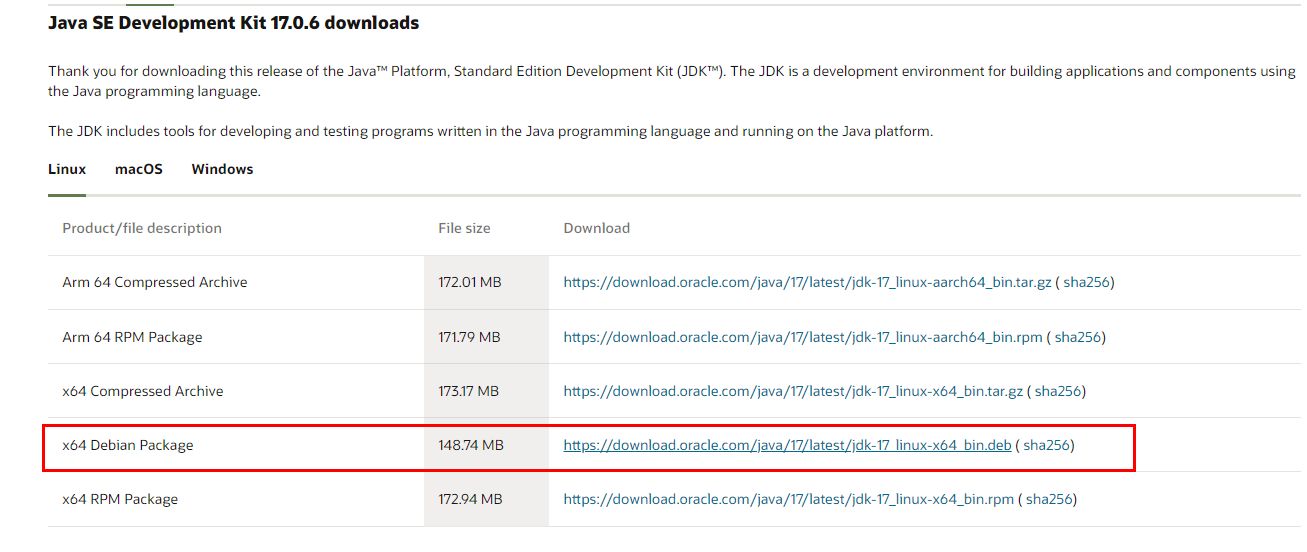
Now run the command using wget:
wget https://download.oracle.com/java/17/latest/jdk-17_linux-x64_bin.deb
Finally, install Oracle Java JDK 17 using the dpkg command.
sudo dpkg -i jdk-17_linux-x64_bin.deb
Step #2:Reinstall Oracle Java 17 on Ubuntu 22.04 LTS
If the Oracle Java 17 installation was NOT successful, run the following commands
sudo apt-get update
sudo apt-get clean
sudo apt-get autoremove
sudo apt --fix-broken install
Run installation file again:
sudo dpkg -i jdk-17_linux-x64_bin.deb
Step #3:Update Java alternatives on Ubuntu 22.04 LTS
In some cases, you may need to install Oracle JDK 17 on the PATH location.
sudo update-alternatives --install /usr/bin/java java /usr/lib/jvm/jdk-17/bin/java 1
sudo update-alternatives --install /usr/bin/javac javac /usr/lib/jvm/jdk-17/bin/javac 1
Step #4:Verify Java Version on Ubuntu 22.04 LTS
After installing JDK, use the below command to verify the version.
java -version
Output:
java version "17.0.6" 2023-01-17 LTS
Java(TM) SE Runtime Environment (build 17.0.6+9-LTS-190)
Java HotSpot(TM) 64-Bit Server VM (build 17.0.6+9-LTS-190, mixed mode, sharing)
javac -version
Output:
ubuntu@ip-172-31-42-19:~$ javac -version
javac 17.0.6
Step #5:Set the Java Environment Variables on Ubuntu
sudo update-alternatives --config java
And copy the path till “jdk-17” (i.e. “/usr/lib/jvm/jdk-17/”)
Open Environment File
sudo nano /etc/environment/
Get to the last line and add JAVA_HOME=”/usr/lib/jvm/jdk-17/”)
Step #6:Load the Java Environment Variables on Ubuntu
Load the Java Environment Variables in Ubuntu 22.04 LTS
source /etc/environment/
Check JAVA_HOME and Oracle Java 11 path
echo $JAVA_HOME
Output:
ubuntu@ip-172-31-42-19:~$ echo $JAVA_HOME
/usr/lib/jvm/jdk-17
Conclusion:
We have covered Download and Install Oracle Java 17 on Ubuntu 22.04 LTS, Update Java alternatives on Ubuntu 22.04 LTS,Verify Java Version on Ubuntu 22.04 LTS,Set the Java Environment Variables on Ubuntu 22.04 LTS.
Related Articles:
- How to Install Oracle Java 11 on Ubuntu 20.04 LTS
- How to Download and Install Oracle JAVA 8 on Ubuntu 20.04 LTS Manually
- How to Download and Install JAVA SE JDK 8 on Windows 10
- How to Download and Install Oracle Java 8 on CentOS 7
- How to Download and Install Oracle JAVA 11 on Ubuntu 18.04/16.04 LTS
- How to Download and Install Oracle Java 12 on Ubuntu 19.04/18.04/16.04 LTS
- How to Download and Install Oracle Java 13 on Ubuntu 18.04/16.04 LTS