In this article we are going to cover How to Install Oracle Java 11 on Ubuntu 20.04 LTS Manually or any Cloud Instance like Amazon EC2, Azure VM, Google Compute Engine,etc. with preinstalled Ubuntu 20.04 LTS
Table of Contents
Prerequisites
- Ubuntu Server 20.04 LTS
- SSH access with sudo privileges
To check Ubuntu version:
uname -a
OR
cat /etc/os-release
Output:
NAME="Ubuntu"
 VERSION="20.04.1 LTS (Focal Fossa)"
 ID=ubuntu
 ID_LIKE=debian
 PRETTY_NAME="Ubuntu 20.04.1 LTS"
 VERSION_ID="20.04"
 HOME_URL="https://www.ubuntu.com/"
 SUPPORT_URL="https://help.ubuntu.com/"
 BUG_REPORT_URL="https://bugs.launchpad.net/ubuntu/"
 PRIVACY_POLICY_URL="https://www.ubuntu.com/legal/terms-and-policies/privacy-policy"
 VERSION_CODENAME=focal
 UBUNTU_CODENAME=focal
Follow the below steps to Install Oracle Java 11 on Ubuntu 20.04 LTS Manually using command line.
#1. Download Oracle Java/JDK 11 on Ubuntu 20.04 LTS
Generally Oracle will not allow to download directly without accepting their licences. We have to create one account in Oracle java website by your personal or official mail. After accepting license download the application from browser to local machine.
This link takes you to the Oracle home website Oracle Java SRE, go to Java SE 11 and Click on Download as shown below.
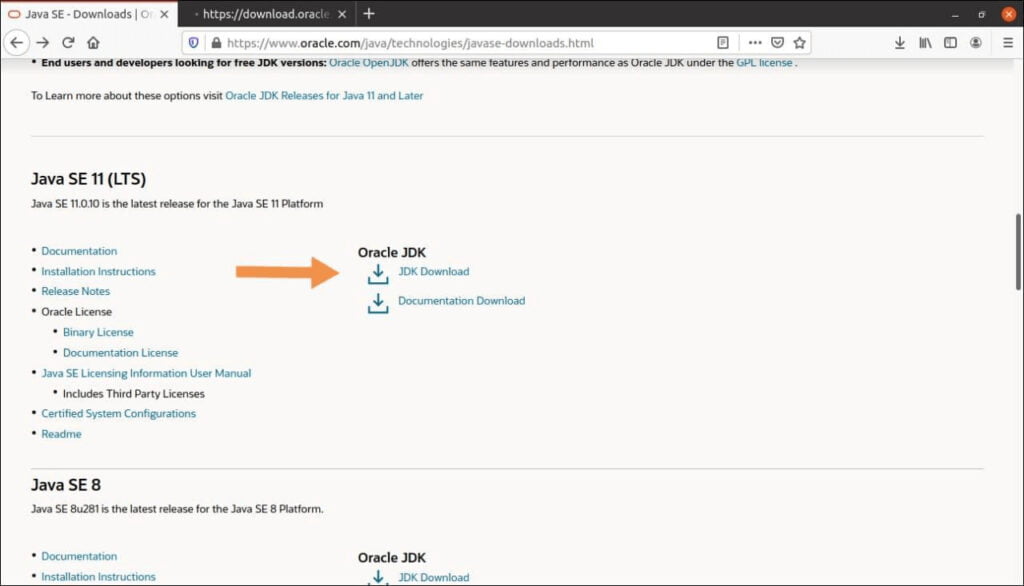
After clicking on JDK Download option you will be redirected oracle java 11 setup download setup and .deb setup for Ubuntu.

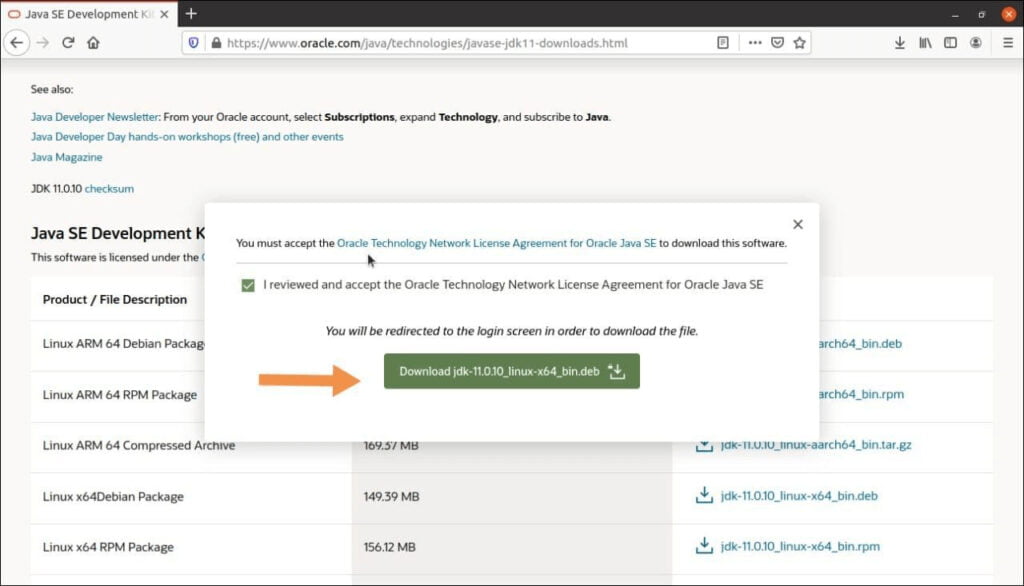
Accept oracle java se license agreement.
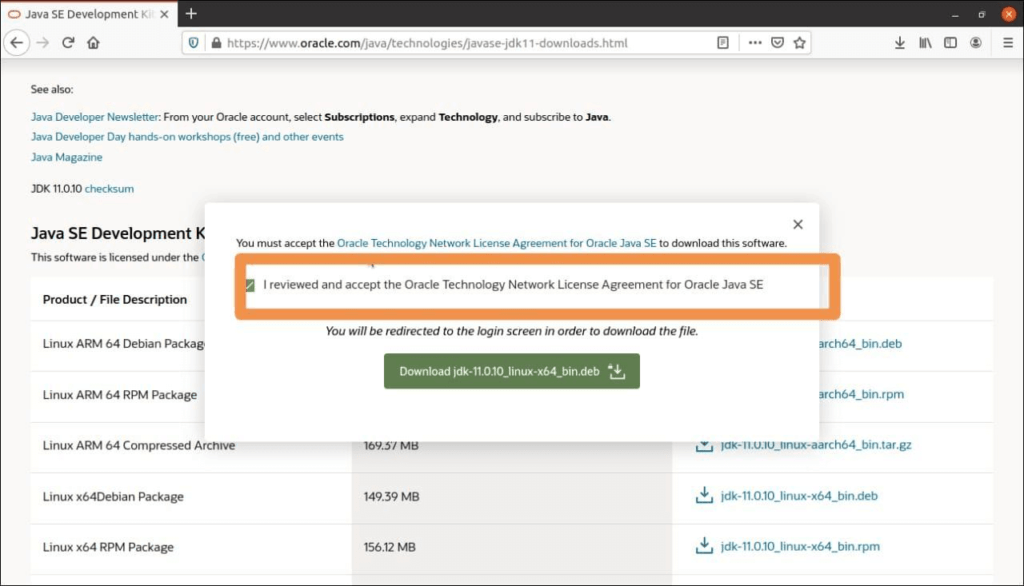
You will be redirected to oracle login page if you dont have account, if you have already logged in download oracle java 11 setup into your system as shown below.
After downloading into local machine, using SCP/SFTP/FTP transfer the file from local machine to Ubuntu server if you using Cloud instance using SSH in your local system.
#2. Install Oracle Java 11 on Ubuntu 20.04 LTS
once download is complete, open Ubuntu terminal and navigate to downloaded directory.
cd ~/Downloads
you will see oracle java 11 setup
ls
jdk-11.0.10_linux-x64_bin.deb
Note: Above oracle java 11 setup will be difference when you are following this article.
Now Install Oracle java 11 on Ubuntu 20.04 using below command
sudo dpkg -i oracle-java_11_version
sudo dpkg -i jdk-11.0.10_linux-x64_bin.deb
Output:
(Reading database ... 210094 files and directories currently installed.)
Preparing to unpack jdk-11.0.10_linux-x64_bin.deb ...
Unpacking jdk-11.0.10 (11.0.10-1) over (11.0.10-1) ...
Setting up jdk-11.0.10 (11.0.10-1) ...
Installing is done ..
#3. Adding Oracle Java/JDK 11 PATH
when we install oracle java 11 using .deb package by default it installs in /usr/lib/jvm directory. so we have add manually add oracle java 11 or JAVA_HOME path in Ubuntu
To check oracle java 11 is installed in /usr/lib/jvm directory
ls /usr/lib/jvm/
Output:
jdk-11.0.10
To add oracle java 11 in correct path create new file jdk11.sh in /etc/profile.d/ directory.
sudo nano /etc/profile.d/jdk11.sh
it created empty file.

Add below lined into the file
export JAVA_HOME="/usr/lib/jvm/jdk-11.0.10"
export PATH="$PATH:${JAVA_HOME}/bin"
save the above file using CTRL + O , Press ENTER back to terminal and to exit press CTRL +X.
Restart the Ubuntu 20.04 system to take effect using below command
sudo reboot
once rebooted use below commands to check JAVA_HOME and Oracle Java 11 path .
echo $JAVA_HOME
Output:
/usr/lib/jvm/jdk-11.0.10
echo $PATH
Output:
/usr/local/sbin:/usr/local/bin:/usr/sbin:/usr/bin:/sbin:/bin:/usr/games:/usr /local/games:/snap/bin:/usr/lib/jvm/jdk-11.0.10/bin
To check oracle Java 11 /JDK 11 version using command line in Ubuntu
javac -version
Output:
javac 11.0.10
#4. Testing Java program on Oracle Java 11
Lets create sample java program to test on oracle java
sudo nano foss.java
paste the below sample program
class Foss
{
public static void main(String args[])
{
System.out.println("Welcome to FossTechNix..!");
}
}
above program save in desktop directory but you can save anywhere as your wish ,my codes file name is a Foss.java.
Go to terminal and navigate to desktop path using below command
cd Desktop/
javac Foss.java
java Foss
Output:
Welcome to FossTechNix ..!
Conclusion:
we have covered Download Oracle Java/JDK 11 on Ubuntu 20.04 LTS, Install Oracle Java 11 on Ubuntu 20.04 LTS, Adding Oracle Java/JDK 11 PATH and Testing Java program on Oracle Java 11.
Related Articles:
How to Download and Install Oracle JAVA 8 on Ubuntu 20.04 LTS Manually
How to Download and Install JAVA SE JDK 8 on Windows 10
How to Download and Install Oracle Java 8 on CentOS 7
How to Download and Install Oracle JAVA 11 on Ubuntu 18.04/16.04 LTS
How to Download and Install Oracle Java 12 on Ubuntu 19.04/18.04/16.04 LTS
How to Download and Install Oracle Java 13 on Ubuntu 18.04/16.04 LTS
Hello. I like your post.
Instead of
sudo reboot,
you can use
source /etc/profile.d/jdk11.sh
Thanks