Table of Contents
Introduction
Java is a set of software and specifications developed at Sun Microsystems. There are two tyes of Java Platforms are JDK (Java Development Kit) and JRE (Java Runtime Environment). Both are helpful for deploying applications on servers and debugging, JVM monitoring,developing.Prerequisites
- Ubuntu Server 20.04 LTS
- SSH access with sudo privileges
uname -aOR
cat /etc/os-releaseOutput:
NAME="Ubuntu"
VERSION="20.04 LTS (Focal Fossa)"
ID=ubuntu
ID_LIKE=debian
PRETTY_NAME="Ubuntu 20.04 LTS"
VERSION_ID="20.04"
HOME_URL="https://www.ubuntu.com/"
SUPPORT_URL="https://help.ubuntu.com/"
BUG_REPORT_URL="https://bugs.launchpad.net/ubuntu/"
PRIVACY_POLICY_URL="https://www.ubuntu.com/legal/terms-and-policies/privacy-policy"
VERSION_CODENAME=focal
UBUNTU_CODENAME=focal
Follow the below steps to Install Oracle Java 8 on Ubuntu 20.04 LTS Manually using command line.
Step #1: Download Oracle Java 8
Generally Oracle will not allow to download directly without accepting their licenses. We have to create one account in Oracle java website by your personal or official mail. After accepting license download the application from browser to local machine. This link takes you to the Oracle home website Oracel Java SRE. Once you opened above link goto “JAVA SE Development Kit 8u241” section, download “jdk-8u251-linux-x64.tar.gz” setup for Ubuntu click on “Accept License Agreement” Check Box.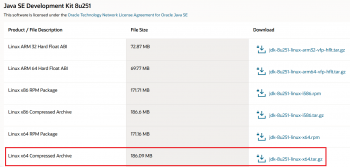 After downloading into local machine, using SCP/SFTP/FTP transfer the file from local machine to Ubuntu server.
Step #2: Copy downloaded Setup and Extract
Create a directory /opt/jdksudo mkdir -p /opt/jdkCopy the tar file from the directory copied from local machine to server to /opt/jdk folder and execute below command:
sudo cp -rf /home/sivasai/jdk-8u251-linux-x64.tar.gz /opt/jdk/
cd /opt/jdk/
sudo tar -zxf jdk-8u251-linux-x64.tar.gz
ls
Step #3: Install Oracle Java 8 on Ubuntu 20.04 LTS with Alternatives
Use update-alternatives command to configure java on your system
sudo update-alternatives --install /usr/bin/java java /opt/jdk/jdk1.8.0_251/bin/java 100
After executing above command it shows below output:
Output:
update-alternatives: using /opt/jdk/jdk1.8.0_251/bin/java to provide /usr/bin/java (java) in auto mode
Step #4: Verify Update Alternatives
Enter below command shows output:
sudo update-alternatives --display java
Output:
$ sudo update-alternatives --display java
java - auto mode
  link best version is /opt/jdk/jdk1.8.0_251/bin/java
  link currently points to /opt/jdk/jdk1.8.0_251/bin/java
  link java is /usr/bin/java
/opt/jdk/jdk1.8.0_251/bin/java - priority 100
To change for alternative mode if you already already any java version:
sudo update-alternatives --config java
It prompts for selecting by 0,1,2..so choose accordingly:
Output
There are 4 choices for the alternative java (providing /usr/bin/java).

  Selection    Path                                  Priority   Status

------------------------------------------------------------

  0            /usr/lib/jvm/java-13-oracle/bin/java   1091      auto mode

  1            /opt/jdk/jdk-12.0.2/bin/java           2         manual mode

* 2            /opt/jdk/jdk-13.0.2/bin/java           1         manual mode

  3            /opt/jdk/jdk1.8.0_251/bin/java         100       manual mode

  4            /usr/lib/jvm/java-13-oracle/bin/java   1091      manual mode

Press <enter> to keep the current choice[*], or type selection number: 3

update-alternatives: using /opt/jdk/jdk1.8.0_251/bin/java to provide /usr/bin/java (java) in manual mode
Step #5: Setting the JAVA_HOME and JRE_HOME Environment Variables
To define the enviroment variable:
sudo nano /etc/environment
Paste the below variable on the file:
/etc/environment
JAVA_HOME=/opt/jdk/jdk1.8.0_251
JRE_HOME=/opt/jdk/jdk1.8.0_251/jre
To check variables defined:
source /etc/environment
echo $JAVA_HOME
Output:
/opt/jdk/jdk1.8.0_251
sudo apt-get update
Step #6: Verify Java Version
To check the java version:
java -version
Output:
java version "1.8.0_251"
Java(TM) SE Runtime Environment (build 1.8.0_251-b08)
Java HotSpot(TM) 64-Bit Server VM (build 25.251-b08, mixed mode)
If you seeing output like above then we have successfully set up the Java 8 on Ubuntu.
OR
if you are getting any issue to check java version then install below package
Related Articles:
sudo apt-get install libc6-i386Conclusion: In this article, We have covered download Oracle Java 8 from official site, install oracle java 8 on Ubuntu 20.04 LTS using command line, configured JAVA_HOME and JRE_HOME, verified installed version.
- How to Install Oracle Java 11 on Ubuntu 20.04 LTS
- How to Download and Install JAVA SE JDK 8 on Windows 10
- How to Download and Install Oracle Java 8 on CentOS 7
- How to Download and Install Oracle JAVA 11 on Ubuntu 18.04/16.04 LTS
- How to Download and Install Oracle Java 12 on Ubuntu 19.04/18.04/16.04 LTS
- How to Download and Install Oracle Java 13 on Ubuntu 18.04/16.04 LTS
Thanks a lot
Welcome bro.
Thanks.
This article go straight to the point.
Thanks for following article. Please share with your friends who also need help.
Thank you so much, very clearly explained the steps
Thanks for your comment.
Nice work I appreciate it. Helped me get Eldevin running on 20.04
Hello Shawn,
Thanks for your comment, Please share with your friends also who need help.
Hi
Thank you for helping
Thanks for your comment.
Helps but probably shouldn’t have specific of commands/ For home directory references use ~ instead and use a * on java version number, at least part of it…
example: “sudo cp -rf ~/jdk-8u2*-linux-x64.tar.gz /opt/jdk/”
For the commands in terminal at least, you’ll just have to be mindful of the java version in steps 4-6.
Thanks for suggestion will update in article.
Thanks for suggestion will update in article.
Simple, effective instructions – if only all of life was like that
Thanks.
If java -version doesn’t work try installing: apt-get install libc6-i386
Thanks for update.
I get the following Error;
sudo update-alternatives –install /usr/bin/java OracleJava /usr/lib/jvm/jre1.8.0_301/bin/java 1
update-alternatives: error: alternative link /usr/bin/java is already managed by java
What happened?
Thanks for this great tutorial; helped me a lot!
Best greetings from Austria
Thanks a lot