In this Article we are going to cover A Beginner’s Guide to Advanced Kubernetes Pod Techniques with Examples.
Kubernetes has become the standard for container orchestration, and at its core lies the Pod—the smallest deployable unit. While beginners often start with simple Pod deployments, truly mastering Pods requires understanding their advanced capabilities.
This guide will take you from fundamental concepts to advanced techniques, complete with real-world examples and best practices. By the end, you’ll be equipped to:
- Design efficient multi-container Pods
- Prevent common Pod failures
- Optimize resource usage
- Implement zero-downtime deployments
Table of Contents
Section #1:Kubernetes Pod Fundamentals
What is a Kubernetes Pod?
A Pod represents a single instance of a running process in your cluster. Unlike Docker containers which run in isolation:
- Shared Networking: Containers in a Pod share an IP address and port space
- Shared Storage: Volumes are accessible to all containers
- Shared Lifecycle: Pods start/stop as a single unit
Key Insight: Pods are ephemeral. When they die, they’re gone forever—which is why we use controllers like Deployments.
Basic Pod YAML Structure:
apiVersion: v1
kind: Pod
metadata:
  name: basic-pod
spec:
  containers:
  - name: main-app
    image: nginx:alpine
    ports:
    - containerPort: 80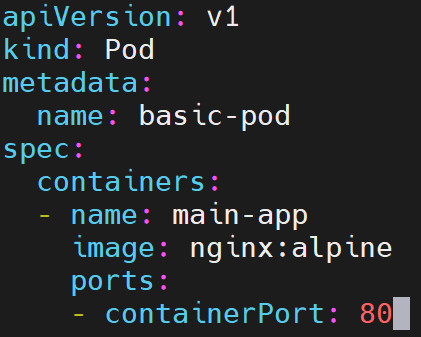

Section #2:Advanced Kubernetes Pod Concepts
#1. Pod Lifecycle & States
Understanding Pod states is crucial for debugging:
| State | Description | Common Triggers |
|---|---|---|
| Pending | Waiting for resources | Insufficient CPU/memory |
| Running | Successfully scheduled | Normal operation |
| Succeeded | Completed successfully | Batch jobs finished |
| Failed | At least one container failed | Crash/Error exit |
| Unknown | Node communication lost | Network issues |
Debugging Commands:
kubectl describe pod/[name] # View events and errors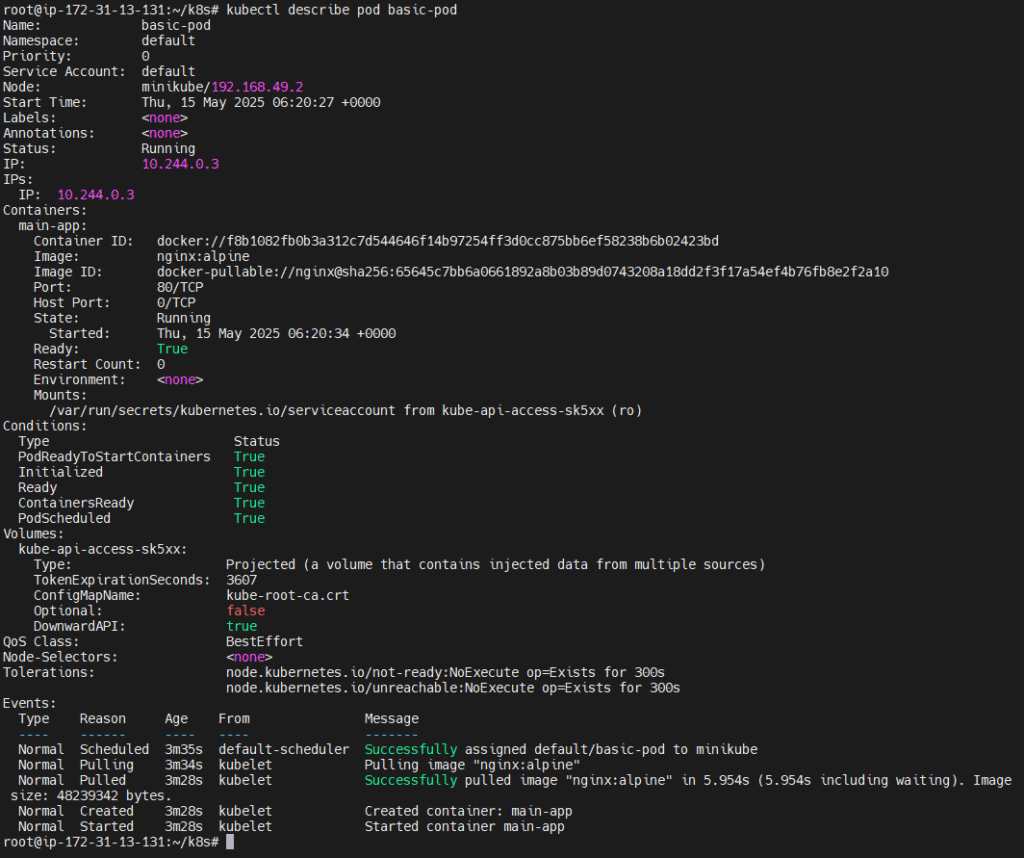
kubectl logs [pod] -c [container] # Check specific container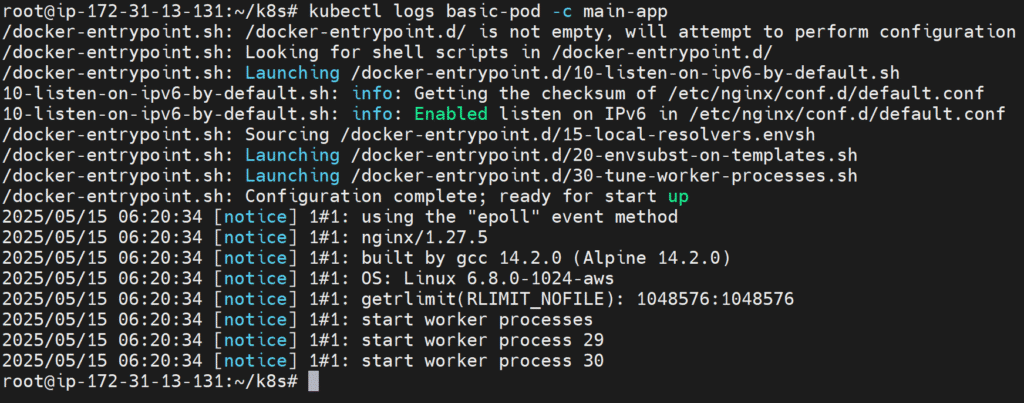
#2.Init Containers: The Setup Crew
Init containers run before your main containers and are perfect for:
- Database migrations
- Config file downloads
- Dependency checks
Real-World Example:
apiVersion: v1
kind: Pod
metadata:
  name: website-pod
spec:
  initContainers:
  - name: config-init
    image: alpine:3.18  # Using standard alpine instead of curl variant
    command:
      - "/bin/sh"
      - "-c"
      - "echo '{\"debug\":false}' > /app-config/config.json && echo 'Config created!'"
    volumeMounts:
    - name: app-config
      mountPath: /app-config

  containers:
  - name: web-server
    image: nginx:1.25-alpine
    ports:
    - containerPort: 80
    volumeMounts:
    - name: app-config
      mountPath: /etc/nginx/config.d
    livenessProbe:
      httpGet:
        path: /
        port: 80

  volumes:
  - name: app-config
    emptyDir: {}
Testing Commands:
# Check status
kubectl get pod website-pod
# View init container logs
kubectl logs website-pod -c config-init
# Verify file was created
kubectl exec website-pod -c web-server -- ls -la /etc/nginx/config.d/
How It Works:
- Init Container Runs First
- Creates
config.jsonin a shared volume (/app) - Uses a lightweight Alpine image (no need for full app dependencies)
- Creates
- Main Container Starts
- NGINX accesses the config at
/etc/nginx/config.d/config.json - The
emptyDirvolume persists the file between containers
- NGINX accesses the config at
- Why This Matters
- Separation of concerns: Setup vs. runtime logic
- Resource efficiency: Only installs setup tools in init container
- Reliability: Main app won’t start until setup completes
Key Use Cases:
- Generating config files
- Waiting for databases (using
untilloops) - Downloading assets
- Setting up permissions
#3.Multi-Container Pod Patterns
Sidecar Pattern
Adds helper functionality to your main container.
Full Pod YAML with Sidecar Pattern (Nginx + Fluentd):
apiVersion: v1
kind: Pod
metadata:
  name: nginx-with-logs
spec:
  volumes:
    - name: logs
      emptyDir: {}  # Shared volume for log files

  containers:
    - name: web-server
      image: nginx
      volumeMounts:
        - name: logs
          mountPath: /var/log/nginx  # Nginx logs will be written here

    - name: log-shipper
      image: fluent/fluentd
      volumeMounts:
        - name: logs
          mountPath: /var/log/nginx  # Fluentd reads logs from here
Check the pod:
kubectl get pod nginx-with-logs
kubectl logs nginx-with-logs -c web-server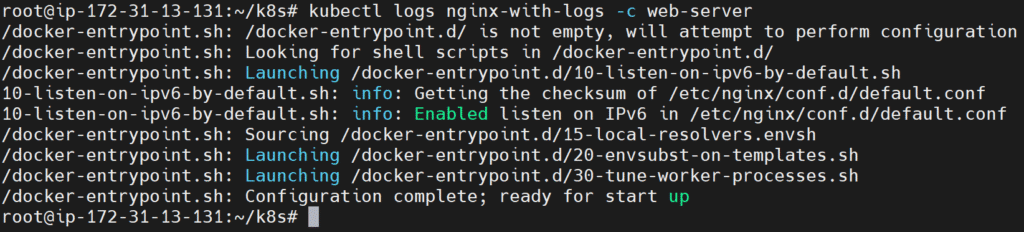
kubectl logs nginx-with-logs -c log-shipper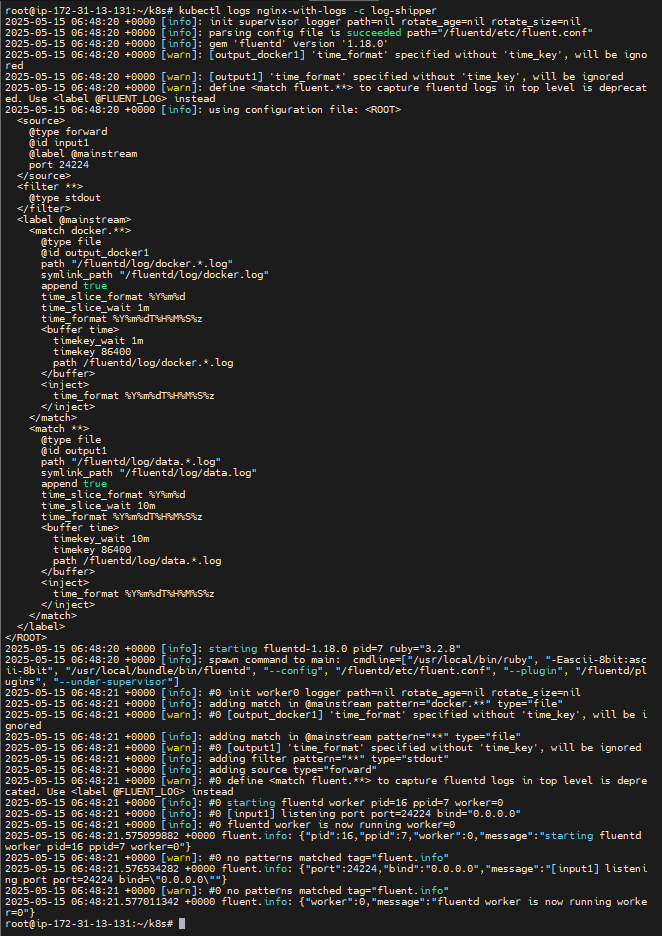
How It Works
| Container | Role | Action |
|---|---|---|
web-server | Main | Serves web content and writes logs to /var/log/nginx |
log-shipper | Sidecar | Reads logs from /var/log/nginx and ships them |
emptyDir | Shared Volume | Allows both containers to access log files |
Using Sidecar Container to Handle Nginx Logs
In Kubernetes, a sidecar container runs alongside the main container in the same Pod and shares resources like volumes. In this example, we use:
- An Nginx container (
web-server) to serve web traffic and write logs to/var/log/nginx. - A Fluentd container (
log-shipper) to act as a log shipper. It reads the Nginx logs from the same path using a shared volume.
We use an emptyDir volume called logs, which allows both containers to read/write to the same directory. This design lets the main app focus on its job (serving web traffic), while the sidecar handles log processing — following the separation of concerns principle.
Ambassador Pattern
Proxies network traffic for the main container:
containers:
- name: app
  image: my-app
- name: redis-proxy  # Handles Redis connections
image: envoyproxyWarning: All containers in a Pod share fate—if one crashes, the entire Pod restarts.
#4.Kubernetes Resource Management
Without Limits: Risk of “Noisy Neighbor” and OOM kills
Error: OOMKilled (Exit Code 137)Proper Configuration:
resources:
  requests:
    cpu: "100m"  # Guaranteed 0.1 CPU core
    memory: "128Mi"
  limits:
    cpu: "500m"  # Can burst to 0.5 cores
    memory: "512Mi"  # Hard memory limit
Best Practices:
- Always set requests equal to your app’s minimum needs
- Set limits 20-30% higher than requests
- Monitor with
kubectl top pods
#5.Kubernetes Health Checks (Probes)
| Probe Type | Purpose | Configuration Tips |
|---|---|---|
| Liveness | Is app running? | Restarts unhealthy Pods |
| Readiness | Is app ready? | Controls service traffic |
| Startup | Is app booted? | Protects slow starters |
Example Configuration:
livenessProbe:
  httpGet:
    path: /healthz
    port: 8080
  initialDelaySeconds: 15  # Wait for slow boot
  periodSeconds: 5
  failureThreshold: 3

readinessProbe:
  exec:
    command: ["pg_isready", "-U", "postgres"]
Critical Settings:
initialDelaySeconds: Avoid false positives during startupperiodSeconds: Balance between responsiveness and overheadfailureThreshold: Allow temporary glitches
#6.Kubernetes Pod Placement Controls
Node Affinity
affinity:
  nodeAffinity:
    requiredDuringSchedulingIgnoredDuringExecution:
      nodeSelectorTerms:
      - matchExpressions:
        - key: gpu-type
          operator: In
          values: ["a100"]
Pod Anti-Affinity (High Availability)
podAntiAffinity:
  requiredDuringSchedulingIgnoredDuringExecution:
  - labelSelector:
      matchLabels:
        app: redis
    topologyKey: "kubernetes.io/hostname"  # Spread across nodes
Use Cases:
- Prevent single-point failures
- Optimize for specialized hardware
#7.Kubernetes Pod Disruption Budgets (PDBs)
Scenario: Ensure at least 2/3 payment service Pods stay running during maintenance:
apiVersion: policy/v1
kind: PodDisruptionBudget
metadata:
  name: payment-pdb
spec:
  minAvailable: 2
  selector:
    matchLabels:
      app: payment-service
Key Concepts:
- Only affects voluntary disruptions (not node failures)
- Two strategies:
minAvailable: Keep X Pods runningmaxUnavailable: Allow Y Pods to be down
Section #3:Kubernetes Production Best Practices
Pod Design Checklist
Single Responsibility Principle – One process per container
Immutable Tags – Never use :latest in production
Proper Labeling – Use app, tier, and env labels
Security Context – Run as non-root when possible
Resource Limits – Prevent resource starvation
Common Pitfalls & Solutions
| Issue | Solution | Debug Command |
|---|---|---|
| CrashLoopBackOff | Check logs for errors | kubectl logs --previous |
| ImagePullBackOff | Verify image name/access | kubectl describe pod |
| Pending Pod | Check resource availability | kubectl describe node |
Section #4:Hands-On Kubernetes Pod Lab
Deploying a Pod with:
- Resource Management
- Health Checks (Liveness & Readiness Probes)
- Node Affinity & Pod Anti-Affinity (for High Availability)
- Pod Disruption Budgets (PDBs)
apiVersion: apps/v1
kind: Deployment
metadata:
  name: my-app
spec:
  replicas: 1
  selector:
    matchLabels:
      app: my-app
  template:
    metadata:
      labels:
        app: my-app
    spec:
      # Optional: You can skip this or adapt if needed
      affinity:
        podAntiAffinity:
          preferredDuringSchedulingIgnoredDuringExecution:
            - weight: 100
              podAffinityTerm:
                labelSelector:
                  matchExpressions:
                    - key: app
                      operator: In
                      values:
                        - my-app
                topologyKey: "kubernetes.io/hostname"

      containers:
        - name: app-container
          image: nginx  # Use a known working image
          ports:
            - containerPort: 80

          # Resource management
          resources:
            requests:
              cpu: "50m"
              memory: "64Mi"
            limits:
              cpu: "200m"
              memory: "128Mi"

          # Health checks
          livenessProbe:
            httpGet:
              path: /
              port: 80
            initialDelaySeconds: 10
            periodSeconds: 5

          readinessProbe:
            httpGet:
              path: /
              port: 80
            initialDelaySeconds: 5
            periodSeconds: 5
Single-Node Friendly Pod Disruption Budget (PDB):
apiVersion: policy/v1
kind: PodDisruptionBudget
metadata:
  name: my-app-pdb
spec:
  maxUnavailable: 0
  selector:
    matchLabels:
      app: my-app
Check:
kubectl get pod 
kubectl get pdb
kubectl describe pdb my-app-pdb
Conclusion:
Exploring advanced Kubernetes pod techniques may seem challenging at first, but it’s a crucial step toward managing real-world applications effectively. By understanding and applying these concepts, beginners can build more reliable, scalable, and efficient Kubernetes workloads.