This article will guide you in creating a standard Continuous Integration (CI) workflow for a Python application, ensuring your code is automatically tested and linted across multiple Python versions every time a change is pushed to your repository.
Step #1: Create Project Structure
Before defining the automation, we must first establish the structure of our Python project and write the core application logic and its corresponding unit tests.
We start by creating a source directory to hold our main application logic, which is a common and recommended practice for structured Python projects.
- Folder to create:
src/ - File to create:
src/app.py
Defining the Main Application (src/app.py)
from flask import Flask

app = Flask(__name__)

@app.route("/")
def index():
    return "Hello, world!"


if __name__ == "__main__":
    app.run()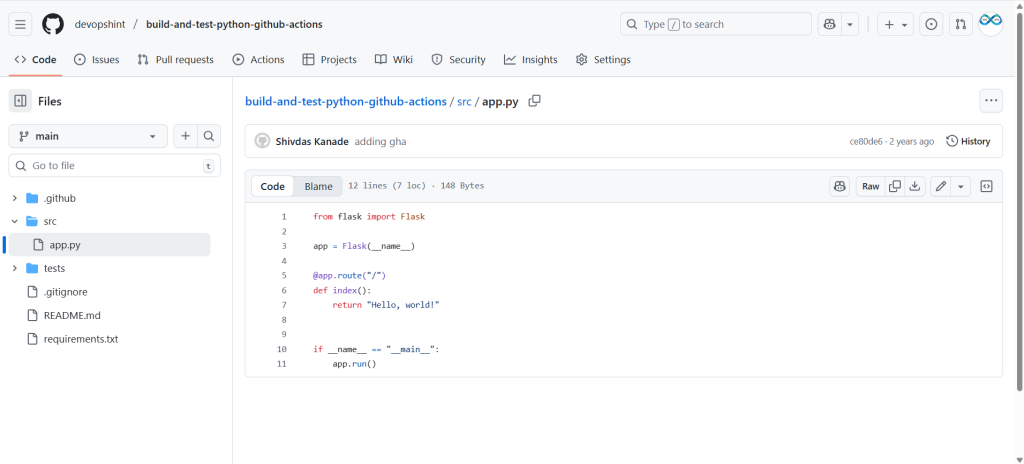
Explanation:
from flask import Flask: Imports the necessary Flask class.app = Flask(__name__): Creates the core Flask application object.@app.route("/"): This decorator registers theindex()function to handle requests made to the root URL path (/).return "Hello, world!": This is the content that will be returned to the client when the root page is accessed.
Since we are testing a web application, our tests must check for HTTP response statuses (like 200 for success) and the content returned by the routes. We use Pytest and Flask’s built-in testing client for this.
File to update: test/test_app.py
from app import index


def test_index():
    assert index() == "Hello, world!"
Explanation:
from src.app import index: This import is crucial. It relies on the CI workflow setting thePYTHONPATHenvironment variable to the repository root, allowing Python to find thesrc/directory and import theappmodule from within it.assert index() == "Hello, world!": The test executes theindex()function directly and asserts that its return value exactly matches the expected string.
Then we will create The Dependency List. (requirements.txt)
flask
pytest
gunicorn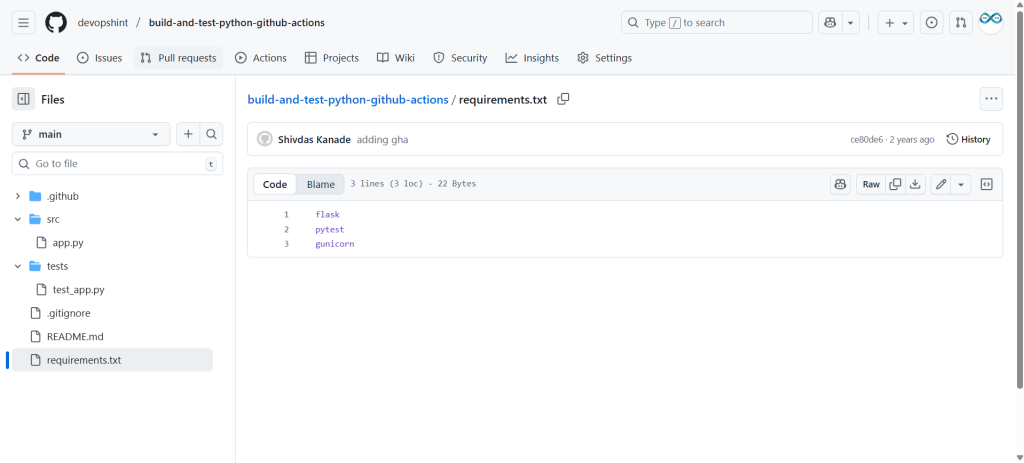
Explanation:
flask: The web framework required by the application itself.pytest: The tool used to discover and run the tests.gunicorn: A production-grade WSGI HTTP Server, often used to serve Flask apps in a deployed environment (and included here as part of the project dependencies).
Step #2: Creating the GitHub Actions Workflow
This is the control file that automates the entire CI process on GitHub’s virtual machines.
- File to create:
.github/workflows/python-app.yml
name: Python application

on:
  push:
    branches: [ "main" ]
  pull_request:
    branches: [ "main" ]

permissions:
  contents: read

jobs:
  build:

    runs-on: ubuntu-latest

    steps:
    - uses: actions/checkout@v3
    - name: Set up Python 3.10
      uses: actions/setup-python@v3
      with:
        python-version: "3.10"
    - name: Install dependencies
      run: |
        python -m pip install --upgrade pip
        pip install flake8 pytest
        if [ -f requirements.txt ]; then pip install -r requirements.txt; fi
    - name: Lint with flake8
      run: |
        # stop the build if there are Python syntax errors or undefined names
        flake8 . --count --select=E9,F63,F7,F82 --show-source --statistics
        # exit-zero treats all errors as warnings. The GitHub editor is 127 chars wide
        flake8 . --count --exit-zero --max-complexity=10 --max-line-length=127 --statistics
    - name: Test with pytest
      run: |
        pip install pytest
        export PYTHONPATH=src
        pytest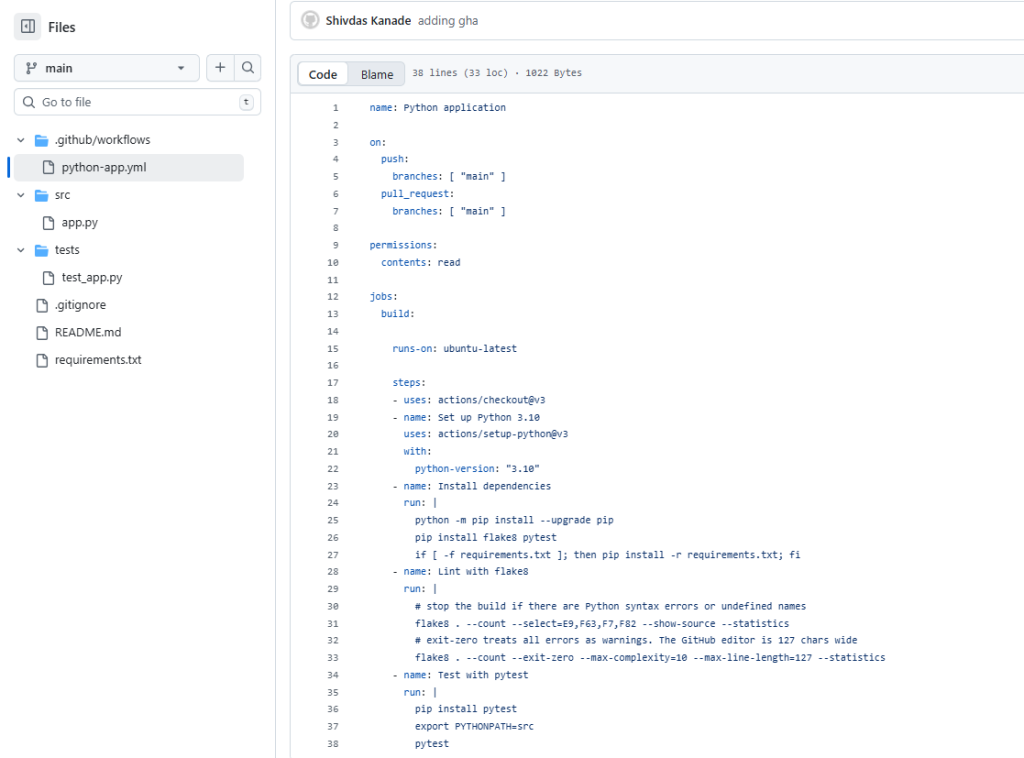
Explanation:
- Workflow Triggers and Permissions
- Name: The workflow is identified as
Python application. - Events (
on): It runs automatically on code pushes and pull requests targeting the"main"branch. - Permissions: It is configured with read-only access to the repository contents for security.
- Name: The workflow is identified as
- Job Configuration
- Job ID: The sole job is named
build. - Runner: It executes on a GitHub-hosted virtual machine running
ubuntu-latest.
- Job ID: The sole job is named
- Execution Steps
- Checkout Code: Downloads the repository files using
actions/checkout@v3. - Set up Python: Configures Python version
3.10for the runner environment. - Install Dependencies: Installs
flake8andpytest, followed by project dependencies (Flask, Gunicorn) fromrequirements.txt. - Lint with Flake8: Runs code quality checks for syntax errors and PEP 8 style compliance.
- Test with Pytest:
- Sets the
PYTHONPATH=srcenvironment variable to allow tests to import modules from thesrc/directory. - Executes
pytestto run all unit tests.
- Sets the
- Checkout Code: Downloads the repository files using
Once you commit and push these files to your GitHub repository, navigate to the Actions tab to monitor the execution.
Successful Output Log (from Test with pytest step). The log for the unit testing step confirms that Pytest successfully discovered and executed the test_index function, which passed by verifying the “Hello, world!” string.
Final Outcome: The entire “Python application” workflow job will display a green checkmark on the GitHub Actions page, confirming that your Flask application’s code is clean (passed linting) and functionally correct (passed unit tests) on the target Python 3.10 environment.

Conclusion:
In conclusion, this workflow sets up essential Continuous Integration (CI) for your Flask application by automatically configuring Python 3.10, installing dependencies, performing code quality checks with Flake8, and running all functional unit tests with Pytest to validate code before merging to main.
Related Articles:
Top 40 GitHub Actions Interview Questions and Answers
Reference: