In this article we are going to cover Deploy jar to Tomcat using GitLab CI Pipeline | GitLab CI CD Deploy to Tomcat Server.
Table of Contents
#1:Install Gitlab-Runner on Ubuntu EC2 Instance
Install GitLab Runner using below command to install latest GitLab Runner visit official GitLab Runner page.
Add the official GitLab repository using below command
curl -L "https://packages.gitlab.com/install/repositories/runner/gitlab-runner/script.deb.sh" | sudo bash
To Install the latest version of GitLab Runner on Ubuntu EC2 Instance
sudo apt-get install gitlab-runner
#2:Grant sudo Permission to GitLab Runner User
After install GitLab Runner you will see gitlab-runner user in /home directory
cd /home
ls
Output:
gitlab-runner ubuntu
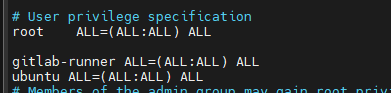
Add the gitlab-runner user in sudoers group and set NOPASSWD as shown below
sudo visudo
gitlab-runner ALL=(ALL:ALL) ALL
ubuntu ALL=(ALL:ALL) ALL
#3:Register GitLab Runner to GitLab on Ubuntu
1. First login to GitLab Server with Username and Password.
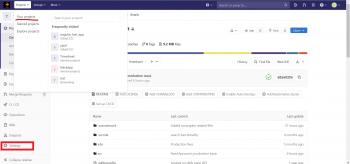
2. Click on your project and select Settings
3. Navigate to Settings and click on CI/CD inside this click on Expand of Runners section
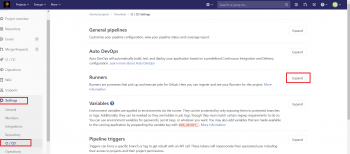
4. Copy GitLab server URL and Registration Token as shown below.
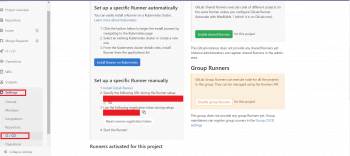
5. Paste GitLab Server URL and Token in registration command as below
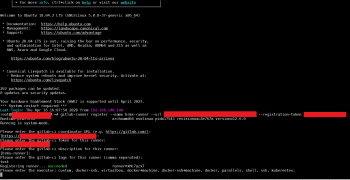
$ gitlab-runner register --name project-name-runner --url https://gitlab.fosstechnix.com --registration-token Uc7yzxTMzsXhXJx3zgM
OR
sudo gitlab-runner register
OR
if you want to register gitlab-runner with docker executor then use below command
sudo gitlab-runner register \
  --non-interactive \
  --url "GITLAB_SERVER_URL" \
  --registration-token "REGISTRATION_TOKEN" \
  --description "docker-runner" \
  --executor "docker" \
  --docker-image ubuntu:latest
6. Copy above command. Login to GitLab runner server through SSH and paste & run copied command on command line.
Follow the default options until which agent you need to register and then select agent as shown below
7. Once you registered Runner for project then you will get runner as below,
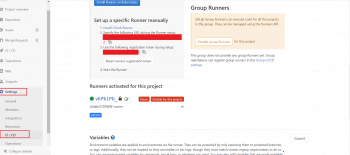
Successfully, We have performed GitLab Runner Registration.
Error: This job is stuck because the project doesn’t have any runners online assigned to it. Go to Runners page.
Solution:
You have added tags while registering GitLab Runner however you have not added tags for your Job.
Follow below steps to add tags.
1. Navigate to Settings and click on CI/CD inside this click on Expand of Runners section
2. Go to Runners and check on Indicates whether this runner can pick jobs without tags Box
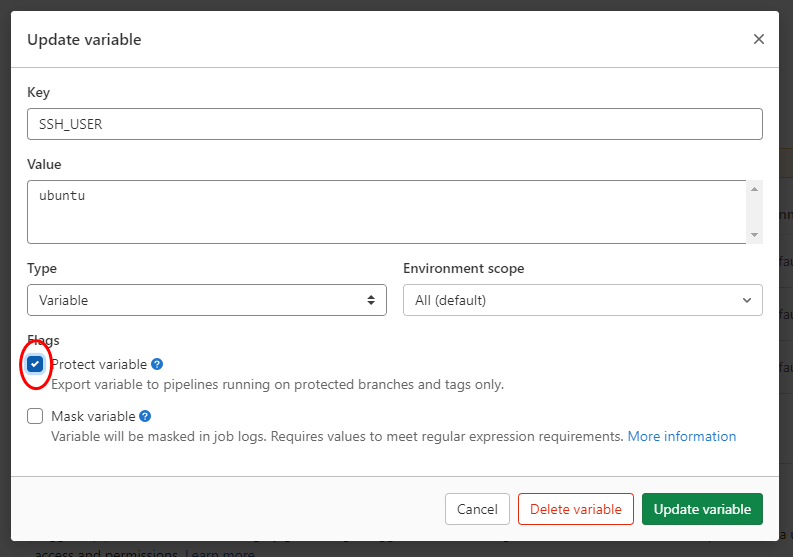
#4:Add SSH server details as GitLab Variable
Add EC2 instance or SSH server details like SSH Private key, EC2 IP Address and SSH in GitLab CI CD Variables. To add variables in GitLab follow below steps.
Go to settings<<CI/CD<<variables<<Expand it
#Add private key in $SSH_PRIVATE_KEY variable
#Add Server Ip in $EC2_IPADDRESS variable
#Add server user in $SSH_USER variable
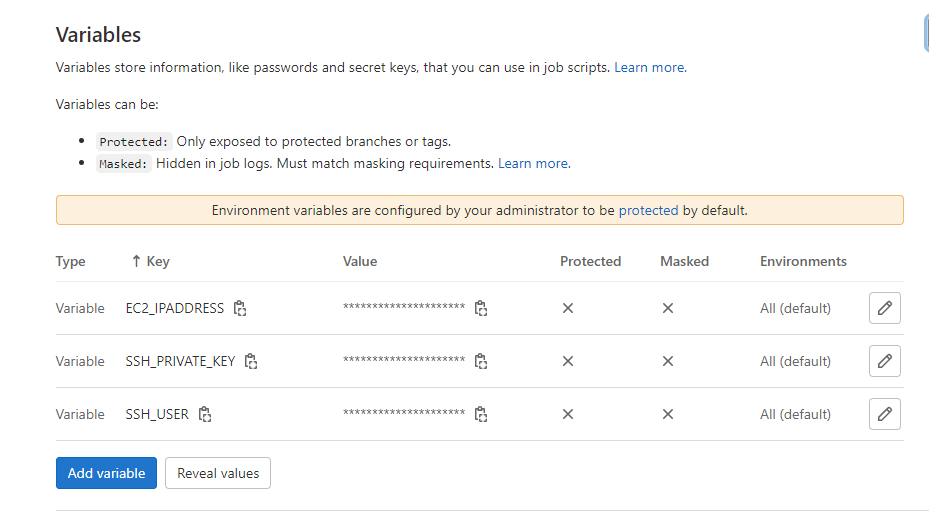
When creating variables you have to remove protect variable flag
#5:Deploy jar to Tomcat using GitLab CI Pipeline
Below is gitlab-ci.yml to Deploy jar to Tomcat using GitLab CI Pipeline.
stages:
  - build
  - deploy


maven-build:
  stage: build
  script: "mvn package -B"
  artifacts:
    paths:
      - target/*.jar

Deploy:
  stage: deploy
  before_script:
  - 'command -v ssh-agent >/dev/null || ( apk add --update openssh )'
  - eval $(ssh-agent -s)
  - echo "$SSH_PRIVATE_KEY" | tr -d '\r' | ssh-add -
  - mkdir -p ~/.ssh
  - chmod 700 ~/.ssh
  - ssh-keyscan $EC2_IPADDRESS >> ~/.ssh/known_hosts
  - chmod 644 ~/.ssh/known_hosts
  script:
    - scp -o StrictHostKeyChecking=no /home/gitlab-runner/builds/d1Qcnb9E/0/devopshint/tomcat-maven/target/tomcat-maven-0.0.1-SNAPSHOT.jar [email protected]:/opt/tomcat/webapps
If you get error permission denied /opt/tomcat/webapps so run the below command for permission to html
sudo chmod -R 777 /opt/tomcat/webapps
Conclusion:
In this article we have covered Deploy jar to Tomcat using GitLab CI Pipeline | GitLab CI CD Deploy to Tomcat Server.
Related Articles:
- Build Java Project using Maven in GitLab CI/CD
- Build Docker Image using GitLab CI CD
- GitLab CI Deploy to EC2 using SSH
- Deploy war to Tomcat using GitLab CI Pipeline
Reference: