In this article we are going to cover How to attach and Mount EBS Volume to EC2 Instance | mount volume to ec2 instance.
What is EBS Volume in AWS?
Elastic Block Store (EBS) is a block-level storage service provided by Amazon Web Services (AWS) for use with their cloud computing platform, Amazon Elastic Compute Cloud (EC2). EBS volumes are durable, high-performance block storage devices that can be attached to EC2 instances.
An EBS volume is essentially a virtual hard drive that can be dynamically attached and detached from EC2 instances as needed. It provides persistent storage for your EC2 instances, allowing you to store data even after the instances are terminated. EBS volumes are stored independently from EC2 instances, which means you can detach a volume from one instance and attach it to another without losing your data.
Types of EBS Volume in AWS
The following are the types of EBS volumes available in Amazon Web Services (AWS):
- General Purpose SSD (gp2): This is the default and most commonly used EBS volume type. It provides a balance of price and performance for a wide range of workloads. It offers baseline performance of 3 IOPS (Input/Output Operations Per Second) per gigabyte with the ability to burst up to 3,000 IOPS for volumes up to 16 TiB in size.
- Provisioned IOPS SSD (io2 and io2 Block Express): These EBS volumes are designed for applications that require high performance and low latency, such as databases. They provide consistently high IOPS and low latency, making them suitable for critical and I/O-intensive workloads. The io2 volumes offer single-digit millisecond latencies and provide up to 500 IOPS per gigabyte provisioned, with a maximum of 64,000 IOPS and 64,000 IOPS for io2 Block Express.
- Cold HDD (sc1): This EBS volume type is optimized for infrequent access and provides a low-cost storage option. It is suitable for workloads with large sequential I/O, such as big data and log processing. However, sc1 volumes have higher latency and lower throughput compared to SSD-based volumes.
- Throughput Optimized HDD (st1): This EBS volume type is designed for frequently accessed, throughput-intensive workloads. It offers low-cost storage optimized for large, sequential I/O. st1 volumes are ideal for scenarios such as streaming workloads, big data processing, and data warehouses.
- Magnetic (Standard): This is the older generation of EBS volumes that uses traditional magnetic hard drives (HDDs). They provide the lowest cost per gigabyte of storage but have limited performance capabilities. Magnetic volumes are best suited for infrequently accessed data or workloads with low I/O requirements.
How to Attach and How to Mount EBS Volume to EC2 Instance
Step #1:Update packages in Linux system
sudo apt update

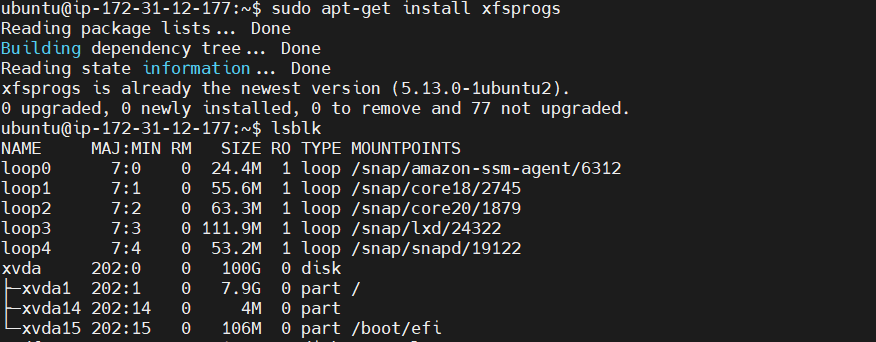
Step #2:Installing XFS utilities package on Linux system
sudo apt-get install xfsprogs
Mount EBS Volume to EC2 Instance
Step #3:Login to your AWS account and create an instance
Step #4:Go on the EC2 Dashboard
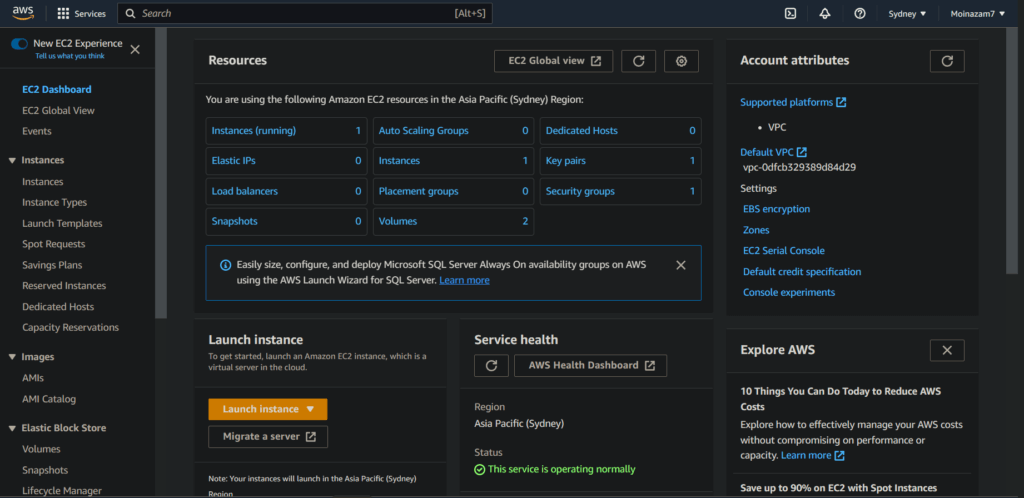
Step #5:Go to volumes

Step #6:Click on create volume to create a new volume

Step #7:Now create a new volume of your preferred size and type
Note: Make sure that the EBS volume and the instance are in the same zone.
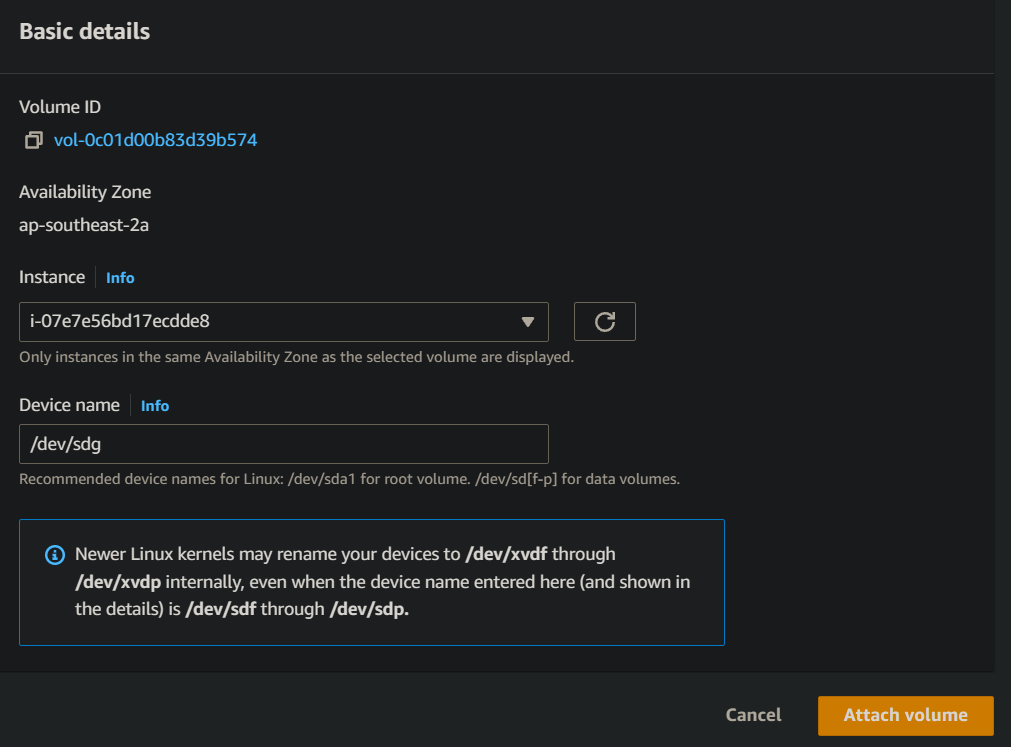
-Select the created volume, right-click and select the “attach volume” option
–Select the ec2 instance from the instance text box as shown above.
-Now, login to your ec2 instance and list the available disks using the following command.
lsblkStep #8:Check if the volume has any data using the following command
sudo file -s /dev/xvdfIf the above command output shows “/dev/xvdf: data“, it means your volume is empty.
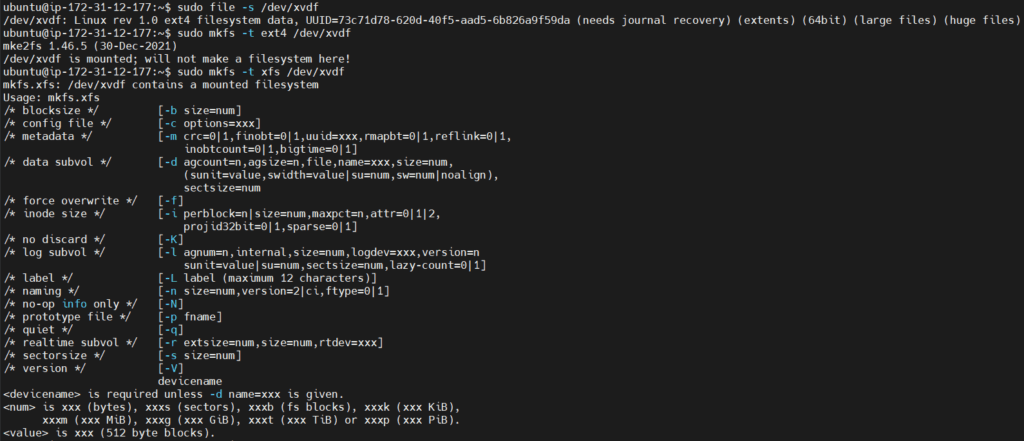
Step #9:Format the volume to the ext4 filesystem using the following command
sudo mkfs -t ext4 /dev/xvdfAlternatively, you can also use the xfs format. You have to use either ext4 or xfs.
sudo mkfs -t xfs /dev/xvdfStep #10:Create a directory of your choice to mount our new ext4 volume. I am using the name “newvolume“. You can name it something meaningful to you
sudo mkdir /newvolumeStep #11:Mount the volume to “newvolume” directory using the following command
Mount EBS Volume to EC2 Instance
sudo mount /dev/xvdf /newvolume/Step #12:cd into newvolume directory and check the disk space to validate the volume mount
cd /newvolume
df -h .
The above command should show the free space in the newvolume directory.

Step #13:Exit the directory
cd ..Step #14:To unmount the volume, use the unmount command as shown below
sudo umount /dev/xvdfConclusion:
As a DevOps Engineer, it is crucial to have a comprehensive understanding of the various EBS attach options when working on real-time projects. This knowledge allows you to effectively mount an EBS volume to an EC2 instance.
In case you encounter any errors during the setup process, please don’t hesitate to reach out in the comment section. We are here to assist you and provide guidance for resolving any issues you may face.
We have covered How to Attach and Mount EBS Volume to EC2 Instance,mount volume to ec2 instance.
Related Articles:
Deploy Helm Chart on EKS Cluster [ 2 Steps]
Reference: