In this article, we are going to perform, How to Install Splunk on Ubuntu 18.04/16.04 LTS or any Cloud Instance like Amazon EC2, Azure VM, Google Compute Engine,etc.
Table of Contents
Introduction
What is Splunk?
Splunk is a most used software technology platform for analyze , searching and monitoring system generated log database in real time.
Splunk Components:
- Splunk Forwarder
- Splunk Indexer
- Splunk Search Head
Prerequisites
- Ubuntu 18.04/16.04 LTS with minimum 2GB RAM and 1 CPU.
- SSH access with sudo privileges
- Firewall Port: 8000
Download and Install Splunk on Ubuntu
Here we are installing and configuring Splunk Enterprise 7.3.1.1 version. To download latest version, First create account and download Splunk Enterprise Software from Splunk official website.
cd /tmp
wget -O splunk-7.3.1.1-7651b7244cf2-linux-2.6-amd64.deb 'https://www.splunk.com

/bin/splunk/DownloadActivityServlet?architecture=x86_64&platform=linux&

version=7.3.1.1&product=splunk&filename=splunk-7.3.1.1-7651b7244cf2-linux-2.6-

amd64.deb&wget=true'
Install Splunk Enterprise using dpkg command.
sudo dpkg -i splunk-7.3.1.1-7651b7244cf2-linux-2.6-amd64.deb
Enable Splunk at system startup.
sudo /opt/splunk/bin/splunk enable boot-start
After Entering above command, We will have to accept Splunk License Agreement . Scroll down pages by pressing Enter or Spacebar on Keyboard , At the end type y to agree the Splunk License terms.
Splunk Software License Agreement 06.04.2019


Do you agree with this license? [y/n]: y
Type Splunk Login administrator username, password and confirm password as shown below,
Output:
This appears to be your first time running this version of Splunk.

 Splunk software must create an administrator account during startup. Otherwise, you

cannot log in.

Create credentials for the administrator account.

Characters do not appear on the screen when you type in credentials.

 Please enter an administrator username: admin

Password must contain at least:


   * 8 total printable ASCII character(s).


Please enter a new password:


Please confirm new password:

Copying '/opt/splunk/etc/openldap/ldap.conf.default' to '/opt/splunk/etc/openldap/ldap.conf'.


Generating RSA private key, 2048 bit long modulus


.......................................+++++


...+++++


e is 65537 (0x10001)


writing RSA key


 Generating RSA private key, 2048 bit long modulus


.................................................................................+++

++

....................................................................................

....................................................................................

...................................................+++++

e is 65537 (0x10001)

writing RSA key

 Moving '/opt/splunk/share/splunk/search_mrsparkle/modules.new' to '/opt/splunk

/share/splunk/search_mrsparkle/modules'.

Init script installed at /etc/init.d/splunk.

Init script is configured to run at boot.
Start the Splunk Service
sudo systemctl start splunk
Verify splunk service running status
sudo systemctl status splunk
Output:
    . splunk.service - LSB: Start splunk


Loaded: loaded (/etc/init.d/splunk; bad; vendor preset: enabled)


   Active: active (running) since Wed 2019-09-11 09:20:10 UTC; 5s ago


     Docs: man:systemd-sysv-generator(8)


  Process: 3664 ExecStart=/etc/init.d/splunk start (code=exited, status=0/SUCCESS)


    Tasks: 104


   Memory: 736.4M


      CPU: 5.774s


   CGroup: /system.slice/splunk.service


           ├─3744 splunkd -p 8089 start


           ├─3745 [splunkd pid=3744] splunkd -p 8089 start [process-runner


           ├─3760 mongod --dbpath=/opt/splunk/var/lib/splunk/kvstore/mongo

--storageEngine=mmapv1 --port=8191 --timeStampFormat=iso8601-utc --smallfiles

--oplogSize=200 --keyFile=/opt/s

           ├─3826 /opt/splunk/bin/python -O /opt/splunk/lib/python2.7/site-packages

/splunk/appserver/mrsparkle/root.py --proxied=127.0.0.1,8065,8000

           ├─3882 /opt/splunk/bin/splunkd instrument-resource-usage -p 8089 --with-kvstore

           ├─3893 /bin/sh -c python /opt/splunk/etc/apps/splunk_instrumentation

/bin/on_splunk_start.py

           └─3894 python /opt/splunk/etc/apps/splunk_instrumentation

/bin/on_splunk_start.py

 Sep 11 09:20:07 splunk.fosstechnix.com[3664]:         All installed files intact.

Sep 11 09:20:07 splunk.fosstechnix.com[3664]:         Done

Sep 11 09:20:07 splunk.fosstechnix.com[3664]: All preliminary checks passed.

Sep 11 09:20:07 cLink-Master-Splunk s[3664]: Starting splunk server daemon (splunkd)...
Now, Open web browser to access splunk web interface. As above mentioned we have to open firewall port 8000.
http://server_name:8000
OR
http://server_ip:8000
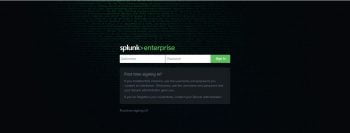
Tpye UserName and Password to login splunk web interface.
Once logged in you will see Splunk Dashboard as below.

Uninstall/Remove Splunk Enterprise completely in Ubuntu
There are two ways to uninstall/remove splunk in ubuntu.
1. Uninstall/Remove Splunk Enterprise using package management utilities
If we configured splunk enterprise at system startup, first remove it from boot scripts before uninstalling using below commands.
Navigate to Splunk_Home directory /opt/splunk/bin and disable it.
sudo ./splunk disable boot-start
Output:
/opt/splunk/bin$ sudo ./splunk disable boot-start

Disabled.
once disabled, then stop splunk service.
sudo ./splunk stop
Output:
cd /opt/splunk/bin/

sudo ./splunk stop

Stopping splunkd...

Shutting down.  Please wait, as this may take a few minutes.

..

Stopping splunk helpers...

Done.
Remove all splunk configuration file.
sudo dpkg -r splunk
2. Uninstall/Remove Splunk Enterprise Manually
Alternative way to uninstall splunk from ubuntu.
Stop splunk service.
sudo ./splunk stop
Output:
cd /opt/splunk/bin/

sudo ./splunk stop

Stopping splunkd...

Shutting down.  Please wait, as this may take a few minutes.

..

Stopping splunk helpers...

Done.
Kill the splunk process if running any.
sudo kill -9 `ps -ef | grep splunk | grep -v grep | awk '{print $2;}'`
Remove the Splunk Enterprise Installation directory.
sudo rm -rf /opt/splunk
Delete the splunk system user and group
sudo userdel splunk

sudo groupdel splunk
To know more about Splunk uninstallation. Please visit Splunk official page.
Conclusion
In this article, we have performed How to install Splunk on Ubuntu 18.04/16.04 LTS system. Mentioned to uninstall/remove splunk enterprise completely from ubuntu using package management utilities and manually.
How to download and Install Nagios on Ubuntu 18.04/16.04 LTS
How to Install ELK Stack on Ubuntu