In this article we are going to cover Upload file to AWS S3 using GitLab CI.
Table of Contents
#1:Install Gitlab-Runner
Visit the official GitLab Runner page to install latest GitLab Runner
https://docs.gitlab.com/runner/install/linux-repository.html
Step 1: Add the official GitLab repository:
curl -L "https://packages.gitlab.com/install/repositories/runner/gitlab-runner/script.deb.sh" | sudo bash
Step 2: To Install the latest version of GitLab Runner,
sudo apt-get install gitlab-runner
OR
To install specific version of GitLab Runner –
apt-cache madison gitlab-runner
sudo apt-get install gitlab-runner=10.0.0
sudo gitlab-runner -version
sudo gitlab-runner status
#2:Add gitlab-runner and user in root using below commands:
sudo visudo
gitlab-runner ALL=(ALL:ALL) ALL
ubuntu ALL=(ALL:ALL) ALL
#3:Register Gitlab Runner
Step 1: firstly run the the command :
sudo gitlab-runner register
Step 2: Then enter the URL https://gitlab.com/ (copy from gitlab account ).
Step 3: Then Enter the registration token so firstly
- Go to the GitLab Account
- Click on Project
- Then click on setting and in below click on CI/CD
- Click on Runner Expand scroll down and copy registration token
- And paste on command
Step 4: Then you can give any meaning full description
Step 5: Then Enter tags for the runner (any tag)
Step 6: Then choose any executor – shell , ssh , docker , etc
#4:Install OpenJDK on Ubuntu 20.04 LTS
Update System packages:
sudo apt update
Install OpenJDK:
sudo apt install default-jdk -y
To Check Java Version
java --version
#5.Install AWS CLI
Update System Packages:
sudo apt update
Install AWS CLI
sudo apt install awscli
To Check AWS version
aws --version
#6.Create new Bucket in AWS
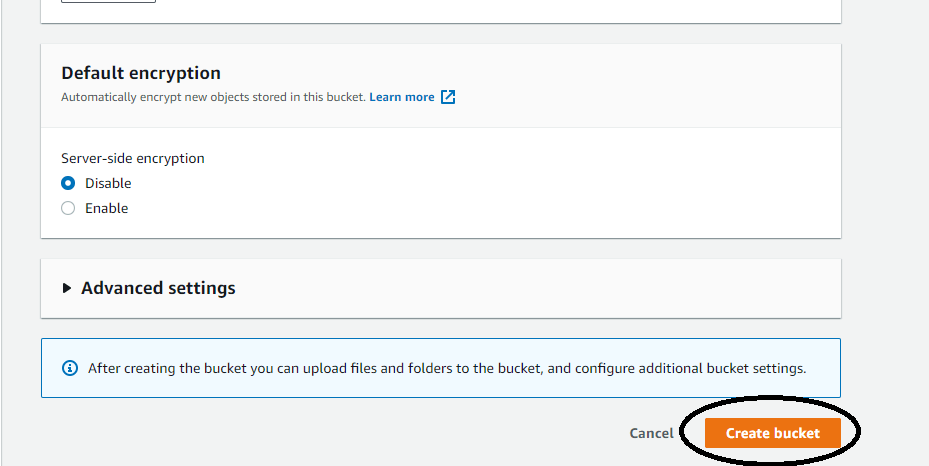
Step 1: Firstly search S3 and go ti buckets then click on create bucket

Step 2: Then enter unique name because bucket name must be unique and not contain spaces or uppercase letters

Step 3: Then remaining keep as it is and click on create bucket

#7:Create new User in AWS
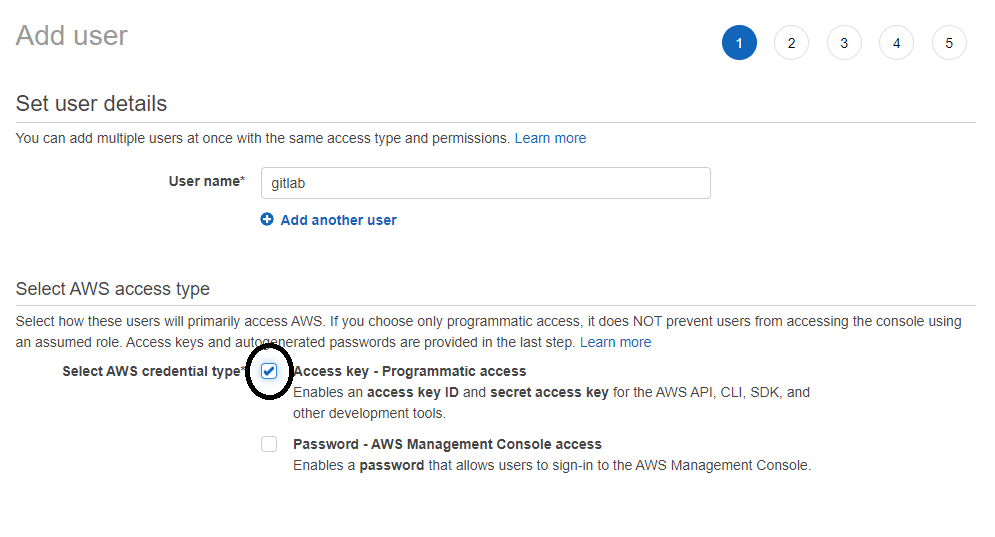
Step1: Firstly go to IAM<<Users<<Add users

Step 2: Now enter user name and select AWS credential type so here I will choose Access key

Step 3: Then here click on Attach existing policies directly then select Amazons3FullAccess

Step 4: Next step is add tags so i don’t want to add any tag so skip and then review once
Now here you can see Access key ID or Secret access key now you can download.

#8:Creating variables inside gitlab
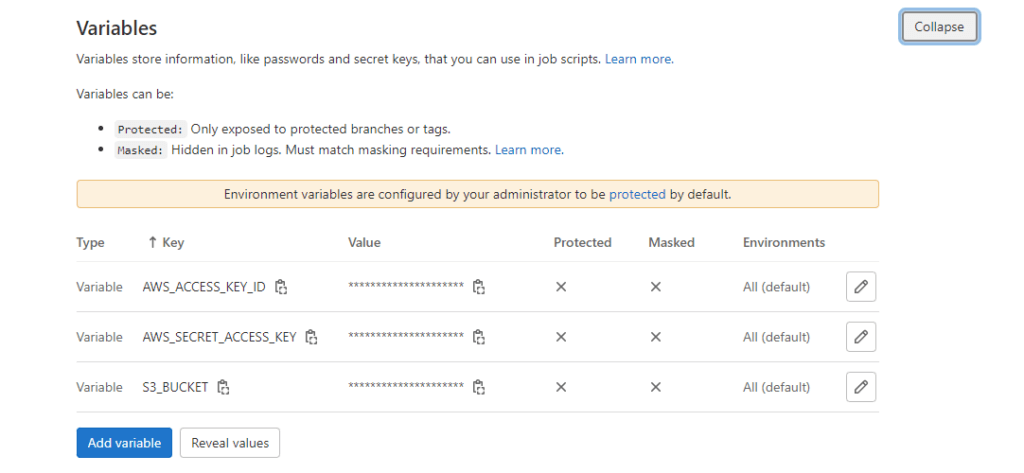
Go to settings<<CI/CD<<variables<<Expand it
#Add bucket name in $S3_BUCKET variable
#Add secret key in $AWS_SECRET_ACCESS_KEY_ variable
#Add access key in $AWS_ACCESS_KEY_ID variable

When creating variables you have to remove protect variable flag

#9:Upload file to AWS S3 using GitLab CI
stages:
  - build

build:
  stage: build
  image: openjdk:12-alpine
  script:
    - ./gradlew build
  artifacts:- deploy

    paths:
      - ./build/libs/*.jar

deploy:
  stage: deploy
  image:
    name: banst/awscli
    entrypoint: [""]
  script:
    - aws configure set region ap-south-1
    - aws s3 cp /home/gitlab-runner/builds/wydXNp9p/0/devopshint/demo1/build/libs/AWS-0.0.1-SNAPSHOT.jar s3://$S3_BUCKET
#10:Permission denied ./gradlew
git clone
cd project name
ls -l gradlew
git update-index --chmod=+x gradlew
chmod +x gradlew
git add .
git commit -m "Update execute permission for gradlew command".
git push
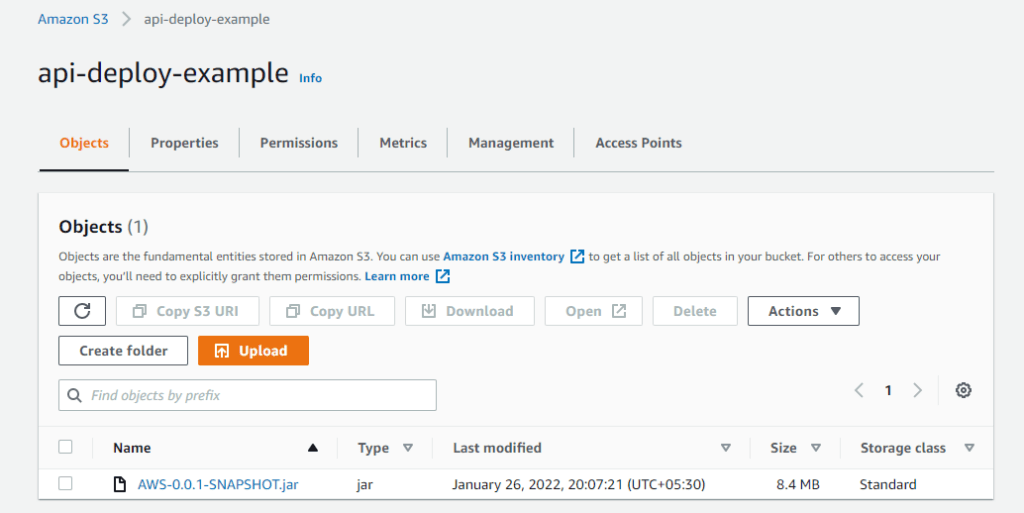
After job succeed you will see .jar file in your bucket

Conclusion:
In this article we have covered Upload file to AWS S3 using GitLab CI.
Related Articles:
- Build Java Project using Maven in GitLab CI/CD
- Build Docker Image using GitLab CI CD
- GitLab CI Deploy to EC2 using SSH
- Deploy war to Tomcat using GitLab CI Pipeline
Reference:
