In this article we will learn How to Automate Application Deployment to Kubernetes with Helm, GitLab and ArgoCD. In today’s cloud-native era, Kubernetes has become the de facto standard for managing containerized applications. While Kubernetes simplifies orchestration, deploying and managing applications across multiple environments can still be challenging. This is where modern tools like GitLab CI/CD, Helm Charts, and ArgoCD come into play. Together, these tools create a robust pipeline that automates building, deploying, and maintaining applications with minimal manual intervention.
This article explores how developers can leverage GitLab CI/CD for continuous integration, Helm Charts for packaging applications, and ArgoCD for seamless deployments to Kubernetes clusters. By the end of this guide, you’ll have a clear understanding of how to implement a GitOps-based workflow to ensure scalable, reliable, and automated application deployment.
Table of Contents
Prerequisites
- AWS Account with Ubuntu 24.04 LTS EC2 Instance.
- Minikube and kubectl, Helm Installed.
- Basic knowledge of Kubernetes and Gitlab.
Step #1:Set Up CI Pipeline
We will create a Repositories for application named nodejs-app and nodejs-manifest.
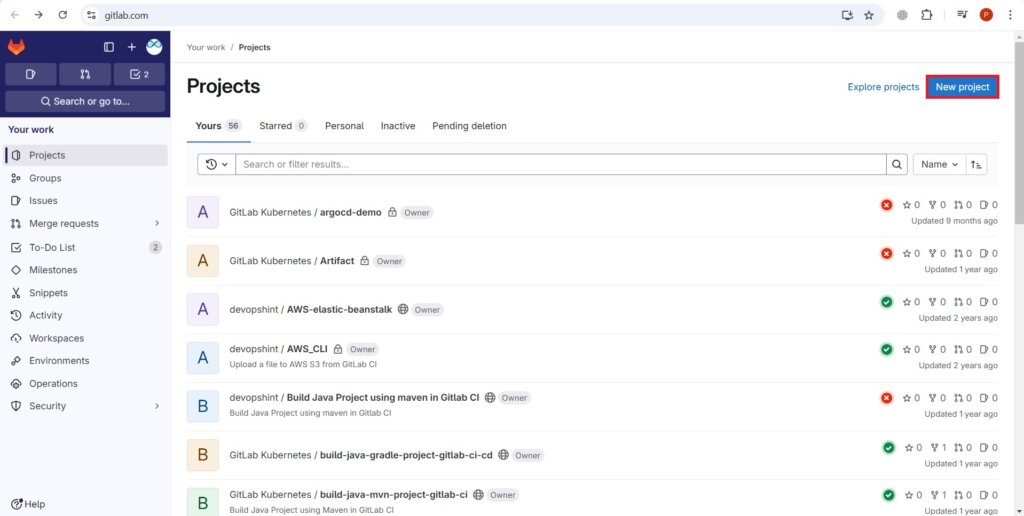
So first login into your Gitlab account and click on New project.
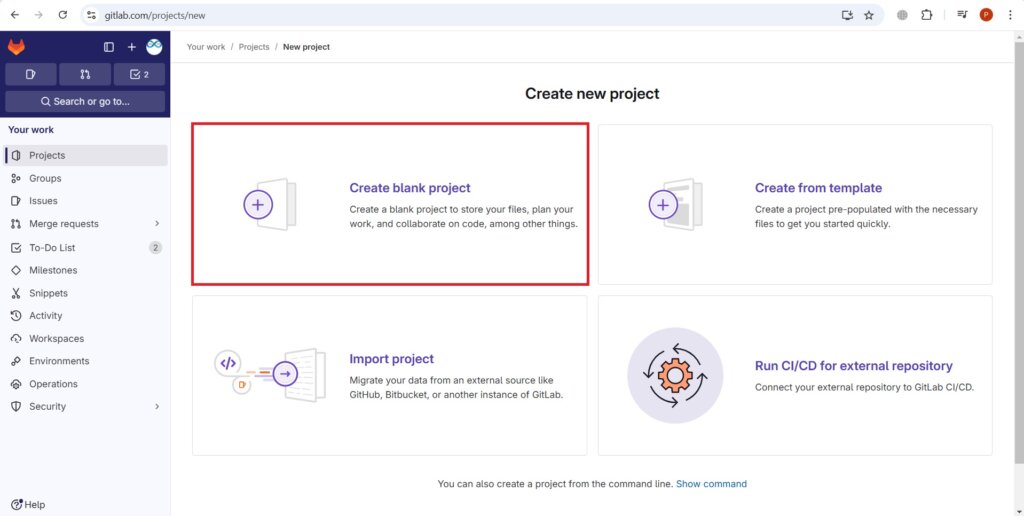
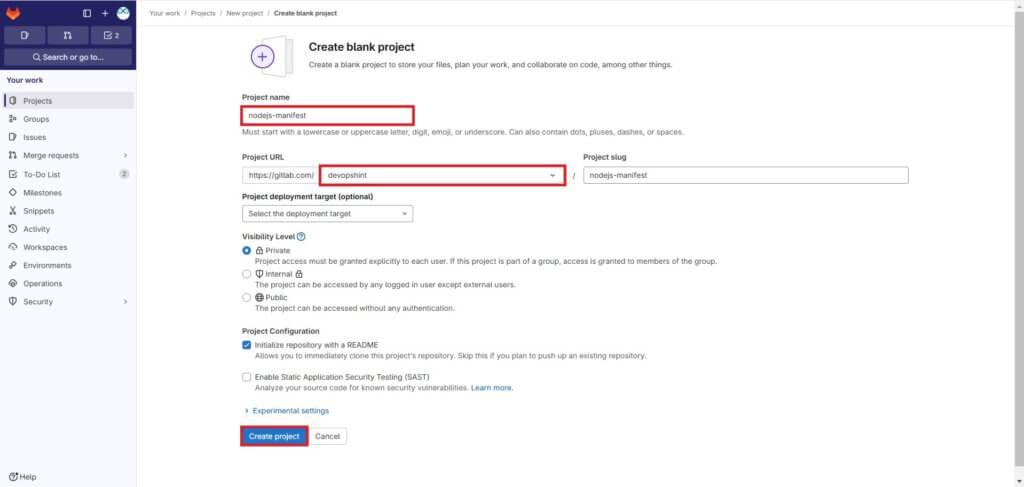
Select Create blank project.
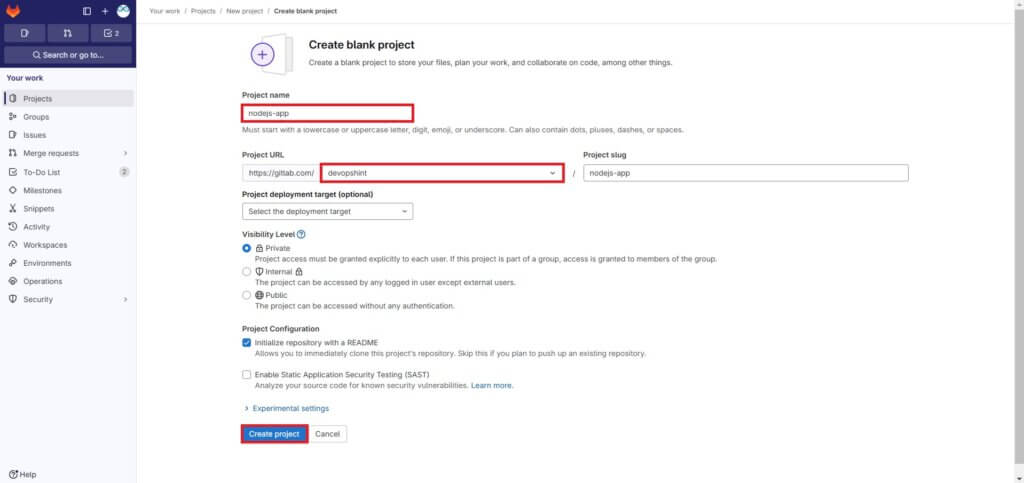
Enter the Project name and select user. Rest keep it as it is. Here we are creating private repos. Finally click on Create project.
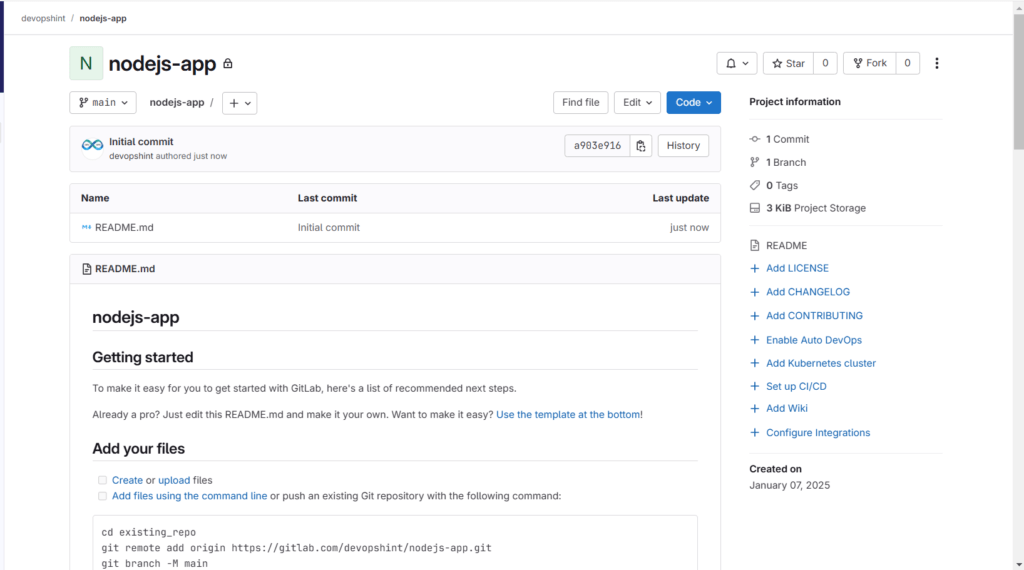
You can see the created repo nodejs-app.
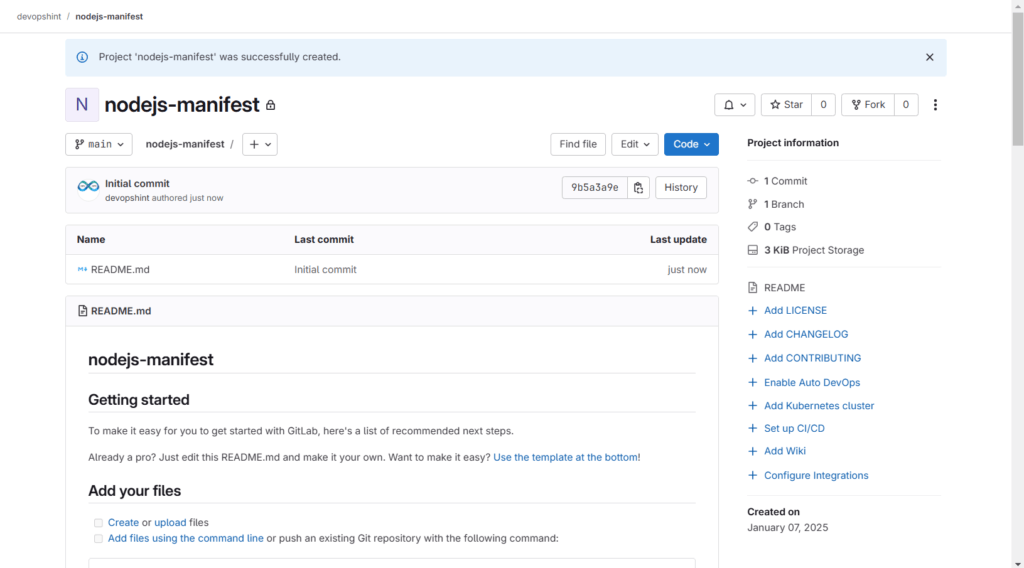
Follow the same procedure for creating another repo nodej-manifest.
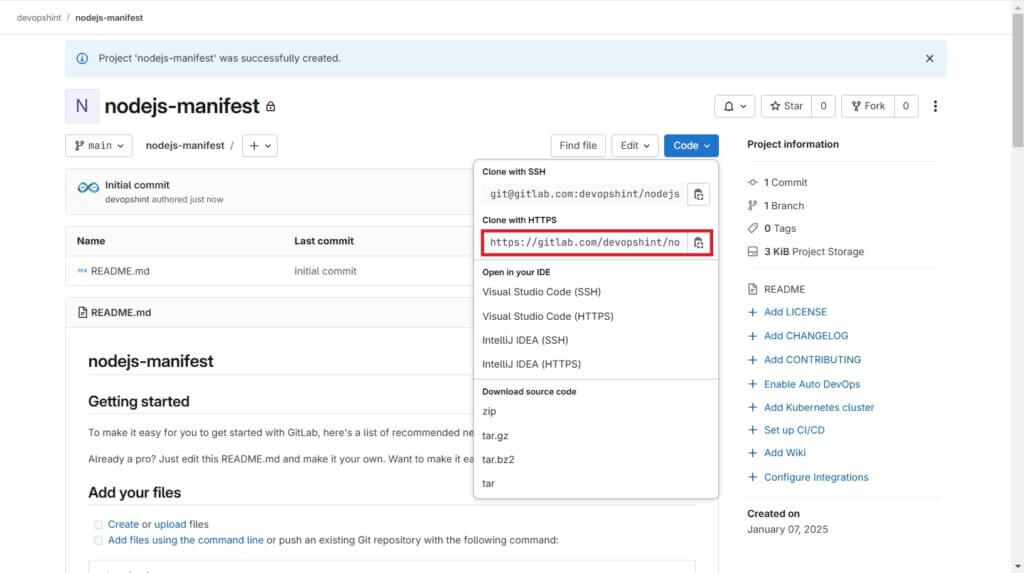
You can see the created repo nodejs-manifest.
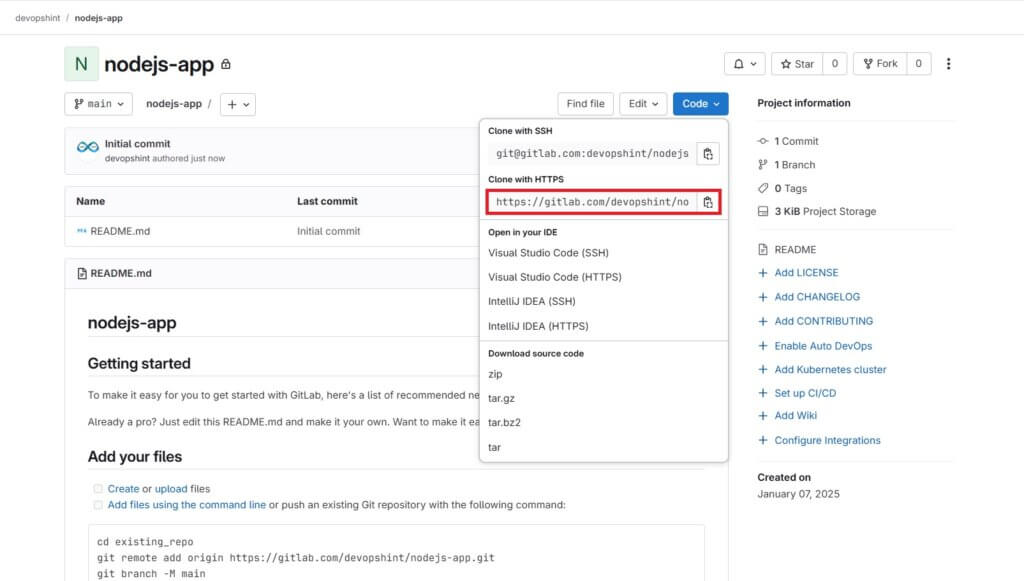
Now go to the nodejs-app repo click on code and copy Clone with HTTPs code.
Next lets copy the repo using git clone and copied code.
git clone https://gitlab.com/devopshint/nodejs-app.git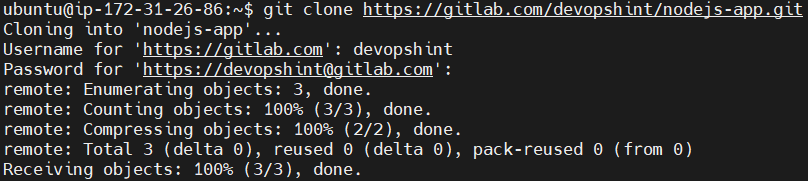
Go to repo. You can see its content.
cd nodejs-app
ls
Create a Dockerfile.
nano Dockerfile
add the following code. And save the file.
# Stage 1: Build the Node.js application
FROM node:16 AS node-build
WORKDIR /app
COPY source_code/package.json source_code/server.js ./
RUN npm install
# Stage 2: Expose the Node.js application
FROM node:16
WORKDIR /app
# Copy the Node.js application and dependencies from the build stage
COPY --from=node-build /app /app
# Expose the port the app will run on
EXPOSE 3000
# Start the Node.js application
CMD ["node", "server.js"]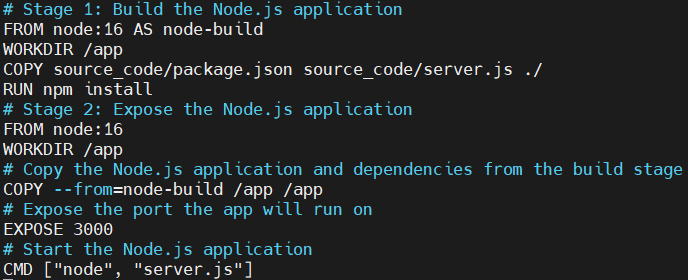
next create a source_code directory and navigate to it.
mkdir source_code
cd source_code
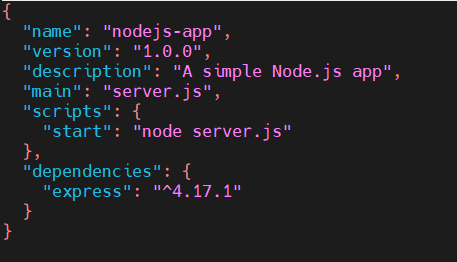
Inside the directory first create a package.json file.
nano package.json
add the following code into it.
{
  "name": "nodejs-app",
  "version": "1.0.0",
  "description": "A simple Node.js app",
  "main": "server.js",
  "scripts": {
    "start": "node server.js"
  },
  "dependencies": {
    "express": "^4.17.1"
  }
}
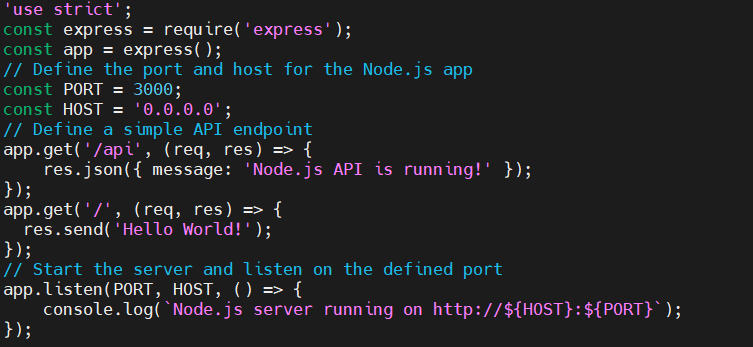
Create a server.js file with the following code in it.
nano server.js
'use strict';
const express = require('express');
const app = express();
// Define the port and host for the Node.js app
const PORT = 3000;
const HOST = '0.0.0.0';
// Define a simple API endpoint
app.get('/api', (req, res) => {
    res.json({ message: 'Node.js API is running!' });
});
app.get('/', (req, res) => {
  res.send('Hello World!');
});
// Start the server and listen on the defined port
app.listen(PORT, HOST, () => {
    console.log(`Node.js server running on http://${HOST}:${PORT}`);
});
Navigate to the root directory.
cd ..
Next lets try to push our repo. first run the git status command. This command displays the state of the working directory and staging area. It helps you track:
- Which files are modified but not yet staged for commit.
- Files that are staged and ready to be committed.
- Untracked files (new files not yet added to version control).
git status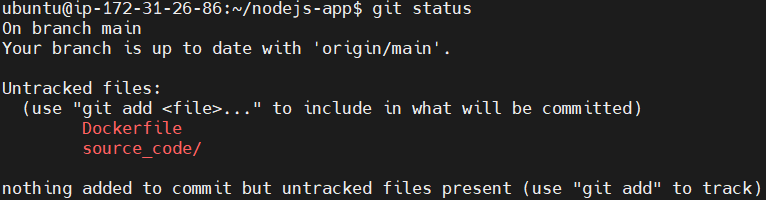
then run following command.
git add .This command stages all the changes in the current directory and its subdirectories for the next commit.

Now you can see the changes by running git status command again.
git status
Lets do the commit. It stages the changes in tracked files and creates a commit with the specified message “Files added to repo”.
git commit -am "Files added to repo"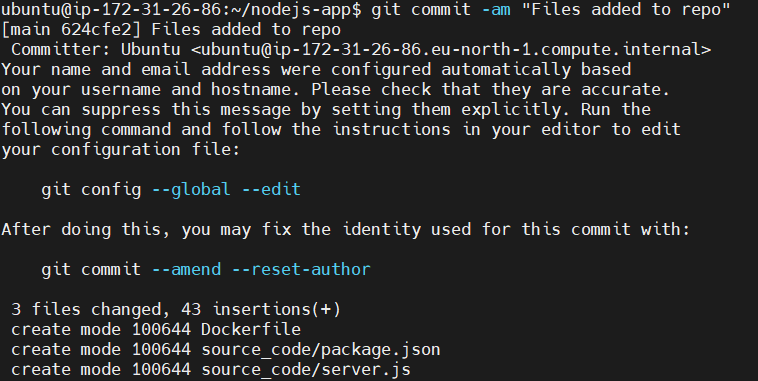
Lets push the repo using git push to gitlab. This uploads the commits from your local repository to the remote repository. You need to enter the gitlab username and password for it.
git push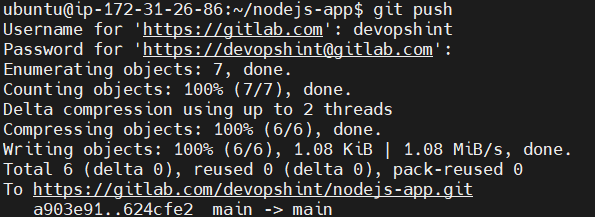
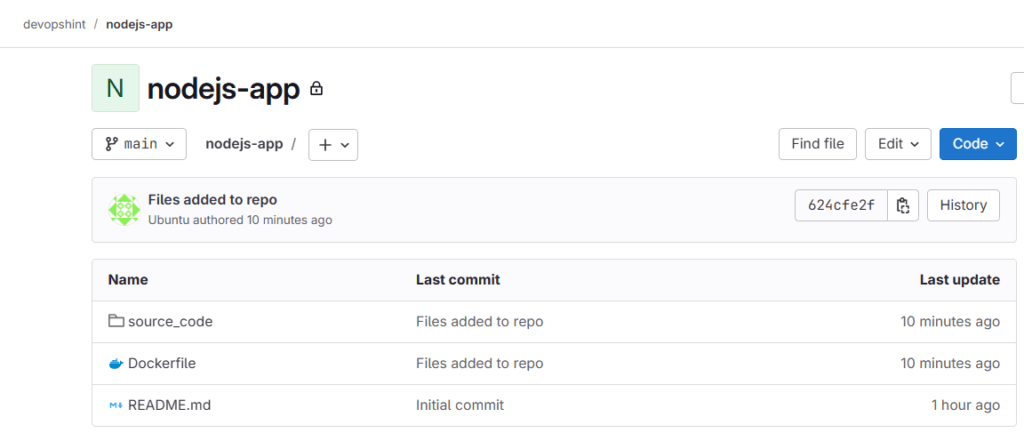
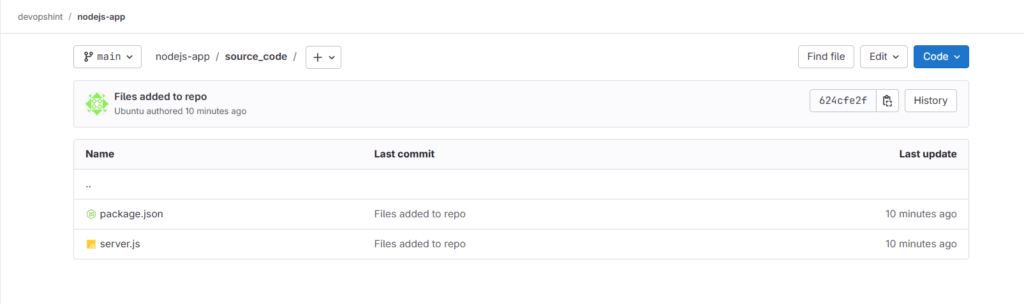
Go back to your nodejs-app repo on gitlab account and refresh the page. You can see the files and folders have been pushed successfully.
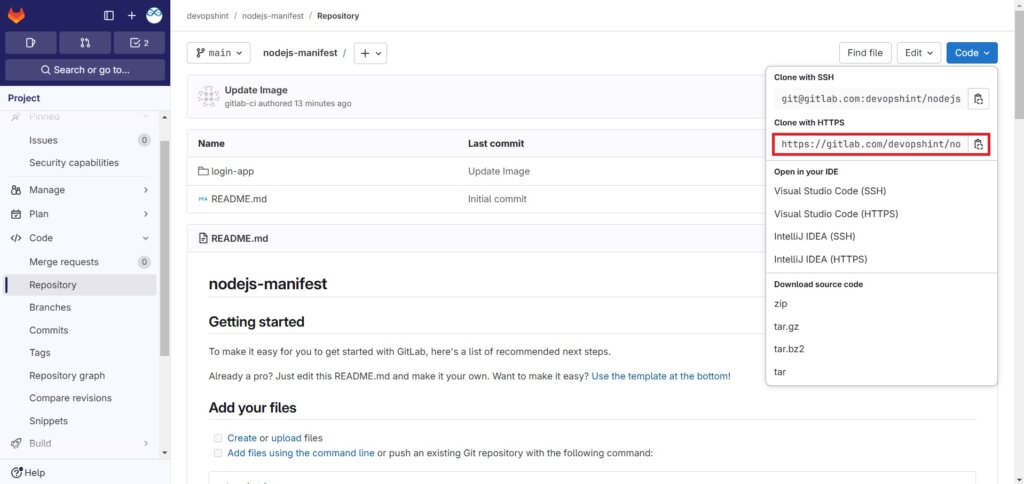
Next go to the nodejs-manifest repo, click on code and copy Clone with HTTPs code.
Open the duplicate tab. Next we will pull the nodejs-manifest repo using git clone and copied code.
git clone https://gitlab.com/devopshint/nodejs-manifest.git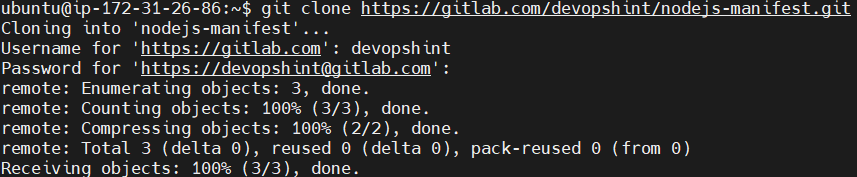
Navigate to the nodejs-manifest repo directory.
cd nodejs-manifest
create and navigate to login-app directory.
mkdir login-app
cd login-app
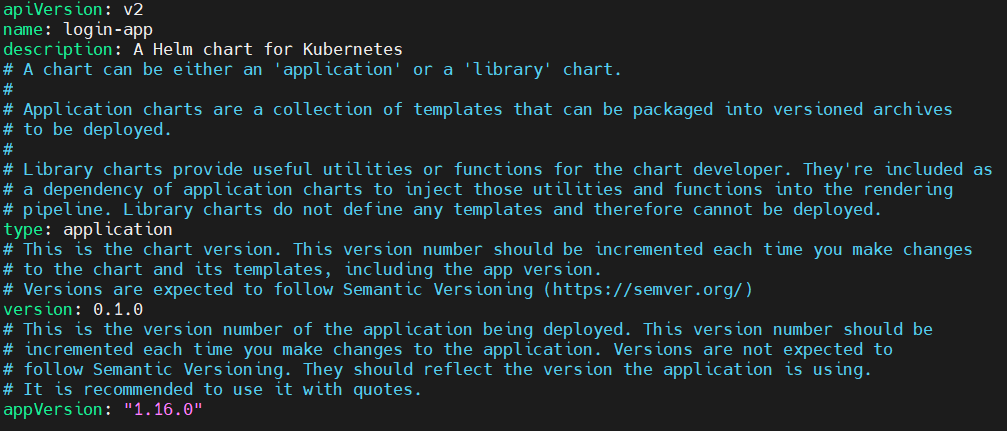
Create a file Chart.yaml with the following code.
nano Chart.yaml
apiVersion: v2
name: login-app
description: A Helm chart for Kubernetes
# A chart can be either an 'application' or a 'library' chart.
#
# Application charts are a collection of templates that can be packaged into versioned archives
# to be deployed.
#
# Library charts provide useful utilities or functions for the chart developer. They're included as
# a dependency of application charts to inject those utilities and functions into the rendering
# pipeline. Library charts do not define any templates and therefore cannot be deployed.
type: application
# This is the chart version. This version number should be incremented each time you make changes
# to the chart and its templates, including the app version.
# Versions are expected to follow Semantic Versioning (https://semver.org/)
version: 0.1.0
# This is the version number of the application being deployed. This version number should be
# incremented each time you make changes to the application. Versions are not expected to
# follow Semantic Versioning. They should reflect the version the application is using.
# It is recommended to use it with quotes.
appVersion: "1.16.0"
Create a values.yaml file with the following code.
nano values.yaml
# Default values for login-app.
# This is a YAML-formatted file.
# Declare variables to be passed into your templates.
replicaCount: 1
image:
  repository: registry.gitlab.com/devopshint/nodejs-app/login_demo:ebcfd93c
  pullPolicy: IfNotPresent
  # Overrides the image tag whose default is the chart appVersion.
  tag: ""
imagePullSecrets: []
nameOverride: ""
fullnameOverride: ""
serviceAccount:
  # Specifies whether a service account should be created
  create: true
  # Annotations to add to the service account
  annotations: {}
  # The name of the service account to use.
  # If not set and create is true, a name is generated using the fullname template
  name: ""
podAnnotations: {}
podSecurityContext: {}
  # fsGroup: 2000
securityContext: {}
  # capabilities:
  #   drop:
  #   - ALL
  # readOnlyRootFilesystem: true
  # runAsNonRoot: true
  # runAsUser: 1000
service:
  type: NodePort
  port: 80
ingress:
  enabled: false
  className: ""
  annotations: {}
    # kubernetes.io/ingress.class: nginx
    # kubernetes.io/tls-acme: "true"
  hosts:
    - host: chart-example.local
      paths:
        - path: /
          pathType: ImplementationSpecific
  tls: []
  #  - secretName: chart-example-tls
  #    hosts:
  #      - chart-example.local
resources: {}
  # We usually recommend not to specify default resources and to leave this as a conscious
  # choice for the user. This also increases chances charts run on environments with little
  # resources, such as Minikube. If you do want to specify resources, uncomment the following
  # lines, adjust them as necessary, and remove the curly braces after 'resources:'.
  # limits:
  #   cpu: 100m
  #   memory: 128Mi
  # requests:
  #   cpu: 100m
  #   memory: 128Mi
autoscaling:
  enabled: false
  minReplicas: 1
  maxReplicas: 100
  targetCPUUtilizationPercentage: 80
  # targetMemoryUtilizationPercentage: 80
nodeSelector: {}
tolerations: []
affinity: {}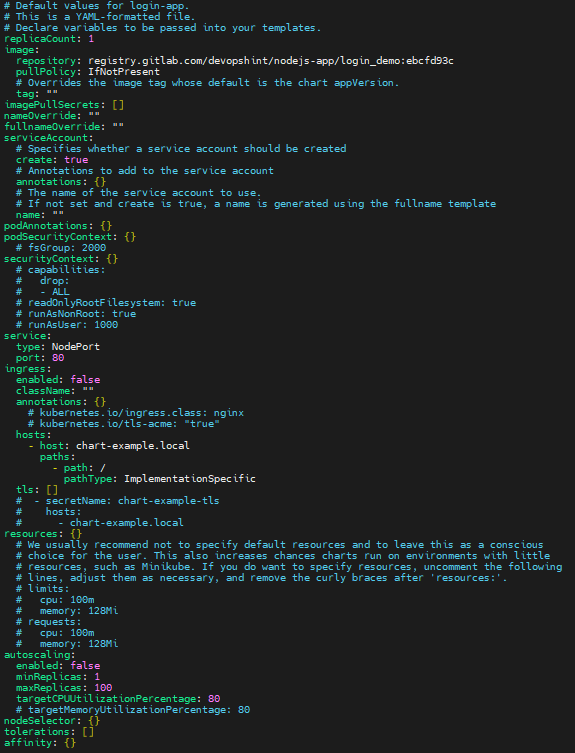
Create and navigate to the templates directory.
mkdir templates
cd templates
Create a deployment.yaml file with the following code.
nano deployment.yaml
apiVersion: apps/v1
kind: Deployment
metadata:
  labels:
    app: logindep
  name: {{ .Release.Name }}-logindep
spec:
  replicas: 3
  selector:
    matchLabels:
      app: logindep
  template:
    metadata:
      labels:
        app: logindep
    spec:
      containers:
      - image: {{ .Values.image.repository }}
        name: sample
      imagePullSecrets:
      - name: helm-secret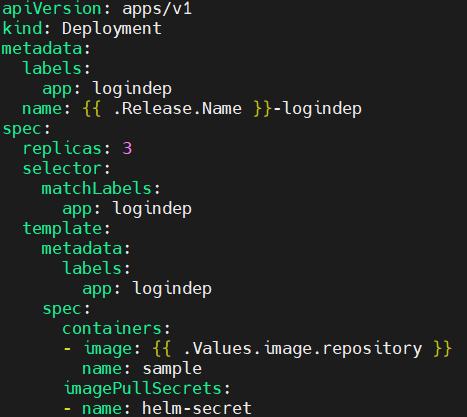
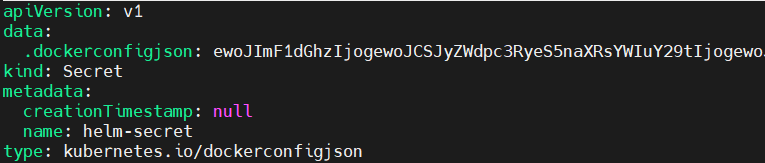
Create a secret.yaml file with the following code.
nano secret.yaml
apiVersion: v1
data:
  .dockerconfigjson: ewoJImF1dGhzIjogewoJCSJyZWdpc3RyeS5naXRsYWIuY29tIjogewoJCQkiYXV0aCI6ICJaR1YyYjNCemFHbHVkRHBFWlhaUGNITklhVzUwUURFeU13PT0iCgkJfQoJfQp9
kind: Secret
metadata:
  creationTimestamp: null
  name: helm-secret
type: kubernetes.io/dockerconfigjson
Create a service.yaml file with the following code.
nano service.yaml
apiVersion: v1
kind: Service
metadata:
  labels:
    app: webapp-svc
  name: {{ .Release.Name }}-webapp-svc
spec:
  ports:
  - name: webapp-svc
    port: 3000
    protocol: TCP
    targetPort: 3000
    #    nodePort: 31000
  selector:
    app: logindep
  type: {{ .Values.service.type }}
status:
  loadBalancer: {}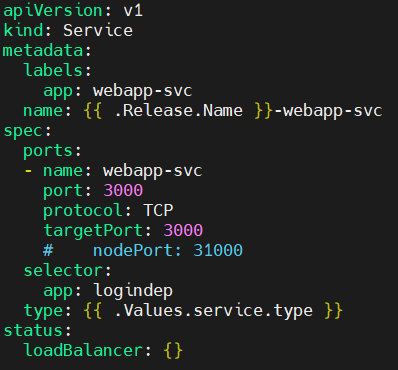
back to root project directory.
cd ../..
Next lets try to push our repo, first run the git status command. This command displays the state of the working directory and staging area. It helps you track:
- Which files are modified but not yet staged for commit.
- Files that are staged and ready to be committed.
- Untracked files (new files not yet added to version control).
git status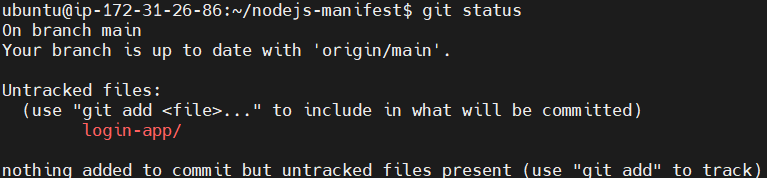
then run following command.
git add .This command stages all the changes in the current directory and its subdirectories for the next commit.

Now you can see the changes by running git status command again.
git status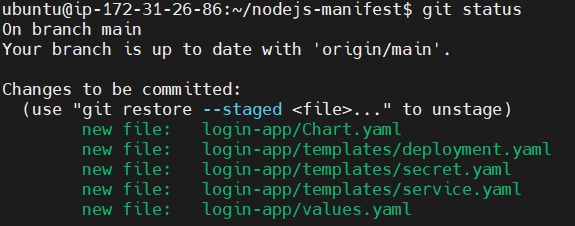
Lets do the commit. It stages the changes in tracked files and creates a commit with the specified message “Files added to repo”.
git commit -am "Files added to repo"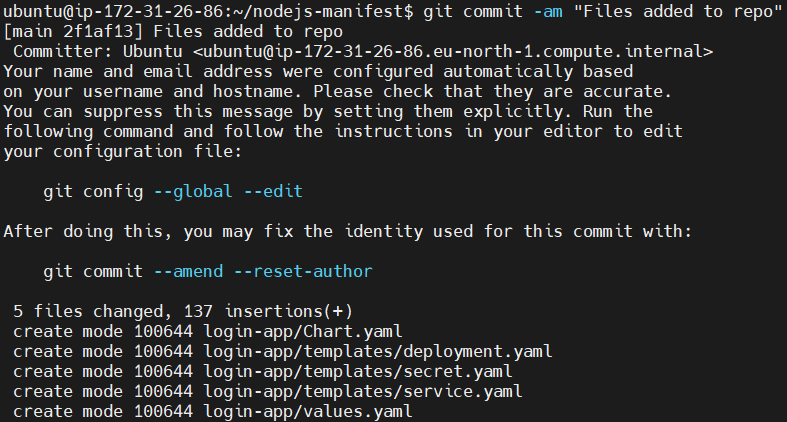
Lets push the repo using git push to gitlab. This uploads the commits from your local repository to the remote repository. You need to enter the gitlab username and password for it.
git push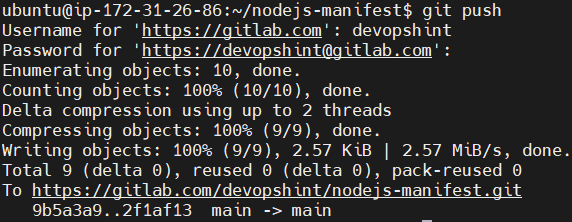
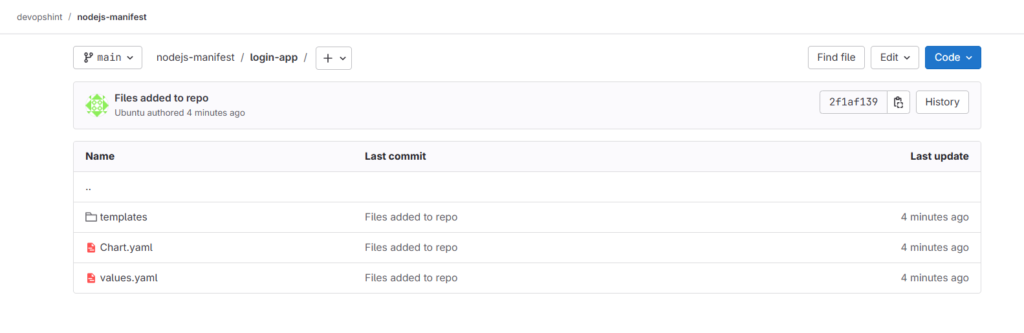
Go back to your nodejs-manifest repo on gitlab account and refresh the page. You can see the files and folders have been pushed successfully.


Step #2:Install and setup ArgoCD
Now lets open another duplicate tab. Create a new namespace called argocd in your Kubernetes cluster.
kubectl create namespace argocd
Install ArgoCD in the argocd namespace by applying the YAML file from the provided URL.
kubectl apply -n argocd -f https://raw.githubusercontent.com/argoproj/argo-cd/stable/manifests/install.yaml
List all the resources in the argocd namespace. It provides an overview of the ArgoCD setup includes Pods, Services, Deployments, ReplicaSets, and more.
kubectl -n argocd get all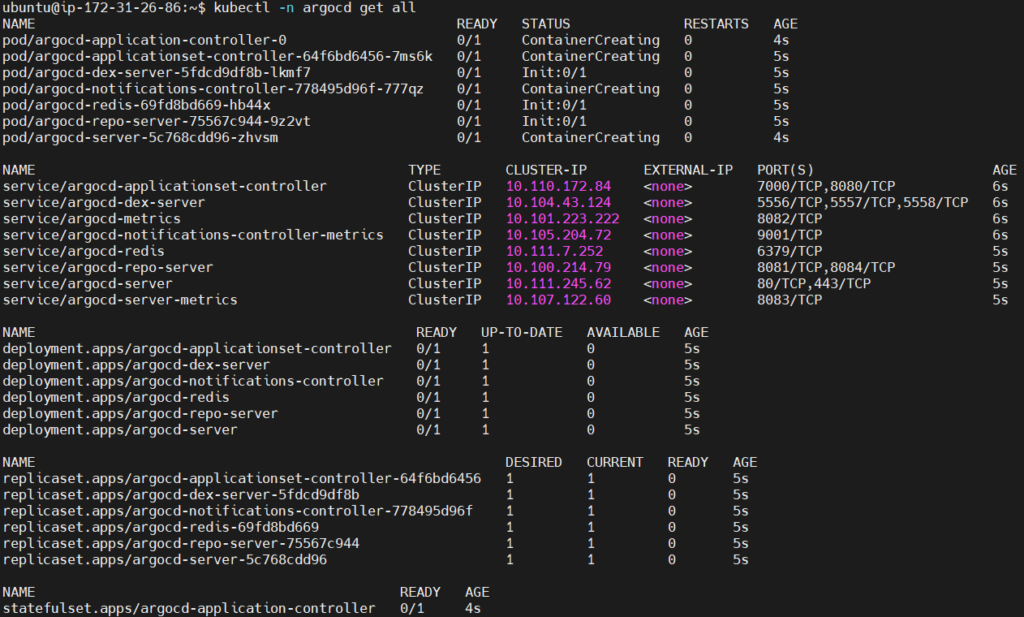
Edit the service configuration of argocd-server.
kubectl -n argocd edit service argocd-server
modify it shown below. Change the type field from ClusterIP to NodePort. ClusterIP exposes the service only within the cluster. NodePort makes the service accessible externally via a specific port on the nodes.
type: NodePort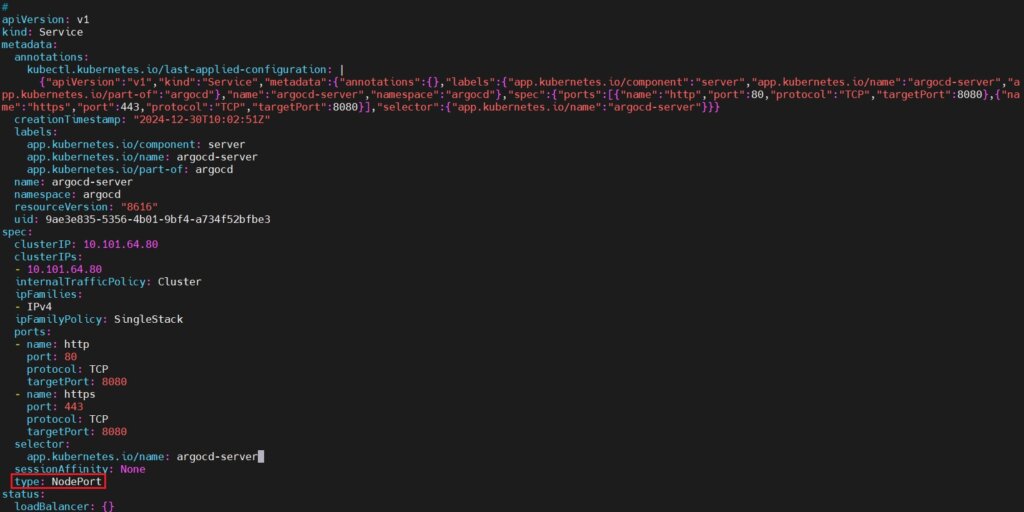
Run the kubectl -n argocd get all again to see if service type changed or not.
kubectl -n argocd get all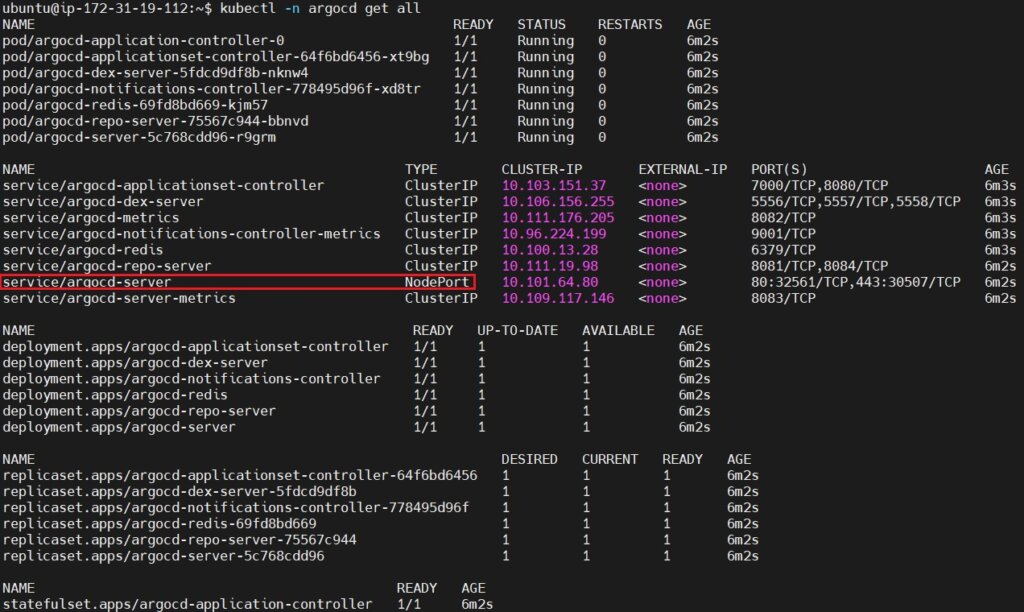
Run the kubectl port-forward command. It forwards traffic from your local machine (port 8080) to the argocd-server service’s port 80 in the Kubernetes cluster. –address 0.0.0.0 Ensures the service is accessible from any IP address, not just localhost.
kubectl port-forward -n argocd --address 0.0.0.0 svc/argocd-server 8080:80
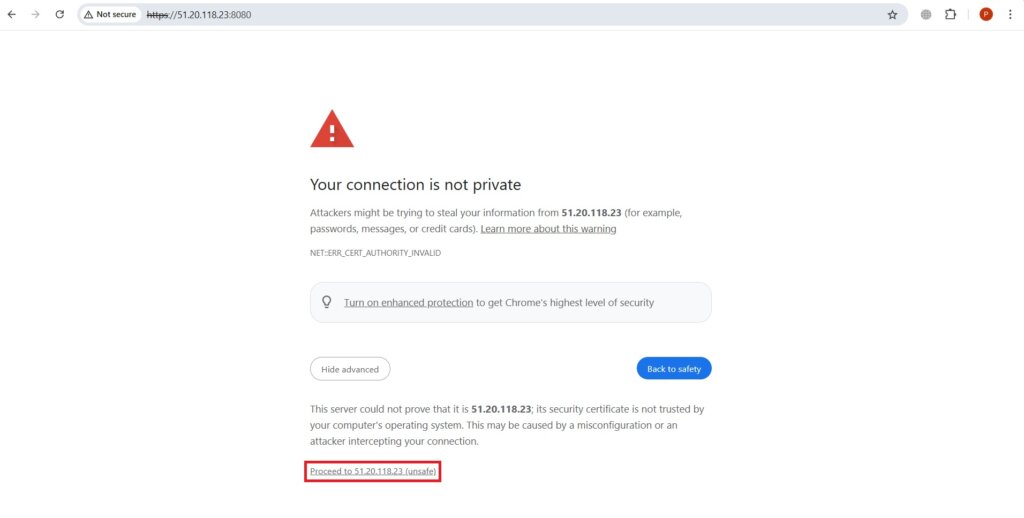
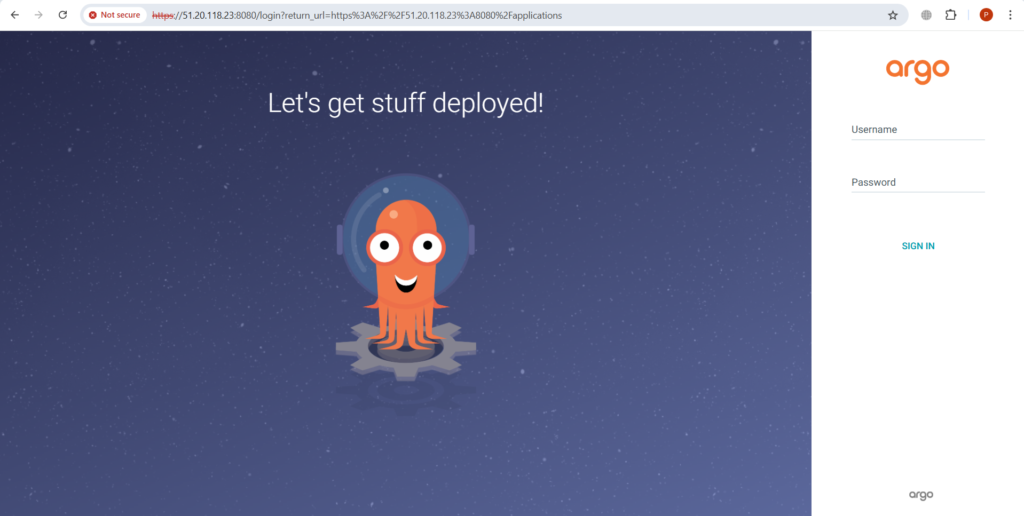
Now open your web browser and run <EC2-Public-IP>:8080. Click on Proceed to ….. to go to the home page of ArgoCD.
Open duplicate tab and Download the latest release of the ArgoCD CLI binary for Linux systems.
curl -sSL -o argocd-linux-amd64 https://github.com/argoproj/argo-cd/releases/latest/download/argocd-linux-amd64
Install the downloaded ArgoCD binary to the system so it can be run from anywhere.
sudo install -m 555 argocd-linux-amd64 /usr/local/bin/argocd
Remove the downloaded binary file from the current directory after it has been installed.
rm argocd-linux-amd64
Retrieve the initial password for the ArgoCD admin user.
argocd admin initial-password -n argocd
Login into argocd using admin as username and password generated above.

Step #3:Setup a CICD pipeline in Gitlab (Build stage)
Go to gitlab > nodejs-app repo and create a new file in it.

Create file named .gitlab-ci.yml. Add the following code into it.
stages:
  - build

variables:
  APP_NAME: login_demo
  IMAGE_TAG: registry.gitlab.com/devopshint/nodejs-app/$APP_NAME:$CI_COMMIT_SHORT_SHA

build_image:
  image: docker
  stage: build
  services:
    - docker:dind
  script:
    - docker login -u $CI_REGISTRY_USER -p $CI_REGISTRY_PASSWORD $CI_REGISTRY
    - docker build -t $IMAGE_TAG .
- docker push $IMAGE_TAG 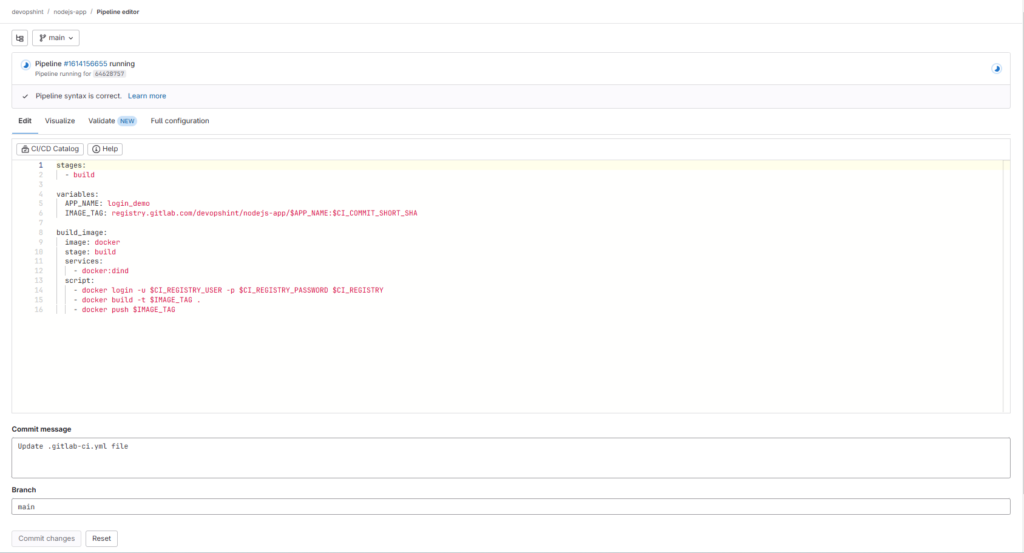
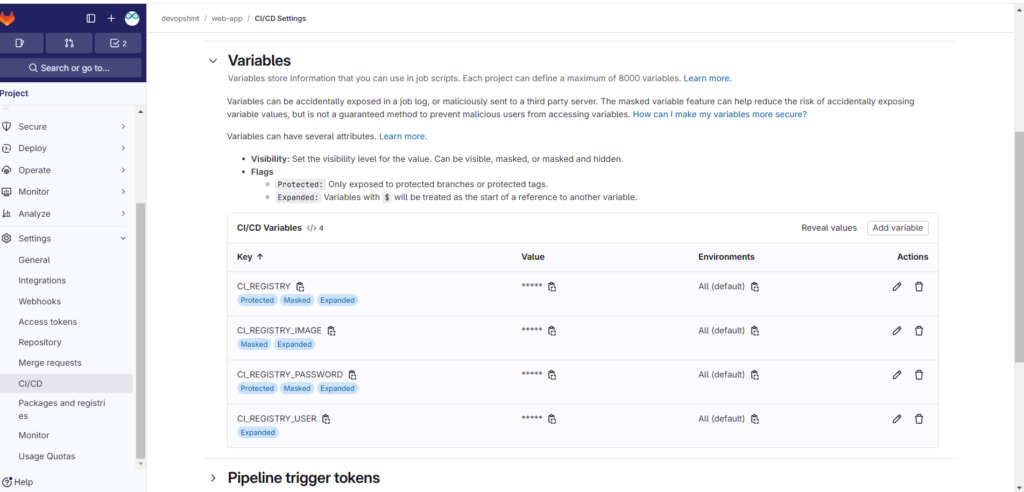
Go to Settings > CI/CD and select Variables. Click on Add variables.
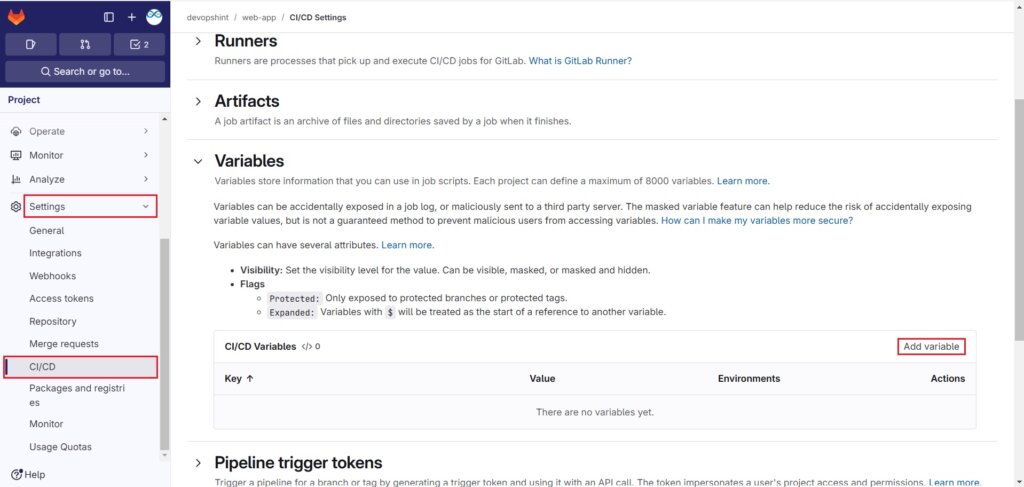
Add the variables as shown below.

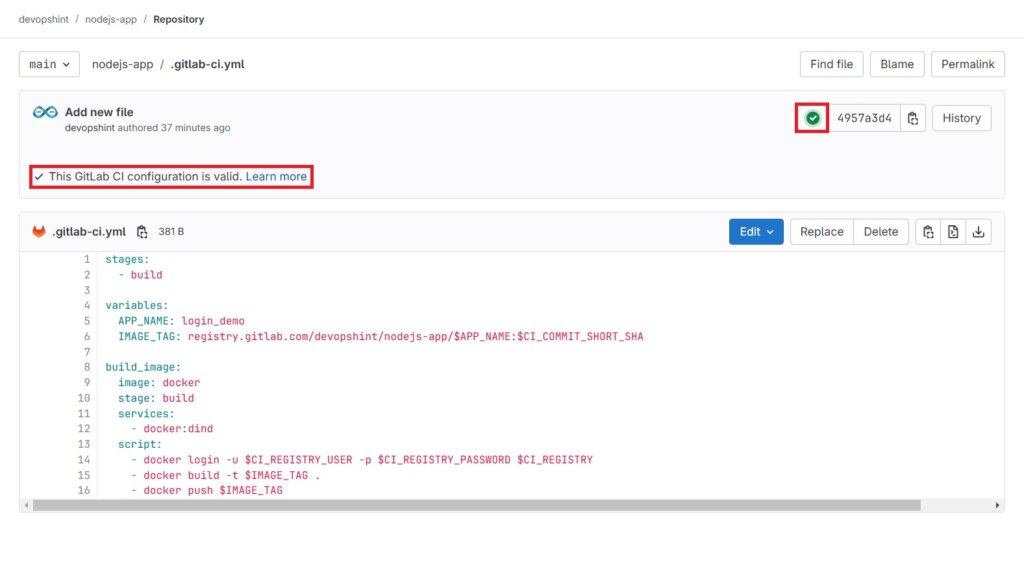
Now get to .gitlab-ci.yml file and click on Commit changes.
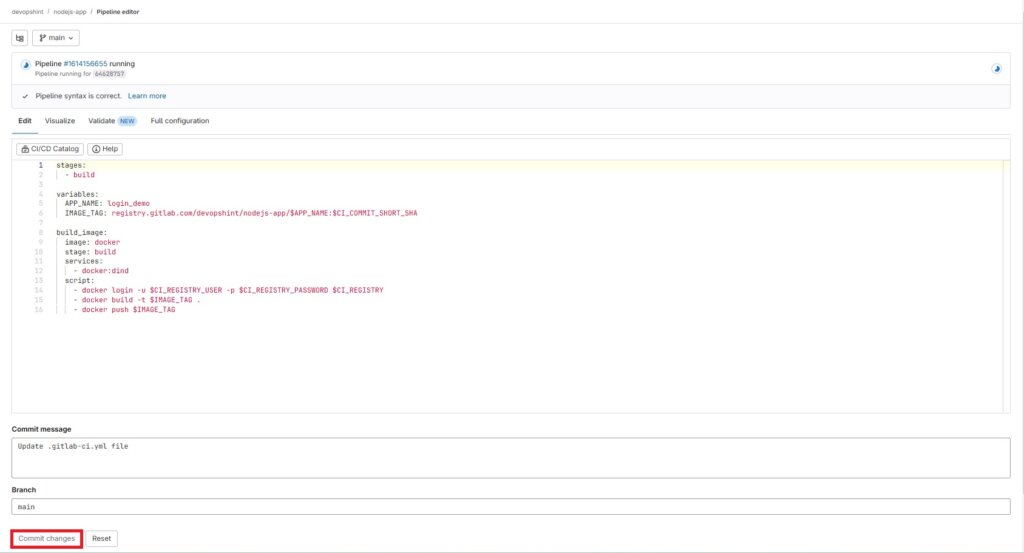
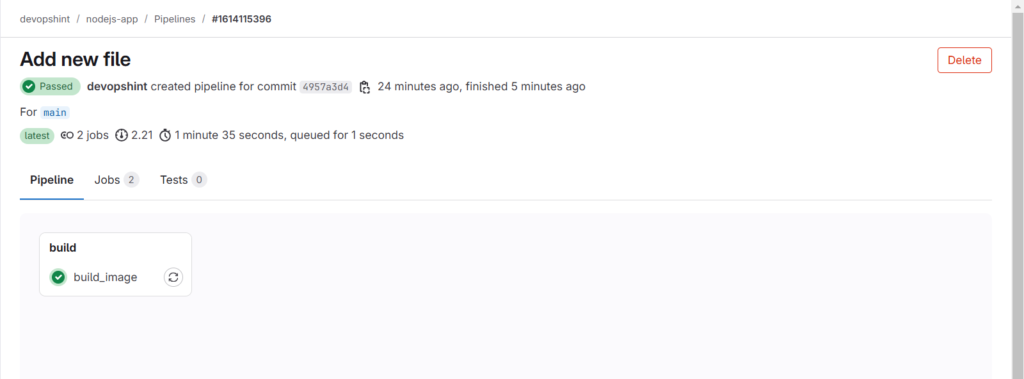
This will validate the file and start the pipeline. Once its done and pipeline is running click on the Green tick mark.
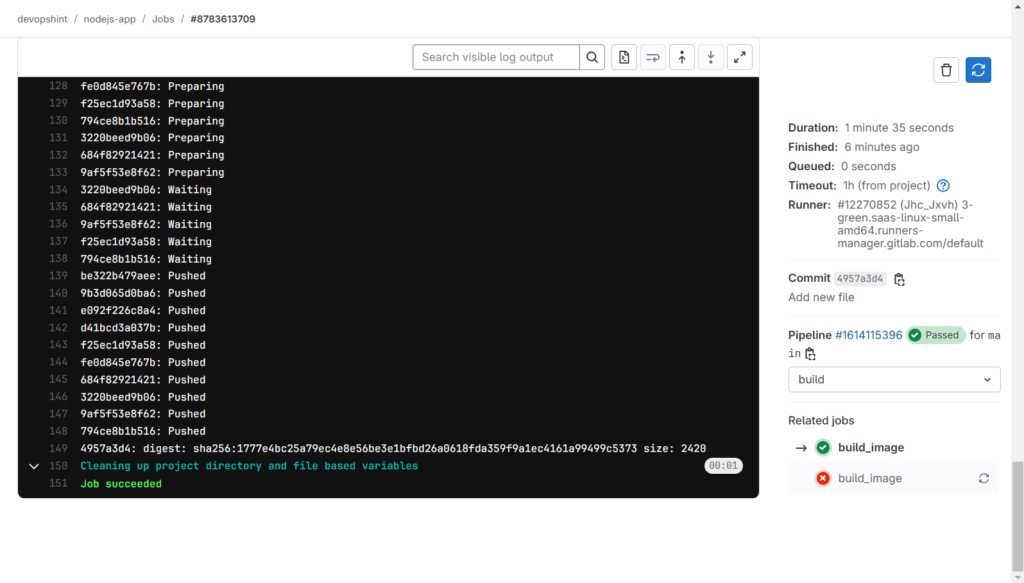
Click on build image to see the pipeline.
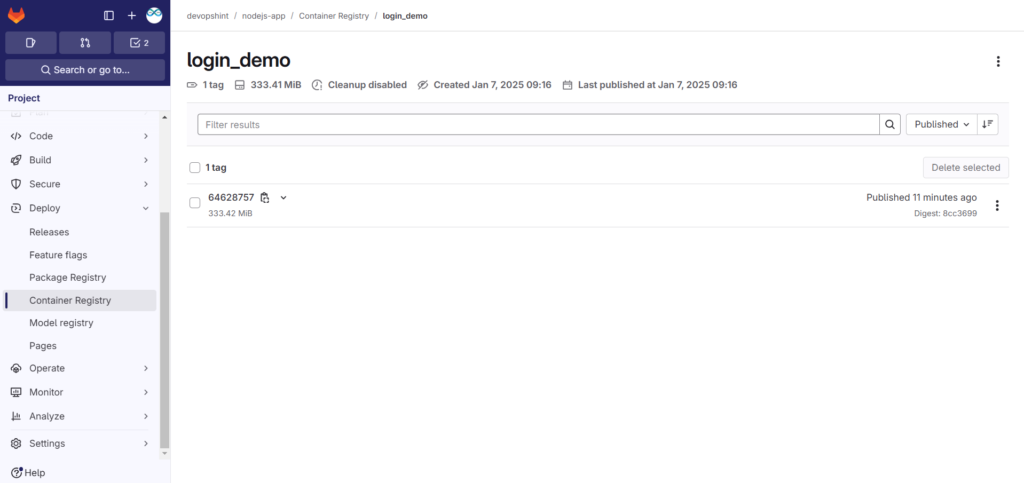
Now go to Deploy > Container Registry. You will see the nodejs-app/login_demo. Click on it.
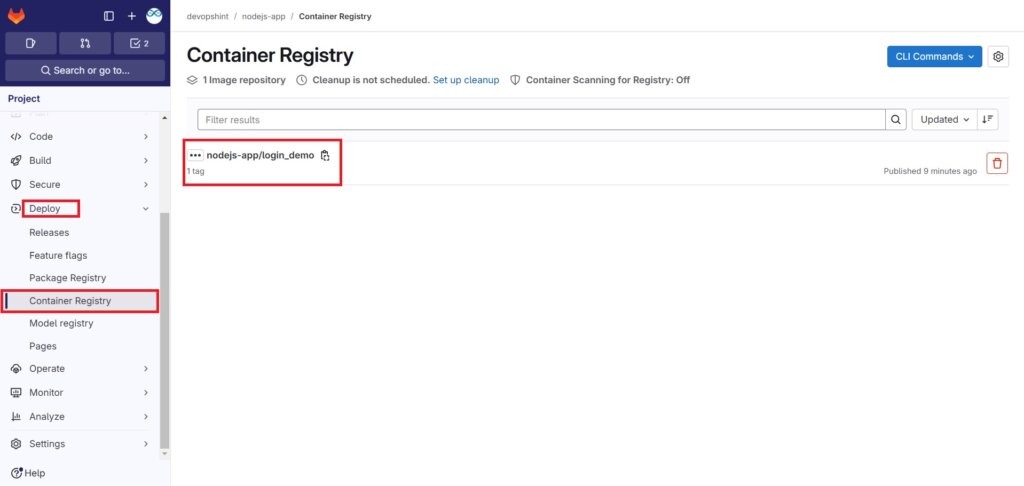
You can see the image which is build.
Step #4:Creating a Kubernetes Secret
log into the GitLab Container Registry.
docker login registry.gitlab.comIt prompts for your GitLab username and personal access token (or password) to authenticate and stores the login credentials in the file ~/.docker/config.json on your local machine.

Display the contents of the Docker configuration file located at ~/.docker/config.json to verify that the login credentials were stored correctly for the GitLab Container Registry..
cat ~/.docker/config.json
Encod the config.json file into a single-line Base64 string. This encoded string will be added to the secret.yaml file. Copy it.
cat ~/.docker/config.json | base64 -w 0
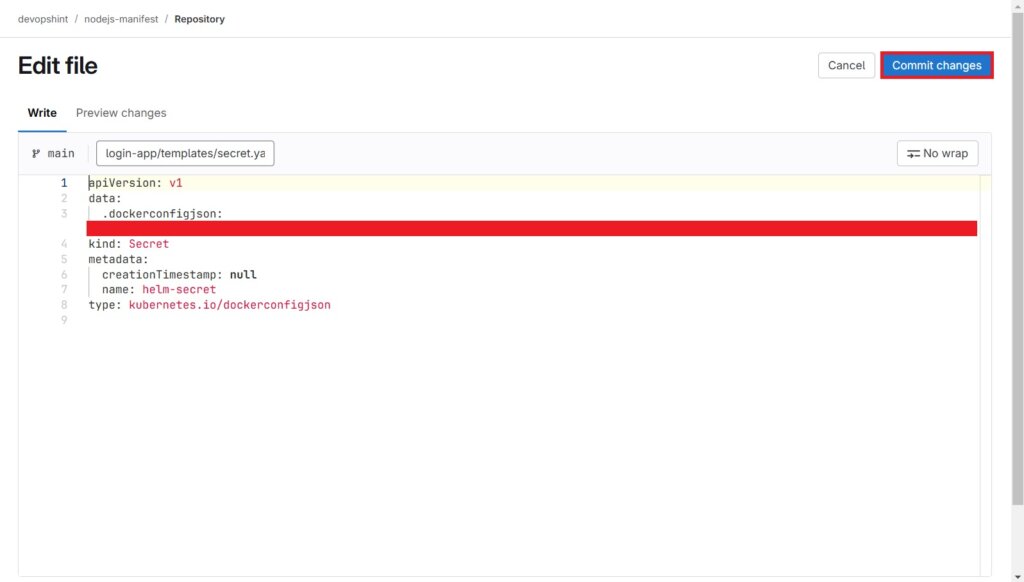
Back to gitlab. Go to our secret.yaml file which is located in nodejs-manifest repo > login-app > templates > secret.yaml
Click on Edit and select Edit single file.

Add the secret copied as shown below and click on Commit changes.
Step #5:Generating and Configuring SSH Keys for Secure Authentication
Create the .ssh directory in the home folder (~) if it doesn’t already exist.
mkdir -p ~/.ssh
Change the permissions of the .ssh directory to make it accessible only to the owner.
chmod 700 ~/.ssh
Generate an SSH key pair (private and public keys). It creates a secure method for authenticating with remote servers or Git repositories without passwords.
ssh-keygen -t rsa -b 4096 -C "[email protected]"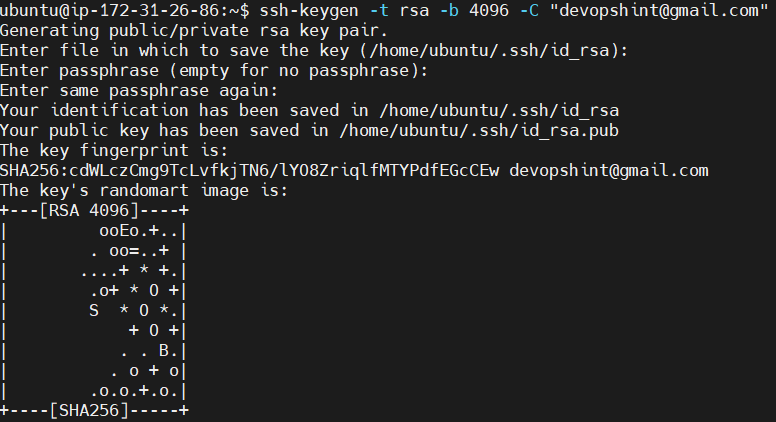
List the contents of the .ssh directory with detailed information. It verifies that the SSH key pair (id_rsa for private and id_rsa.pub for public) has been created successfully.
ls -l ~/.ssh
Display the contents of the public key file. Copy it.
cat ~/.ssh/id_rsa.pub
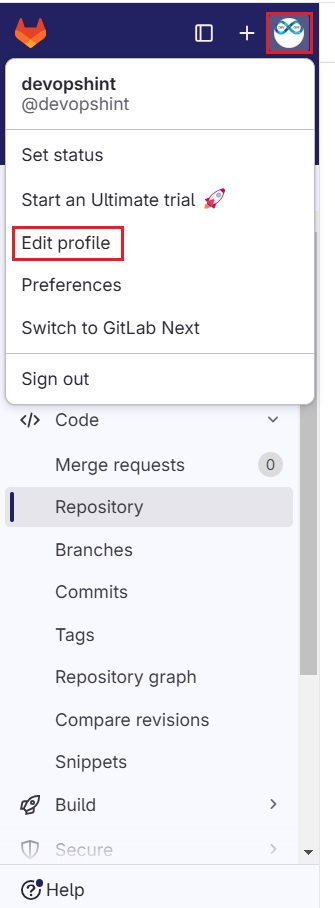
Go back to gitlab. Click on profile as shown below and select Edit profile.
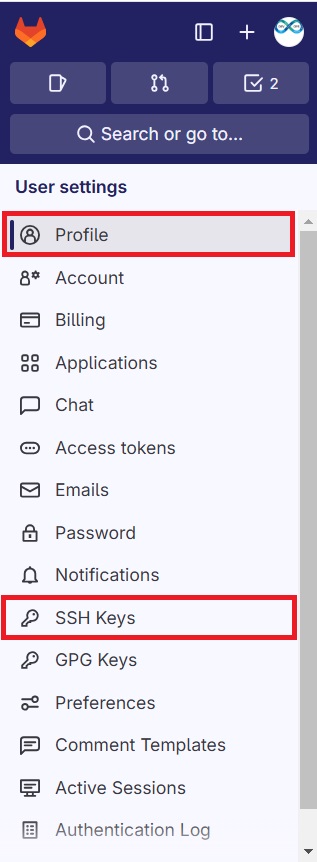
Select Profile then click on SSH Keys.
Add the SSH Key.
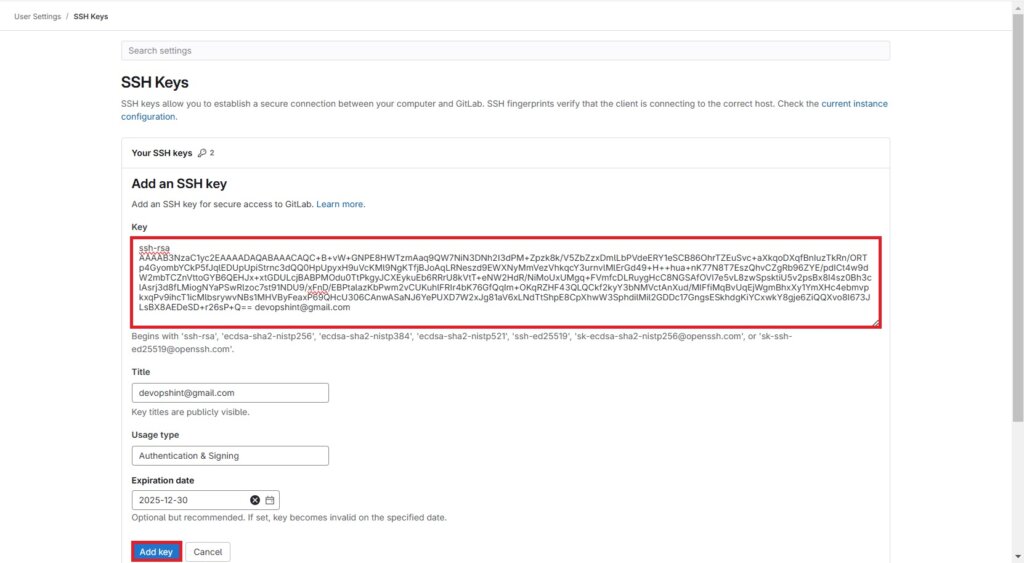
You can see that our key is added successfully.

Display the contents of the private key file. Copy it.
cat ~/.ssh/id_rsa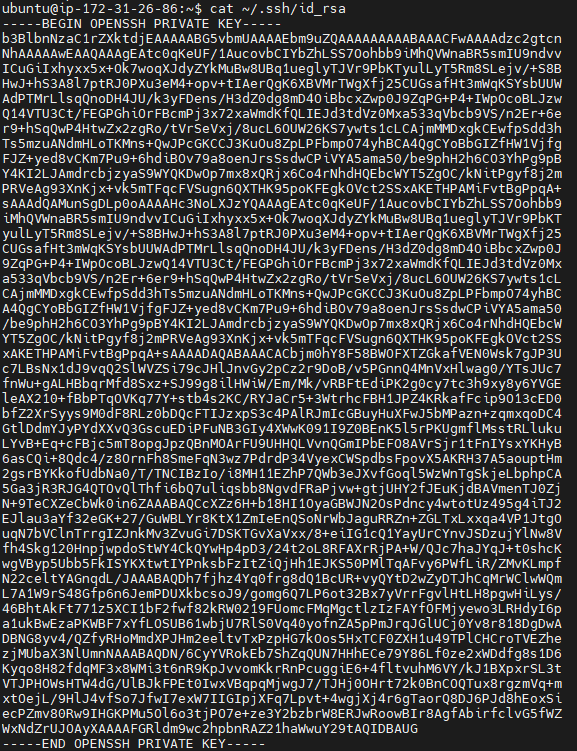
Now go back to gitlab, web-app repo. Select CI/CD and Variables.
Create variable as shown below.
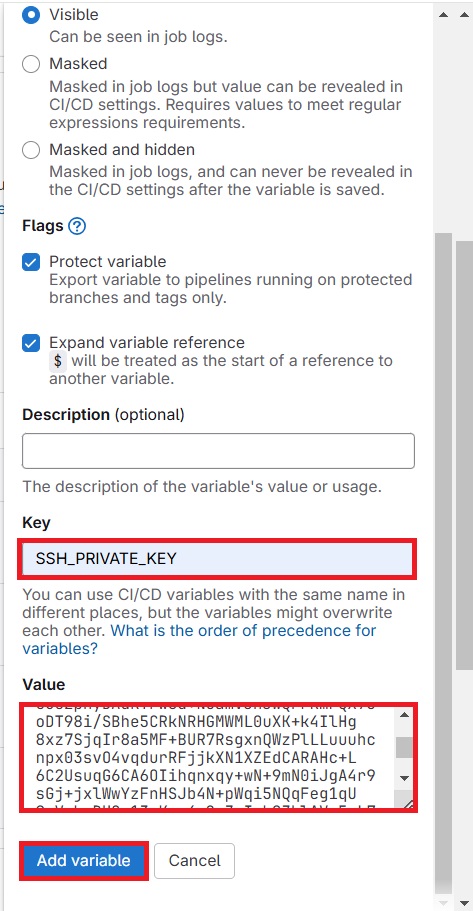
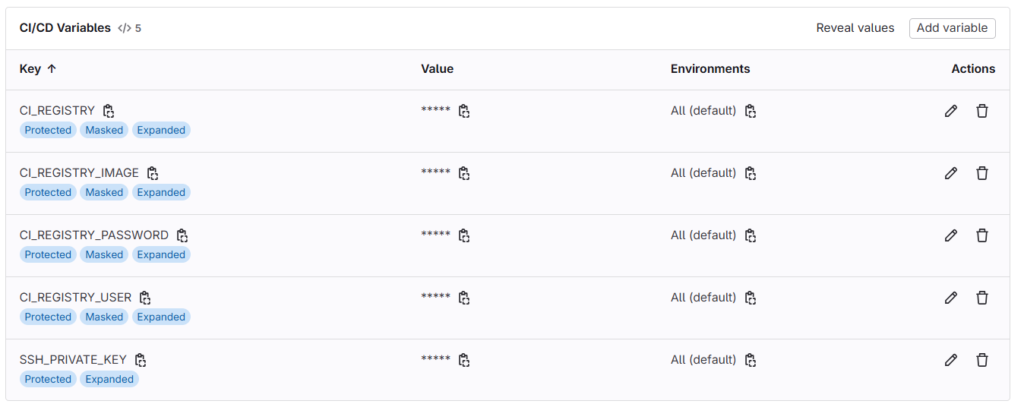
As you can see our Variable is creates successfully.
SSH key pairs provide a secure and convenient way to authenticate without passwords. They are critical for accessing servers, deploying applications, or pushing code to Git repositories.
Step #6:Setup a CICD pipeline in Gitlab (Helm Chart Updation)
Now go to web-app repo, open .gitlab-ci.yml and edit it .
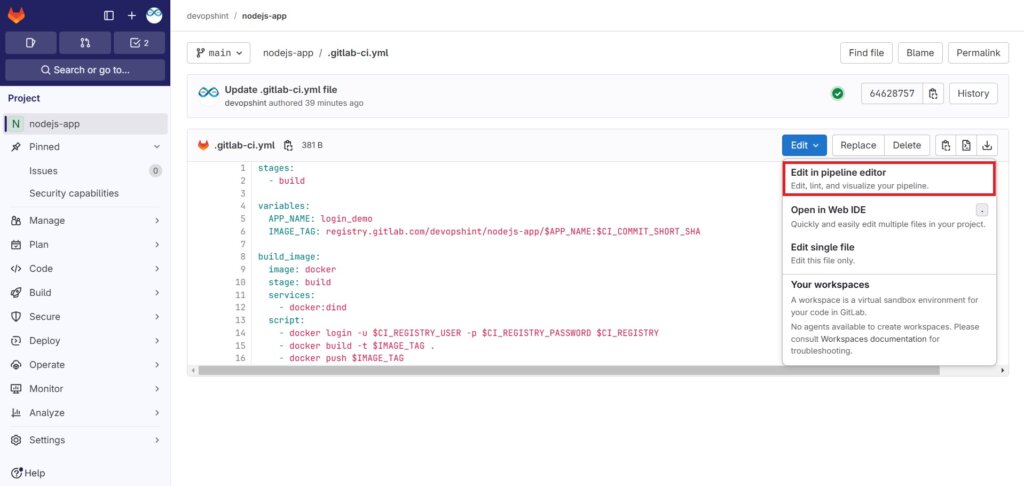
add the update helm chart part in it and click on Commit changes. Click on green tick mark to see pipeline.
stages:
  - build
  - update_helm_chart
variables:
  APP_NAME: login_demo
  IMAGE_TAG: registry.gitlab.com/devopshint/nodejs-app/$APP_NAME:$CI_COMMIT_SHORT_SHA
build_image:
  image: docker
  stage: build
  services:
    - docker:dind
  script:
    - docker login -u $CI_REGISTRY_USER -p $CI_REGISTRY_PASSWORD $CI_REGISTRY
    - docker build -t $IMAGE_TAG .
    - docker push $IMAGE_TAG
update_helm_chart:
    stage: update_helm_chart
    image: ubuntu:24.04
    before_script:
      - 'which ssh-agent || ( apt-get update -y && apt-get install openssh-client git -y )'
      - mkdir -p /root/.ssh
      - echo "$SSH_PRIVATE_KEY" > /root/.ssh/id_rsa
      - chmod 600 /root/.ssh/id_rsa
      - ssh-keyscan -H gitlab.com >> ~/.ssh/known_hosts
      - chmod 644 ~/.ssh/known_hosts
        # run ssh-agent
      - eval $(ssh-agent -s)
        # add ssh key stored in SSH_PRIVATE_KEY variable to the agent store
      - echo "$SSH_PRIVATE_KEY" | tr -d '\r' | ssh-add -
      # Git
      - git config --global user.email "[email protected]"
      - git config --global user.name "gitlab-ci"
      - git clone [email protected]:devopshint/nodejs-manifest.git
      - cd nodejs-manifest
      - ls -latr
    script:
    # Update Image TAG
     - sed -i "s/login_demo:.*/login_demo:${CI_COMMIT_SHORT_SHA}/g" login-app/values.yaml
     - git add login-app/values.yaml
     - git commit -am "Update Image"
     - git push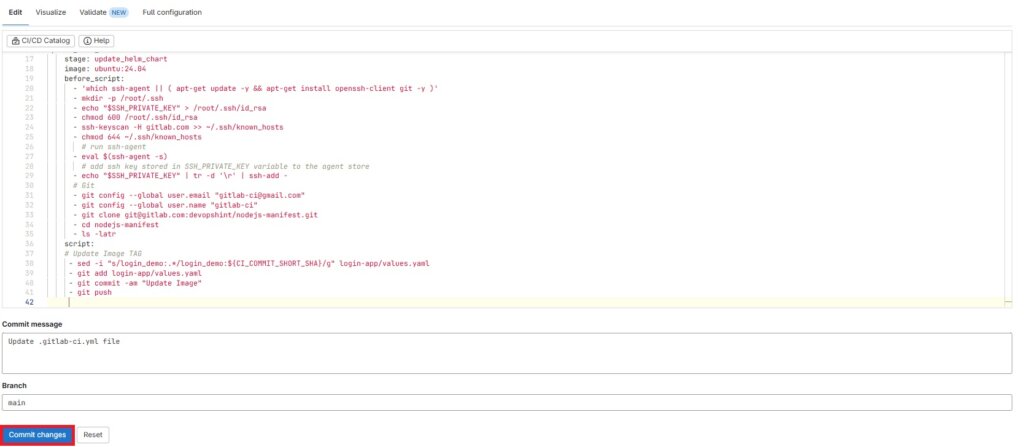
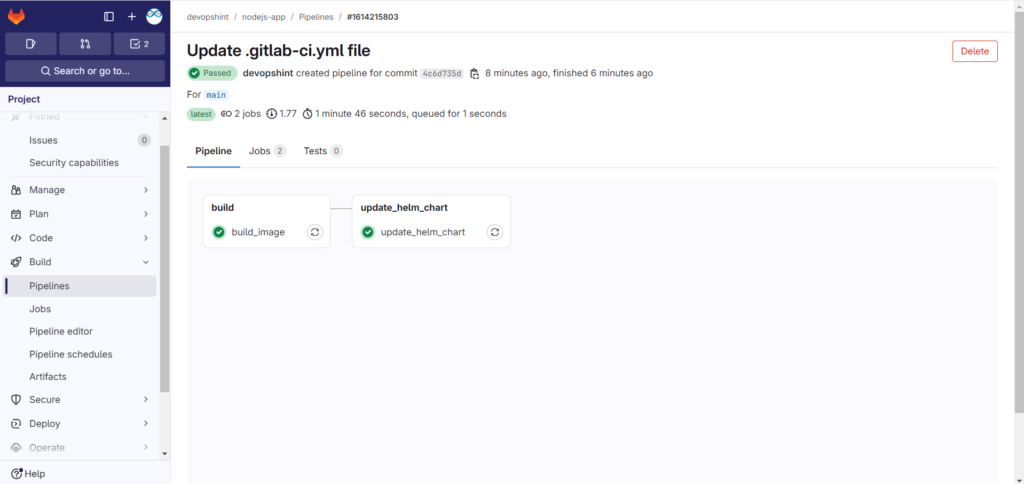
Click on update_helm_chart to see the pipeline.

Step #7:Deploying Application with ArgoCD
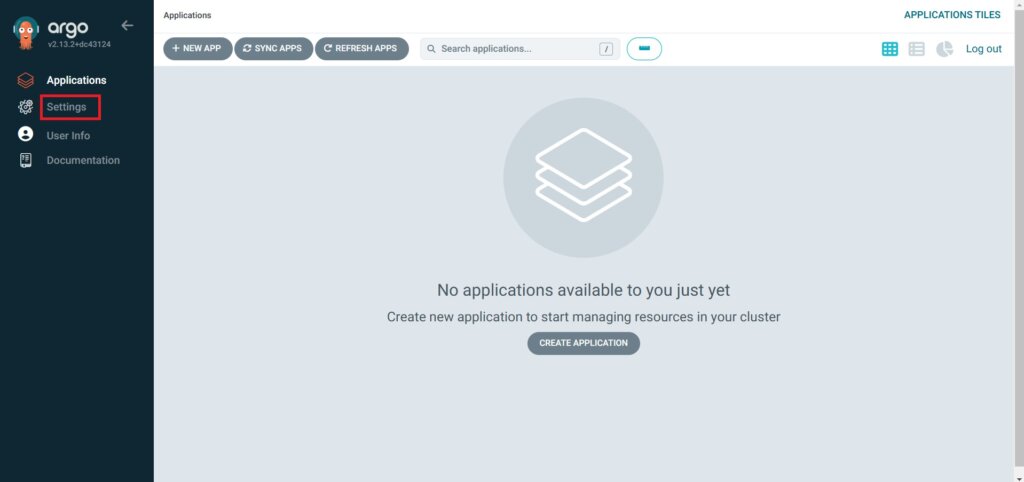
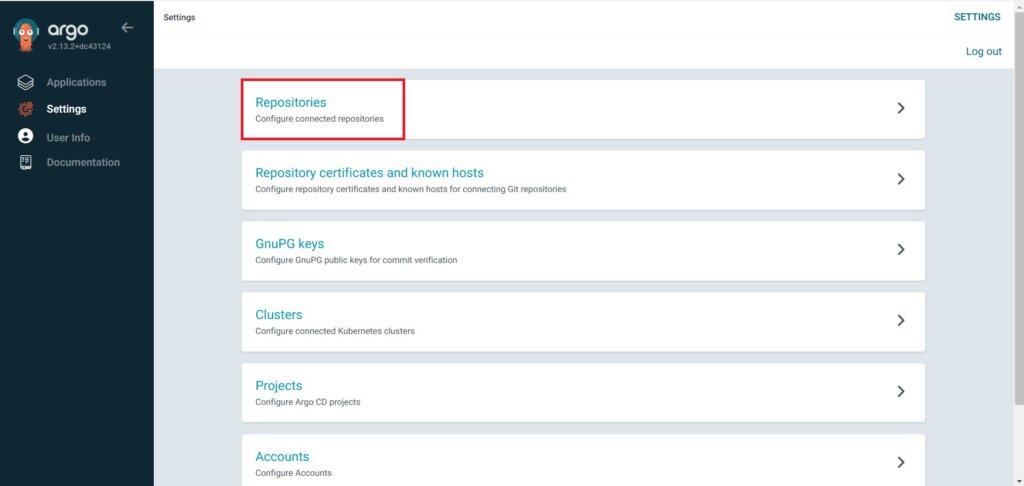
Go to ArgoCD. Click on Settings.
Click on Repositories.
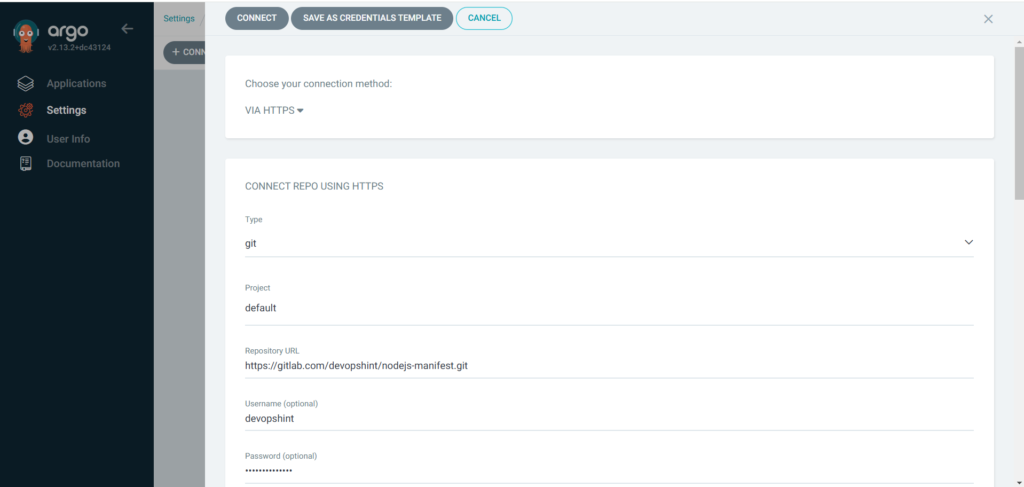
Click on CONNECT REPO.

Copy HTTPs code from nodejs-manifest.
Paste it Repository URL, Use connection method VIA HTTPS, Type git, Project default, Username and Password (git token).
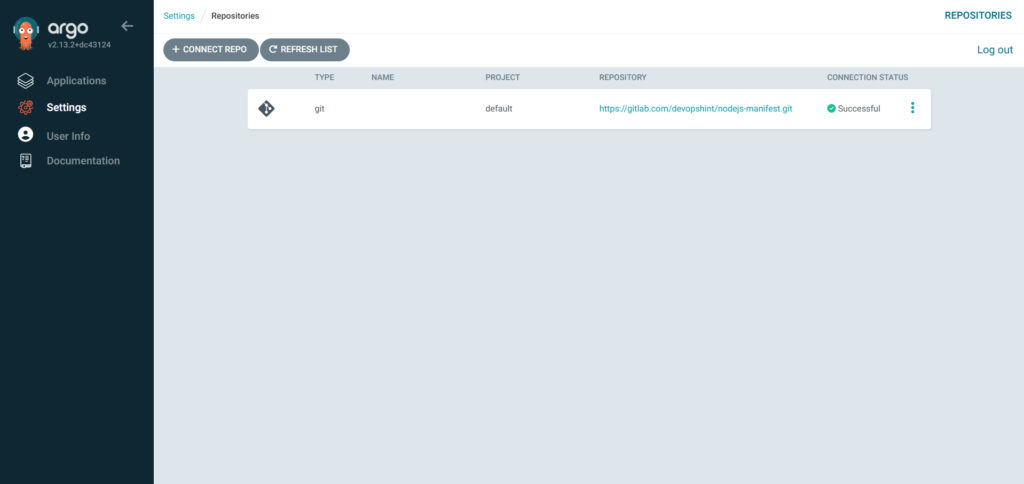
You can see the CONNECTION STATUS as Successfull.
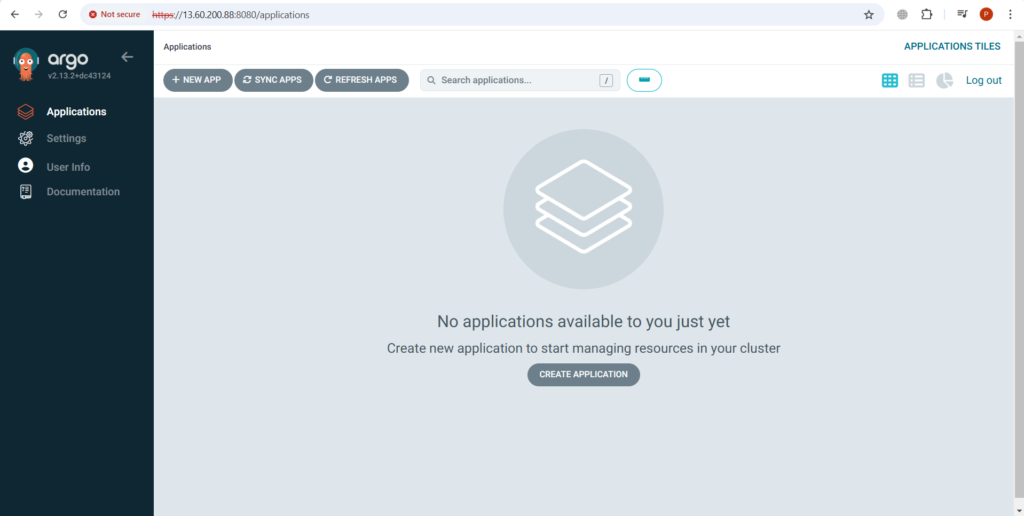
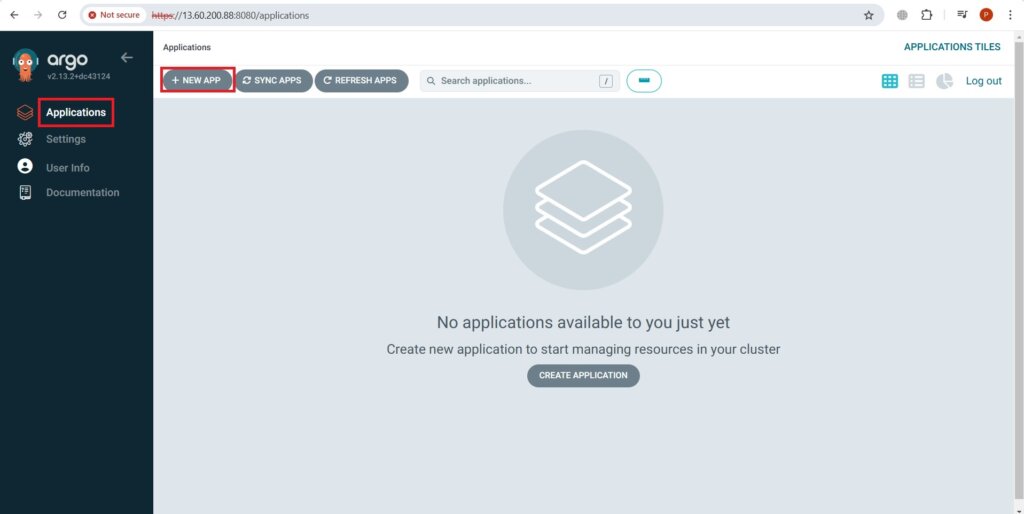
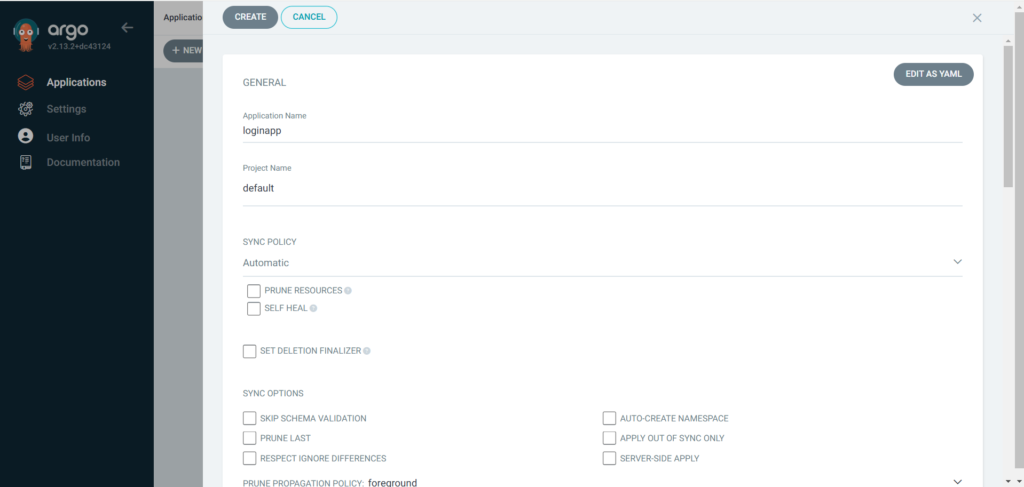
Now go to Applications and Click on NEW APP.
Type Application Name – loginapp, Project Name as default, SYNC POLICY as Automatic.
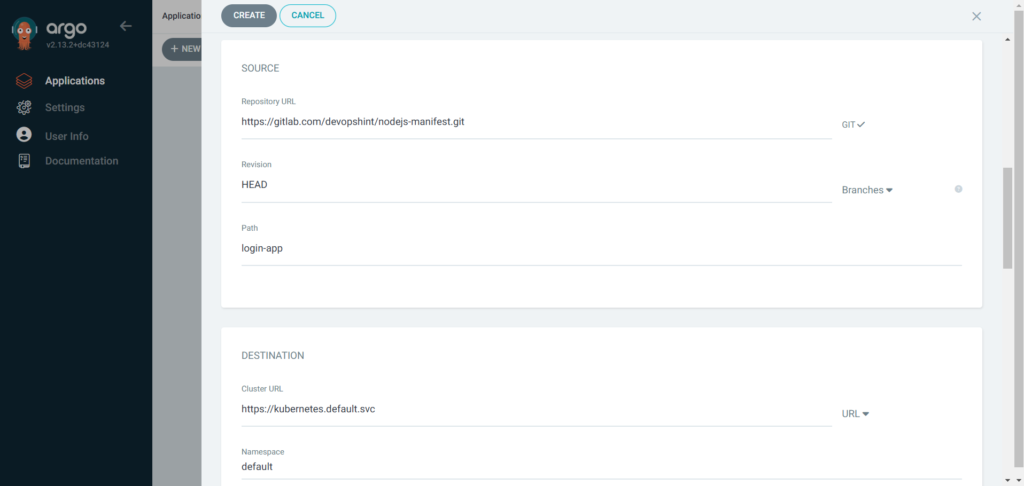
Select Repository URL and other details will be auto filled. Also select Cluster URL, it will be auto filled and Namespace as default.
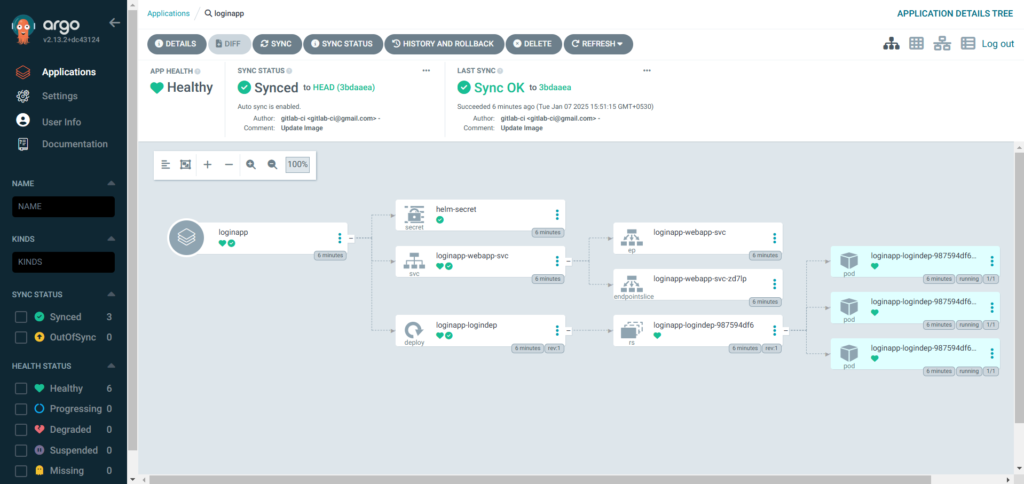
Now our application is created. You can see the Healthy and Synced status. Click on it see the more details of Pipeline.

Step #8:Test the Application
Now in another tab run the following command to see the pods status.
kubectl get pods
run the following command to see the deployments.
kubectl get deployments
run the following command to see the available services.
kubectl get services
Lets forward the loginapp-webapp-svc to access it from web browser.
kubectl port-forward --address 0.0.0.0 svc/loginapp-webapp-svc 8081:3000
Use Public IP address with port 8081 to start application. After starting it you will see the login page.

Conclusion:
By using GitLab CI/CD, Helm Charts, and ArgoCD together, you can automate the entire process of building, deploying, and managing applications on Kubernetes. This setup simplifies repetitive tasks, ensures reliable deployments, and lets your team focus more on improving the application instead of managing infrastructure. It’s a powerful way to streamline workflows, reduce errors, and deliver features faster and more efficiently.
Related Articles:
Kubernetes Metrics and Logs using Prometheus, Filebeat, and Grafana Loki
Reference: