In this article we are going to cover with Simple Guide to Autoscaling with KEDA in Kubernetes.
In data-intensive applications, efficiently managing background tasks like batch processing is critical — especially when demand fluctuates. Instead of provisioning static resources, why not let Kubernetes dynamically scale processing jobs based on workload?
In this Article, we build a scalable CSV processing pipeline where:
- A Python job generates CSV files with dummy data.
- Filenames are pushed to a Redis list.
- A KEDA ScaledJob in Kubernetes watches Redis and spins up multiple worker pods to process those CSVs.
- Docker Hub hosts our container images.
- Everything is containerized, deployed, and autoscaled within a Kubernetes cluster.
Let’s walk through the entire process — from structuring the project to deploying it step-by-step.
Table of Contents
Directory Structure
.
├── csv-processor.Dockerfile
├── data-generator.Dockerfile
├── k8s
│   ├── csv-processor-scaledjob.yaml
│   ├── data-generator-job.yaml
│   ├── data-pvc.yaml
│   ├── pvc-inspection.yaml
│   ├── redis-deployment.yaml
│   └── redis-service.yaml
├── requirements.txt
└── src
    ├── data_generator.py
    └── process_csv.py
Step-by-Step Process
#1.Install Keda in your Kubernetes Cluster
Install Keda in your Kubernetes Cluster:
kubectl apply -f https://github.com/kedacore/keda/releases/download/v2.10.0/keda-2.10.0.yaml
#2.Python Scripts
data_generator.py:
- Generates synthetic sales data from Jan to May 2020.
- Creates one CSV file per day under
/data/raw/. - Pushes the filename into a Redis list (
csvs-to-process).
import os
import csv
import random
from datetime import datetime, timedelta
import redis

def generate_csv_files(start_date, end_date, directory):
    print("Starting generation of csv files")

    redis_host = os.getenv("REDIS_HOST")
    redis_list = os.getenv("REDIS_LIST")
    if not redis_host or not redis_list:
        print(f"Missing environment variables. REDIS_HOST: {redis_host}, REDIS_LIST: {redis_list}")
        exit()

    redis_client = redis.Redis(host=redis_host, port=6379, db=0)

    if not os.path.exists(directory):
        os.makedirs(directory)

    current_date = start_date
    while current_date < end_date:
        filename = current_date.strftime('%Y%m%d') + '.csv'
        data = []
        for _ in range(200):
            timestamp = current_date + timedelta(seconds=random.randint(0, 86400))
            item_id = random.randint(1, 5)
            quantity_sold = random.randint(1, 10)
            data.append([timestamp, item_id, quantity_sold])

        filepath = os.path.join(directory, filename)
        with open(filepath, 'w', newline='') as csv_file:
            writer = csv.writer(csv_file)
            writer.writerow(['timestamp', 'item_id', 'quantity_sold'])
            writer.writerows(data)

        redis_client.lpush(redis_list, filename)
        current_date += timedelta(days=1)

    print("Finished generation of csv files")

if __name__ == '__main__':
    start_date = datetime(2020, 1, 1)
    end_date = datetime(2020, 6, 1)
    directory = os.path.join(os.path.dirname(__file__), '..', 'data/raw')
    generate_csv_files(start_date, end_date, directory)
process_csv.py:
- Pops a filename from the Redis list.
- Reads the CSV, aggregates total quantity sold by item ID.
- Writes result to
/data/processed/with_aggregated_sales.csvsuffix.
import os
import pandas as pd
import redis
from typing import Tuple

def read_csv_from_redis() -> Tuple[str, pd.DataFrame]:
    redis_host = os.getenv("REDIS_HOST")
    redis_list = os.getenv("REDIS_LIST")

    if not redis_host or not redis_list:
        print(f"Missing environment variables. REDIS_HOST: {redis_host}, REDIS_LIST: {redis_list}")
        exit()

    redis_client = redis.Redis(host=redis_host, port=6379, db=0)
    last_csv_name = redis_client.rpop(redis_list)
    if not last_csv_name:
        print("No CSV files to process, exiting.")
        exit()

    last_csv_name = last_csv_name.decode("utf-8")
    full_filename = os.path.join(os.path.dirname(__file__), '..', 'data/raw', last_csv_name)
    df = pd.read_csv(full_filename)
    return last_csv_name, df

def aggregate_csv(filename_raw: str, df: pd.DataFrame) -> None:
    aggregated_data = df.groupby('item_id')['quantity_sold'].sum().reset_index()
    processed_dir = os.path.join(os.path.dirname(__file__), '..', 'data/processed')
    if not os.path.exists(processed_dir):
        os.makedirs(processed_dir)
    output_filename = os.path.join(processed_dir, f"{filename_raw.split('.')[0]}_aggregated_sales.csv")
    aggregated_data.to_csv(output_filename, index=False)
    print(f"Aggregated sales data written to '{output_filename}'.")

def main():
    filename, df = read_csv_from_redis()
    aggregate_csv(filename, df)

if __name__ == '__main__':
    main()
requirements.txt:
numpy==1.24.4
pandas==2.0.3
redis==4.6.0
#3.Dockerfiles
data-generator.Dockerfile:
FROM python:3.9-slim

WORKDIR /app

COPY requirements.txt .
RUN pip install --no-cache-dir -r requirements.txt

COPY src/data_generator.py ./src/data_generator.py

ENTRYPOINT ["python", "src/data_generator.py"]
csv-processor.Dockerfile:
FROM python:3.9-slim

WORKDIR /app

COPY requirements.txt .
RUN pip install --no-cache-dir -r requirements.txt

COPY src/process_csv.py ./src/process_csv.py

ENTRYPOINT ["python", "src/process_csv.py"]
#4.Push Docker images to Docker Hub
Make sure you have a Docker Hub account. Then:
# Login to Docker Hub
docker login

# Build images
docker build -t <dockerhub-username>/datagenerator:v1 -f data-generator.Dockerfile .
docker build -t <dockerhub-username>/csvprocessor:v1 -f csv-processor.Dockerfile .

# Push images
docker push <dockerhub-username>/datagenerator:v1
docker push <dockerhub-username>/csvprocessor:v1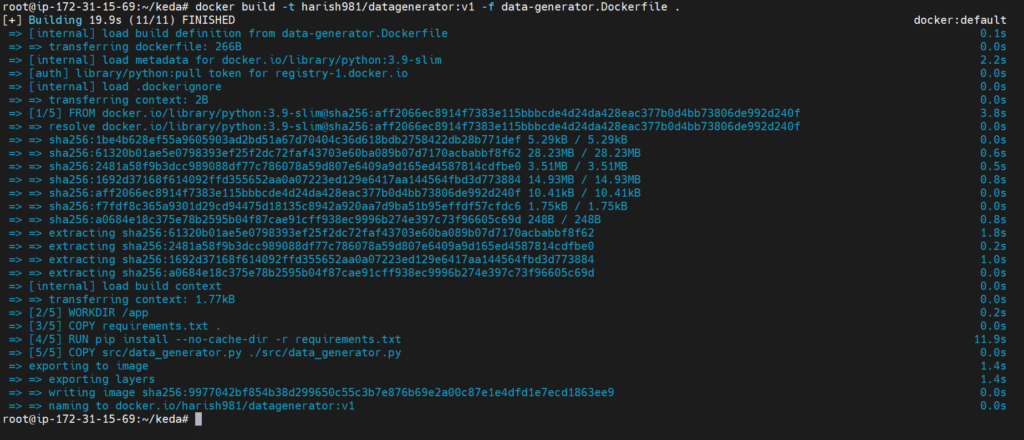


#5.Kubernetes manifests
redis-deployment.yaml:
apiVersion: apps/v1
kind: Deployment
metadata:
  name: redis
spec:
  replicas: 1
  selector:
    matchLabels:
      app: redis
  template:
    metadata:
      labels:
        app: redis
    spec:
      containers:
      - name: redis
        image: redis:latest
        ports:
        - containerPort: 6379
redis-service.yaml:
apiVersion: v1
kind: Service
metadata:
  name: redis
spec:
  selector:
    app: redis
  ports:
  - protocol: TCP
    port: 6379
    targetPort: 6379
kubectl apply -f k8s/redis-deployment.yaml
kubectl apply -f k8s/redis-service.yaml
Note the redis CLUSTER IP to use in the data-generator-job.yaml and csv-processor-scaledjob.yaml
data-pvc.yaml:
apiVersion: v1
kind: PersistentVolumeClaim
metadata:
  name: data-pvc
spec:
  accessModes:
  - ReadWriteOnce
  resources:
    requests:
      storage: 1Gi
kubectl apply -f k8s/data-pvc.yaml
pvc-inspection.yaml:
apiVersion: v1
kind: Pod
metadata:
  name: pvc-inspection-pod
spec:
  containers:
  - name: busybox
    image: busybox
    command:
      - sleep
      - "3600"
    volumeMounts:
    - name: data-volume
      mountPath: /data
  volumes:
  - name: data-volume
    persistentVolumeClaim:
      claimName: data-pvc
  restartPolicy: Always
kubectl apply -f k8s/pvc-inspection.yaml
csv-processor-scaledjob.yaml:
apiVersion: keda.sh/v1alpha1
kind: ScaledJob
metadata:
  name: csv-processor
spec:
  jobTargetRef:
    template:
      spec:
        containers:
        - name: csv-processor
          image: harish981/csvprocessor:latest
          env:
          - name: REDIS_HOST
            value: 10.105.171.157
          - name: REDIS_LIST
            value: csvs-to-process
          resources:
            limits:
              cpu: "0.2"
              memory: "100Mi"
            requests:
              cpu: "0.2"
              memory: "100Mi"
          volumeMounts:
          - name: data-volume
            mountPath: /app/data
        volumes:
        - name: data-volume
          persistentVolumeClaim:
            claimName: data-pvc
        restartPolicy: Never
  pollingInterval: 10
  maxReplicaCount: 5
  triggers:
  - type: redis
    metadata:
      address: 10.105.171.157:6379
      listName: csvs-to-process
      dataType: list
kubectl apply -f k8s/csv-processor-scaledjob.yaml
data-generator-job.yaml:
apiVersion: batch/v1
kind: Job
metadata:
  name: data-generator
spec:
  template:
    spec:
      containers:
      - name: data-generator
        image: harish981/datagenerator:latest
        env:
        - name: REDIS_HOST
          value: 10.105.171.157
        - name: REDIS_LIST
          value: csvs-to-process
        volumeMounts:
        - name: data-volume
          mountPath: /app/data
      restartPolicy: Never
      volumes:
      - name: data-volume
        persistentVolumeClaim:
          claimName: data-pvc
Change the below things in data-generator-job.yaml and csv-processor-scaledjob.yaml:
- Replace
<dockerhub-username>with your actual Docker Hub username - redis value and address to your redis value and address in the env and triggers
kubectl apply -f k8s/data-generator-job.yaml
#6.Verify
kubectl get scaledobjects
kubectl get pods
Here you can see the pods are getting created
To check if the csv-processor jobs are actually generating the processed files, let’s use kubectl exec to open a shell inside the running pvc-inspection-pod:
kubectl exec -it pvc-inspection-pod -- /bin/sh
This opens a shell in the pvc-inspection-pod, where the PVC is mounted at /data. Go to the processed folder by running:
cd data/processed
ls
You should see .csv files like 20200101_aggregated_sales.csv if everything went well. To check the contents, use one of the file names from the data/processed folder with the command below.
cat 20200101_aggregated_sales.csv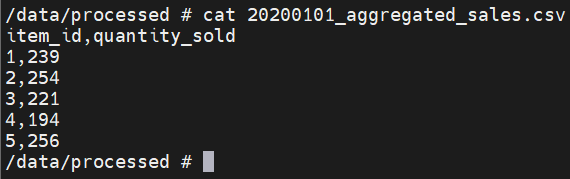
Conclusion:
In this project, we built a fully containerized, event-driven CSV processing pipeline that automatically scales based on workload using KEDA. By combining Python, Redis, Docker, and Kubernetes, we created a clean and efficient system that generates, queues, and processes data — only when needed.
This setup not only saves resources but also keeps your system flexible and responsive. Whether you’re handling CSVs or other types of background jobs, this pattern can be a solid foundation for real-world, scalable applications.