In this article, We are going to perform How to Configure Sendmail to Relay Emails using Gmail SMTP on Ubuntu 18.04/16.04 LTS System.
Table of Contents
Introduction
Sendmail is open source Mail Transfer Agent (MTA) used to transfer emails among hosts using Simple Mail Transfer Protocol (SMTP). It is widely used to send email using command line.Here we are configuring to transfer email using gmail smtp.
Prerequisites
- Ubuntu 18.04/16.04 LTS with Minimal Installation
- SSH Access with sudo privileges
- Open Firewall Port: 587
#1: Remove/uninstall/stop postfix
Postfix is the default Mail Transfer Agent (MTA) in ubuntu. First, we have to remove postfix from ubunut, enter below commands to uninstall postfix.
sudo apt-get remove postfix
sudo apt-get purge postfix
#2: Install Sendmail on Ubuntu 18.04/16.04 LTS
First switch to root user.
sudo su
update the system database before installing any packages.
apt-get update
Enter below command to install sendmail and other mail utilities if not installed.
apt-get install sendmail sendmail-bin mailutils
#3: Configure Sendmail to Relay Emails using Gmail SMTP
1. Create Authentication File
We have to create new directory to store gmail account details.
mkdir -m 700 /etc/mail/authinfo
In above directory create a file named gmail-smtp-authentication and input your gmail account here.
nano /etc/mail/authinfo/gmail-smtp-authentication
AuthInfo: "U:root" "I:[email protected]" "P:GMAIL_USER_PASSWORD"
Replace your USER and GMAIL_USER_PASSWORD with your Gmail email id and password respectively.
2. Create Sendmail-Gmail Authentication Database HASH Map
We have to create database map from gmail-smtp-authentication file using makemap utility as below command.
makemap hash /etc/mail/authinfo/gmail-smtp-authentication < /etc/mail/authinfo/gmail-smtp-authentication
This will create authentication database, /etc/mail/authinfo/gmail-smtp-authentication.db
3. Configure Sendmail SMART HOST
SMART HOST is the mail relay which allows SMTP server to route email to among hosts rather than sending to recipient server. Here we are using smtp.gmail.com on port 587 to relay emails.
Note the below line;
FEATURE(authinfo',hash -o /etc/mail/authinfo/gmail-smtp-authentication.db')dnl
Replace it with your Gmail Authentication sendmail database map you generated above.
Next, Copy and Paste below lines in /etc/mail/sendmail.mc file above MAILER_DEFINITIONS as shown below,
nano /etc/mail/sendmail.mc
dnl #
dnl # Defining Gmail Smarthost for sendmail
define(`SMART_HOST',`[smtp.gmail.com]')dnl
define(`RELAY_MAILER_ARGS', `TCP $h 587')dnl
define(`ESMTP_MAILER_ARGS', `TCP $h 587')dnl
define(`confAUTH_OPTIONS', `A p')dnl
TRUST_AUTH_MECH(`EXTERNAL DIGEST-MD5 CRAM-MD5 LOGIN PLAIN')dnl
define(`confAUTH_MECHANISMS', `EXTERNAL GSSAPI DIGEST-MD5 CRAM-MD5 LOGIN PLAIN')dnl
FEATURE(`authinfo',`hash -o /etc/mail/authinfo/gmail-smtp-authentication.db')dnl

dnl #
dnl # Default Mailer setup
MAILER_DEFINITIONS
MAILER(`local')dnl
MAILER(`smtp')dnl
4. Regenerate Sendmail Configuration
Save the configuration file above and re-build Sendmail configuration.
make -C /etc/mail
Output:
make: Entering directory '/etc/mail'
Updating databases ...
Reading configuration from /etc/mail/sendmail.conf.
Validating configuration.
Creating /etc/mail/databases...
Updating auth ...
sasl2-bin not installed, not configuring sendmail support.

To enable sendmail SASL2 support at a later date, invoke "/usr/share/sendmail/update_auth"

Creating /etc/mail/relay-domains
# Optional file...
Updating Makefile ...
Reading configuration from /etc/mail/sendmail.conf.
Validating configuration.
Creating /etc/mail/Makefile...
Updating sendmail.cf ...
The following file(s) have changed:
/etc/mail/relay-domains /etc/mail/sendmail.cf
** ** You should issue `/etc/init.d/sendmail reload` ** **
make: Leaving directory '/etc/mail'
5. Reload Sendmail Service
After rebuilding Sendmail configuration, reload Sendmail.
/etc/init.d/sendmail reload
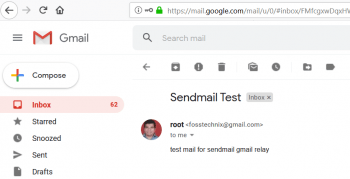
#3: Testing Sendmail Gmail Relay
echo "test mail for sendmail gmail relay" | mail -s "Sendmail Test" [email protected]
#4: Start, Restart and Stop Sendmail Service
sudo /etc/init.d/sendmail start

sudo /etc/init.d/sendmail restart

sudo /etc/init.d/sendmail stop
Conclusion
In this article, We have uninstalled postfix, 1.Installed Sendmail 2.Configured sendmail 3.Created Authentication File 4.Created Sendmail-Gmail Authentication Database HASH Map 5.Configure Sendmail SMART HOST 6.Regenerated Sendmail Configuration 6.Tested Sendmail Gmail Relay.
Perfect. Worked first time. Thank you.
Hi, have you used multiple accounts to authenticate?
No. I have used only one Gmail Account.
Hi Shivdas,
Great article. However, can you help using office365 smtp relay server instead of Gmail ?
That Office365 smtp relay server is setup in same LAN network where Sendmail Linux box is. I need Sendmail relay emails to that server only with an office365 authenticated user account.
Thanks and much appreciated.
If you have 2FA enabled, you will need to create an Application Specific password for Gmail in order for this to work. https://support.google.com/accounts/answer/185833?hl=en
Thanks for update.
Hi, Shivdas! I used your plan and messed it up. I forgot to become root early in the process, and later when I was generating the user/pass file, I used my regular gmail password when I should have used my google supplied app specific password. I retraced my steps and now it’s all good. It’s great when a reader can get it right on the first try, but it’s even better when someone can get it right on the second(or even third) try!
Thank you,
Cy Kurtz
Thanks for comment.
Thanks for this Shivdas.
Just a note to others, i had to enable “less secure apps” to get it to work for some reason.
Thanks John. We will update mentioned steps.
Here is the help link to “less secure apps”:
https://support.google.com/accounts/answer/6010255
And here is the page you need to change it on:
https://myaccount.google.com/lesssecureapps
Otherwise you will get “Critical security alert” notification on the account that “Sign-in attempt was blocked. Someone just used your password to try to sign in to your account from a non-Google app. Google blocked them, but you should check what happened. Review your account activity to make sure no one else has access.”
Thanks Tom for updating.
Shivdas, thank you so much!!!
Thanks for your comment.
Greate article. But it seems it doesnt work with GSuite where the actual user is not @gmail.com, instead @mydomain.com, also Smart_Host is mail.mydomain.com
Thanks for update.
Gmail SMTP does not support any of the auth methods you offer.
The only AUTH methods that work:
250-8BITMIME
250-STARTTLS
250-ENHANCEDSTATUSCODES
250-PIPELINING
250-CHUNKING
250 SMTPUTF8