In this article we are going to cover How to Install MongoDB on Amazon Linux 2 and Connect MongoDB using compass.
How to create Amazon Linux 2 EC2 Instance in AWS
There are 7 steps
Step 1: Go to Ec2 instance then click on launch instance then select Amazon Linux 2


Step 2: Choose an Instance type so if you want another instance you can select as per your choice.
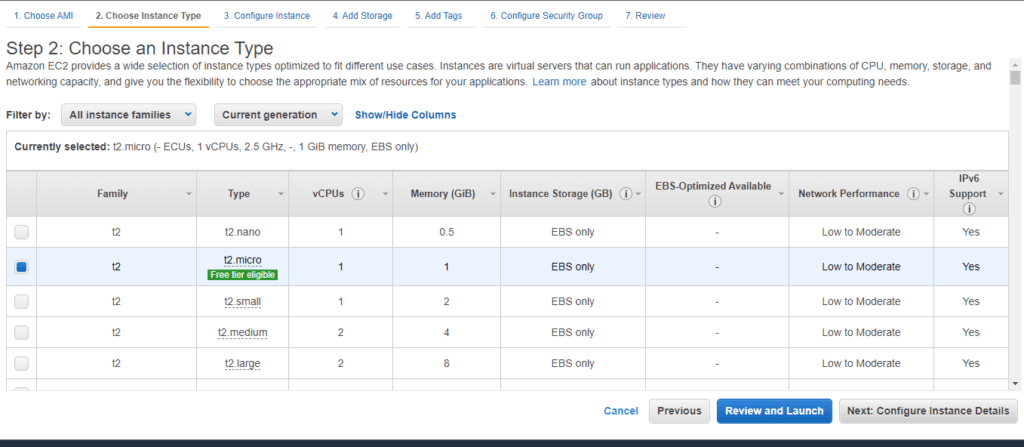
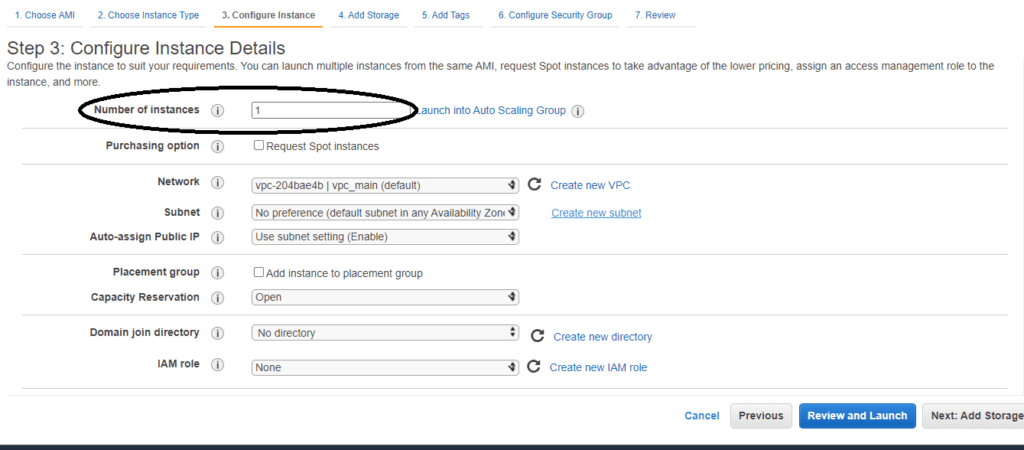
Step 3: Then Next is Configure Instance. Here you can specify the number of instances you want.
Step 4: Here they give us 8 GiB free space.

Step 5: Here you can give any meaning full name to your instance.

Step 6 : So here select “Select an existing security group” then select “default”

Step 7 : Here review once its correct or not then click on launch.
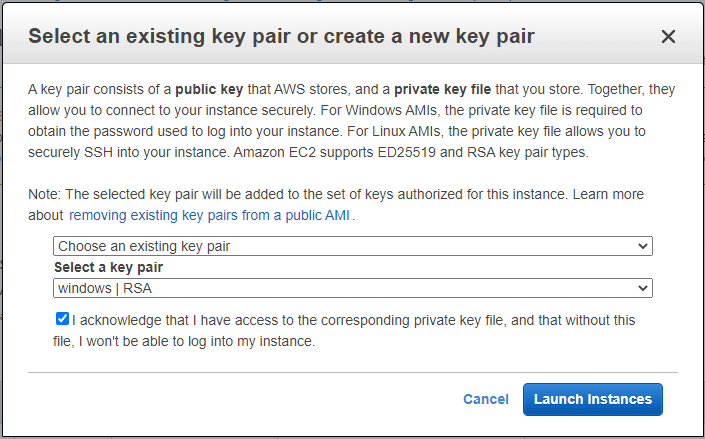
Then after click on launch there is pop up select an existing key pair or create a key pair so if have already a key pair then select a key pair otherwise create a key pair
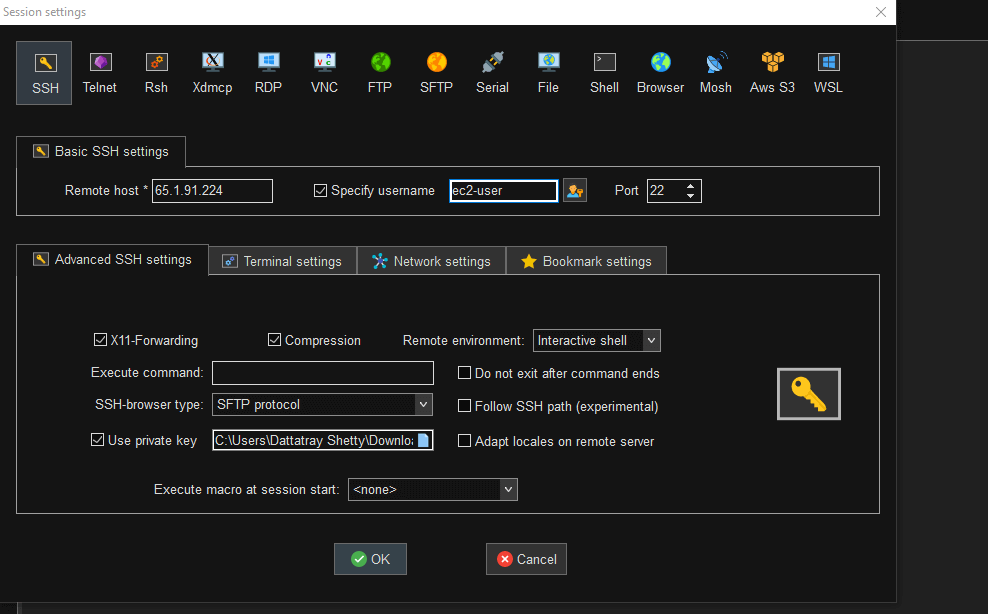
So now here im using MobaXterm to connect terminal so copy the ip_address of your instance connect to your terminal
So you can see in this image firstly click on session then SSH then in Remote host paste the ip_address then in username you can specify only ec2-user for Amazon Linux 2. Then in Use private key you need to give the path of your key pair that we have created. Then click on Ok.
How to Install MongoDB on Amazon Linux 2
To install latest MongoDB and specific MongoDB visit MongoDB official download page
Step 1: Configure the package management system (yum)
Create a /etc/yum.repos.d/mongodb-org-5.0.repo file so that you can install MongoDB directly :
sudo nano /etc/yum.repos.d/mongodb-org-5.0.repo
And add this below lines in this directory
[mongodb-org-5.0]
name=MongoDB Repository
baseurl=https://repo.mongodb.org/yum/amazon/2/mongodb-org/5.0/x86_64/
gpgcheck=1
enabled=1
gpgkey=https://www.mongodb.org/static/pgp/server-5.0.asc
Step 2: How to Install MongoDB on Amazon Linux 2
Install MongoDB using below command :
sudo yum install -y mongodb-org
You can specify any available version of MongoDB add the following exclude directive to your /etc/yum.conf file:
exclude=mongodb-org,mongodb-org-database,mongodb-org-server,mongodb-org-shell,mongodb-org-mongos,mongodb-org-tools
Start the MongoDB service using below command :
sudo systemctl start mongod
Reload the system daemon to apply changes :
sudo systemctl daemon-reload
Using below command to check service is running or not :
sudo systemctl status mongod
Enable MongoDB service at System startup using below command :
sudo systemctl enable mongod
Step 3 : Allow Remote Access
By default, MongoDB is listening on 127.0.0.1:27017 only:
Open MongoDB configuration file /etc/mongod.conf and change bindIp by adding required
sudo nano /etc/mongod.conf
# network interfaces net: port: 27017 bindIp: 127.0.0.1
To
# network interfaces
    net:
       port: 27017
       bindIp: 0.0.0.0 # to bind to all interfaces
After change in file you need to restart mongodb service
Now restart the MongoDB service using below command:
sudo systemctl restart mongod
Step 4: Configuring MongoDB administrator username
Configuring MongoDB administrator username :
mongo
Inside the mongo shell type this command to switch to the admin database:
>use admin
Now let’s create the administrator username and set a password for the username:
> db.createUser({user:"demo", pwd:"demo@123", roles:[{role:"root", db:"admin"}]})
Type this command in the shell to exit the shell:
>exit
Step 5 : Enable MongoDB authentication
Open /lib/systemd/system/mongod.service with nano:
sudo nano /lib/systemd/system/mongod.service
Add the below line into this /lib/systemd/system/mongod.service
ExecStart=/usr/bin/mongod --quiet --auth --config /etc/mongod.conf
Now connect to the MongoDB shell using this command:
mongo -u demo -p --authenticationDatabase admin
> db.runCommand({connectionStatus : 1})
How to access MongoDB using compass
Now you need to install MongoDB Compass in your machine next step is
Step 1: Click on Fill in connection fields individually
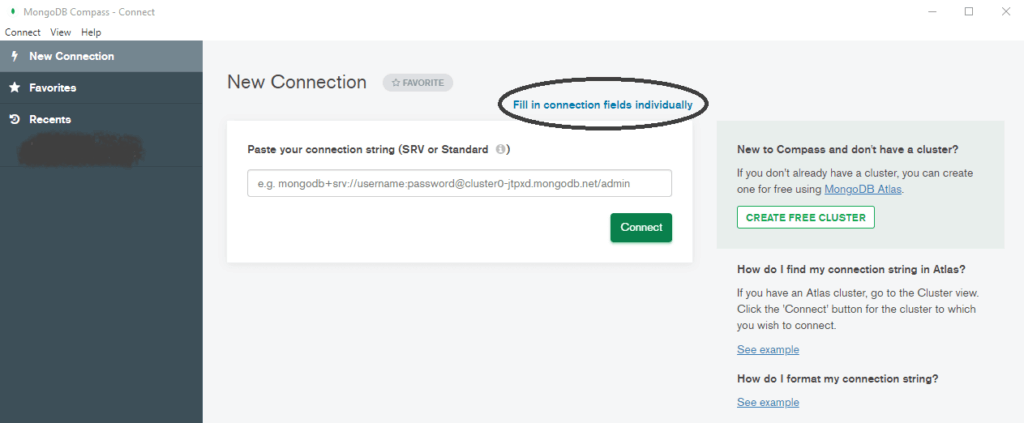
Step 2: Now you can see here in Hostname you need to paste your instance ip_address in Authentication you need to choose Username / Password then when we have created a user so there we assign username and password so same you have to assign username and password here.

Step 3: Now click on connect

Conclusion:
In this article we have covered How to Install MongoDB on Amazon Linux 2 and Connect MongoDB using compass.
Related Articles:

Your article is short and sweet and works well for amazon linux 2. Thanks for putting it together.