In this article, we will learn how to automate MySQL database backups using shell scripting. Automating database backups is crucial for ensuring data integrity and availability. A well-crafted shell script can handle the backup process seamlessly, saving you time and reducing the risk of data loss. Here we will walk through the steps to create a shell script that automates the backup of a MySQL database.
Table of Contents
Prerequisites
- AWS Account with Ubuntu 24.04 LTS EC2 Instance.
- Basic knowledge of MySQL and Shell scripting.
Step #1:Install MySQL on Ubuntu
Update the system.
sudo apt update 
now install the mysql using following command.
sudo apt install mysql-server -y
check the status to verify the mysql is running properly on your system.
sudo systemctl status mysql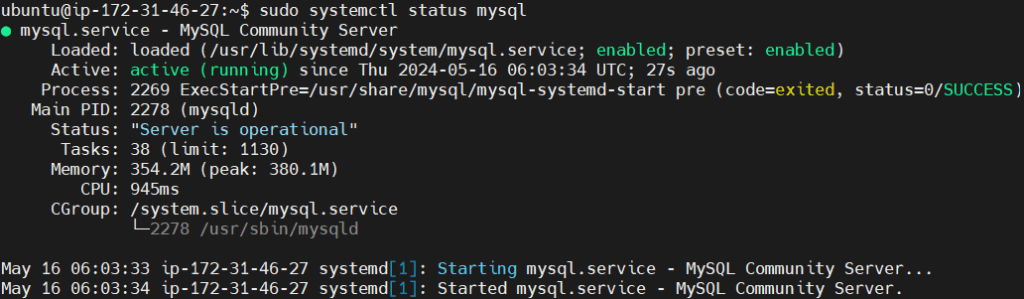
Step #2:Create MySQL database and User
Lets create a Mysql database. First log into the MySQL Console
sudo mysql -u root 
now create a database using following mysql commands.
Create the database
CREATE DATABASE devopshint;Switch to the newly created database
USE devopshint;Create the table named employees.
CREATE TABLE employees (
    id INT AUTO_INCREMENT PRIMARY KEY,
    name VARCHAR(100) NOT NULL,
    position VARCHAR(100),
    salary DECIMAL(10, 2),
    hire_date DATE
);
Now, let’s insert some example data into the employees table:
INSERT INTO employees (name, position, salary, hire_date) VALUES
('John Doe', 'Software Engineer', 60000.00, '2022-01-15'),
('Jane Smith', 'Project Manager', 75000.00, '2021-03-22'),
('Sam Brown', 'Data Analyst', 55000.00, '2023-05-01');
Verify the inserted data.
SELECT * FROM employees;
Create a new user with a unique, strong password
CREATE USER 'fosstechnix' IDENTIFIED BY 'devops';Grant the fosstechnix all possible privileges on the devopshint database and its tables.
GRANT ALL PRIVILEGES ON devopshint.* TO 'fosstechnix';Grant the PROCESS privilege to the fosstechnix. Here this privilege is granted globally (*.*).
GRANT PROCESS ON *.* TO fosstechnix;Flush privileges to ensure the changes take effect, then exit the MySQL console.
flush privileges;

exit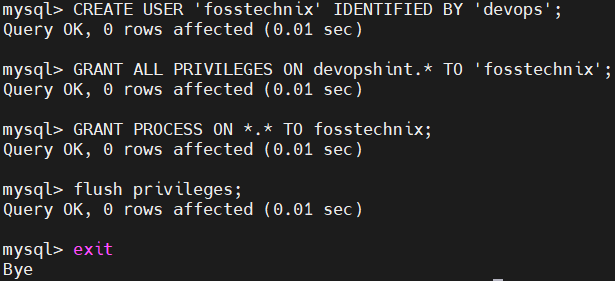
Step #3:Create MySQL database backup using shell script
Open the terminal and use the nano command to create a new file.
nano backup_data.sh
Write the script for mysql database backup into the file.
#!/bin/bash

# Database credentials

DB_USER="fosstechnix"
DB_PASS="devops"
DB_NAME="devopshint"

# Backup directory

BACKUP_DIR="/home/ubuntu/mysql_backup"

# Date format for the backup file
DATE=$(date +"%Y-%m-%d_%H-%M-%S")
BACKUP_FILE="$BACKUP_DIR/$DB_NAME-backup-$DATE.sql"

# Create backup directory if it doesn't exist

mkdir -p "$BACKUP_DIR"

# Perform database backup using mysqldump

mysqldump -u "$DB_USER" -p"$DB_PASS" "$DB_NAME" > "$BACKUP_FILE"

# Check if the backup was successful

if [ $? -eq 0 ]; then
 echo "Database backup successful: $BACKUP_FILE"
else
 echo "Database backup failed"
fi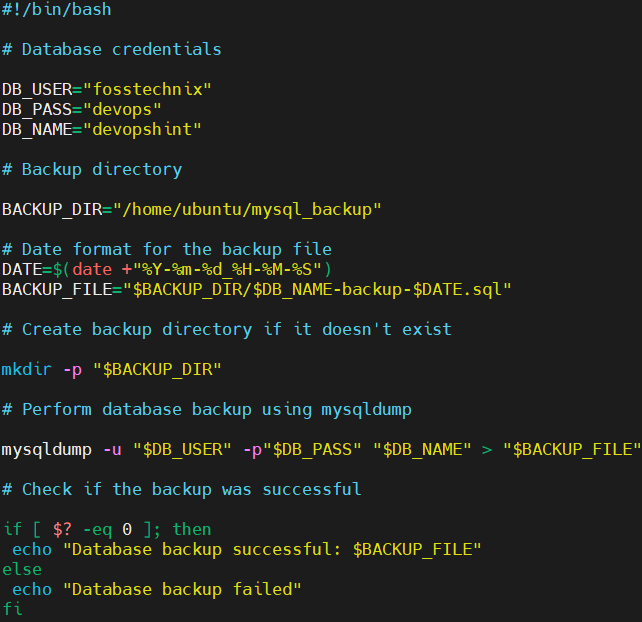
Save the file and exit the editor. This script automates the process of backing up a MySQL database.
Explanation of the script:
- Setting up credentials and configurations: Defines the necessary variables for database credentials, backup directory, and backup file naming.
- Creating the backup directory: Ensures the directory exists to store the backup files.
- Executing the backup: Uses mysqldump to create the backup file.
- Verifying success: Checks the exit status of mysqldump to confirm if the backup was successful and prints the appropriate message.
Change the file permissions to make it executable using the chmod command.
chmod +x backup_data.sh
Run the script by executing the following command.
./backup_data.sh
As you can see our database backup is successful. You can verify it by navigating to the directory where backup is stored.
cd mysql_backup
Run the ls command to list out the content of in it.
ls
Step #4:Restore the backup data using shell script
Now let’s try to restore this data.
First create a file to write a shell script.
nano restore_backup.sh
write the script to restore data.
#!/bin/bash

# MySQL Credentials
MYSQL_USER="fosstechnix"
MYSQL_PASSWORD="devops"
NEW_DATABASE_NAME="employees_data"
BACKUP_DIR="/home/ubuntu/mysql_backup"

# Find the latest backup file
LATEST_BACKUP=$(ls -t "$BACKUP_DIR" | head -1)

# Check if a backup file exists
if [ -z "$LATEST_BACKUP" ]; then
  echo "No backup files found in $BACKUP_DIR"
  exit 1
fi

# Create the new database
mysql -u "$MYSQL_USER" -p"$MYSQL_PASSWORD" -e "CREATE DATABASE $NEW_DATABASE_NAME;"

# Check if the database was created successfully
if [ $? -ne 0 ]; then
  echo "Failed to create the new database: $NEW_DATABASE_NAME"
  exit 1
fi

# Restore the backup to the new database
mysql -u "$MYSQL_USER" -p"$MYSQL_PASSWORD" "$NEW_DATABASE_NAME" < "$BACKUP_DIR/$LATEST_BACKUP"

# Check if the restoration was successful
if [ $? -eq 0 ]; then
  echo "Database restoration successful."
else
  echo "Database restoration failed."
fi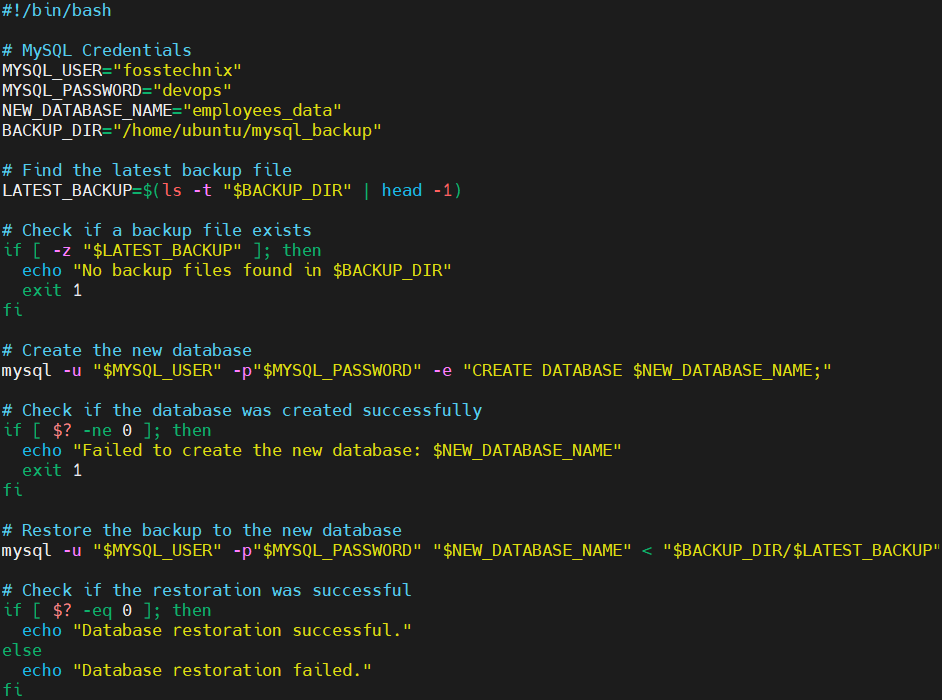
Save the file and exit the editor. This script automates the process of restoring a MySQL database from the most recent backup file.
Explanation:
- Setting up credentials and configurations: Defines the necessary variables for MySQL credentials, new database name, and backup directory.
- Finding the latest backup file: Identifies the most recent backup file in the specified directory.
- Checking for backup file existence: Ensures that a backup file exists before proceeding.
- Creating the new database: Creates a new database where the backup will be restored.
- Restoring the backup: Uses the mysql command to restore the database backup from the latest backup file into the new database.
- Verifying success: Checks the exit status of the commands to confirm if the database creation and restoration were successful and prints appropriate messages.
By running this script, you automate the process of finding the latest backup and restoring it to a new database, which can be particularly useful for database recovery or setting up test environments.
Now lets login back into the Mysql.
sudo mysql -u root
Grant the fosstechnix all possible privileges on the employees_data database and its tables.
GRANT ALL PRIVILEGES ON employees_data .* TO 'fosstechnix';Grant the PROCESS privilege to the fosstechnix. Here this privilege is granted globally (*.*).
GRANT PROCESS ON *.* TO fosstechnix;Flush privileges to ensure the changes take effect, then exit the MySQL console.
flush privileges;

exit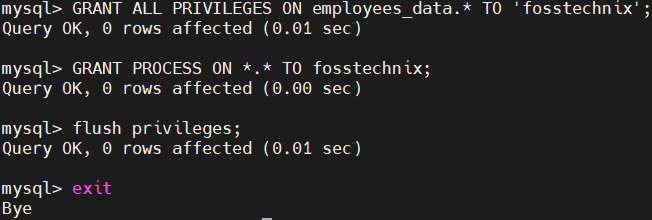
Change the file permissions to make it executable using the chmod command.
chmod +x restore_backup.sh
Run the script by executing the following command.
./restore_backup.sh
As you can see our database restoration is successful.
Let’s verify it by login into mysql and checking the database.
mysql -u fosstechnix -pEnter the password when prompted.

Select the database.
USE employees_data;Show the tables.
SHOW TABLES;Verify the inserted data.
SELECT * FROM employees;
As you can see it shows the data has been restored successfully.
Conclusion:
In conclusion, the provided shell scripts offer a robust and automated solution for managing MySQL database backups and restorations. By automating the database backup process, you ensure that your data is regularly and securely saved with timestamped filenames, making it easy to manage and restore specific versions. The restoration script, simplifies the recovery process by automatically finding the latest backup file and restoring it to a newly created database. Implementing these scripts into your database management routine will enhance your data protection strategy and provide peace of mind, knowing that your backups and restorations are handled efficiently and effectively.
Related Articles:
How to Install Docker on Ubuntu 24.04 with Shell Script
Reference: