In this article we are going to cover How to Upload Artifact to Nexus using Jenkins.
Table of Contents
What is Artifactory in DevOps ?
In CI/CD process when we build our project we obtain an artifactory after a build.So further in deployment phase we deploy these artifactories on our production / pre-production server.
So now if we assume what if we don’t use artifacts…It will be really very difficult over time.hat is why Artifacts are important to hold onto throughout the development process and also after that.
What is Nexus Repository Manager ?
Artifact Repository: Artifact repository is a location where you can store your all artifacts which are needed for the projects.
Nexus Repository Manager: It allows developer to collect, retrieve, manage our artifacts.
Basically Nexus Repository Manager helps us to host our repositories.
For eg- “Maven Central Repository” so we can use it to retrieve all dependencies needed for a Maven build.
Prerequisites
- Java Projects – You can use our Sample Java GitHub Repo
- Jenkins Installed with Maven Job – Follow our article to setup Jenkins on Linux
- Nexus Repository Manager Installed with Credentials – Follow this this article to setup Nexus on Linux
Navigate to Dashboard->> Manage Jenkins ->> Manage Plugin ->> Search for “GitHub Integration Plugin”, “Maven Integration Plugin” and “Nexus Artifactory Uploader“.
#1:Create Maven Job in Jenkins
Enter Job name and select “Maven Project” and Click OK.

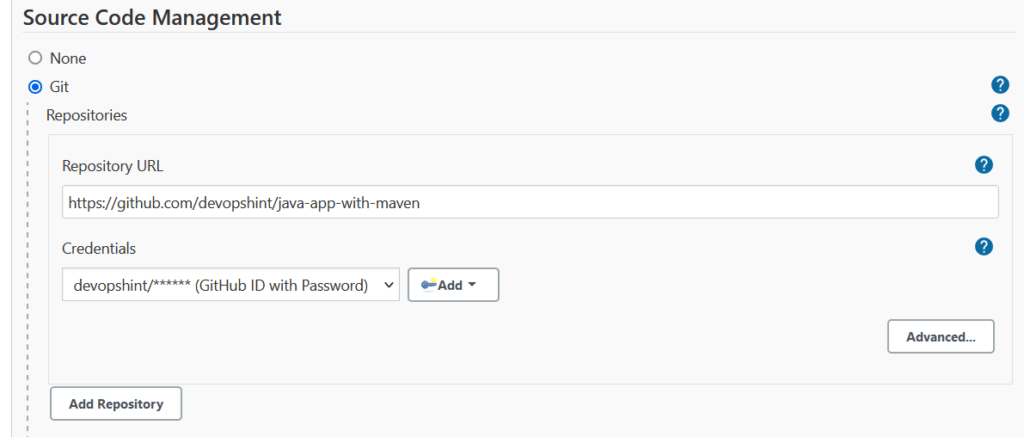
#2:Enter Project Details in Jenkins (source code management)
Give some description for your Project., Now In Source Code Management provide your Git Repository URL or you can use our GitHub Repository for testing.
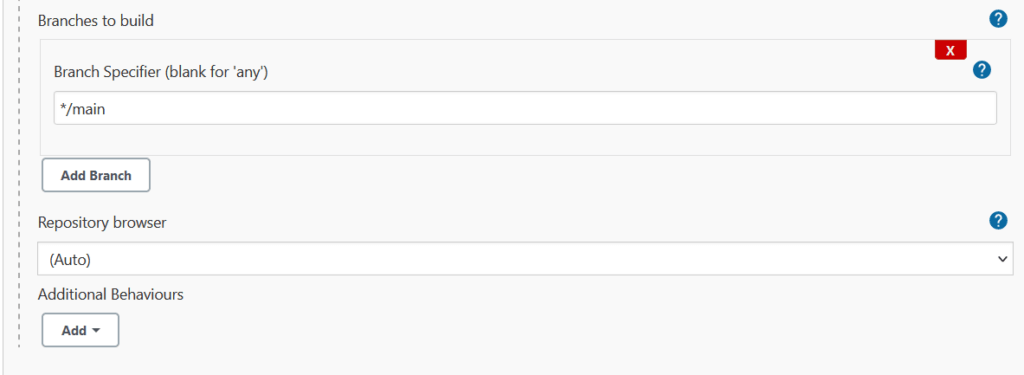
#3:Set Branch and Build Triggers in Jenkins
Provide your particular github branch.
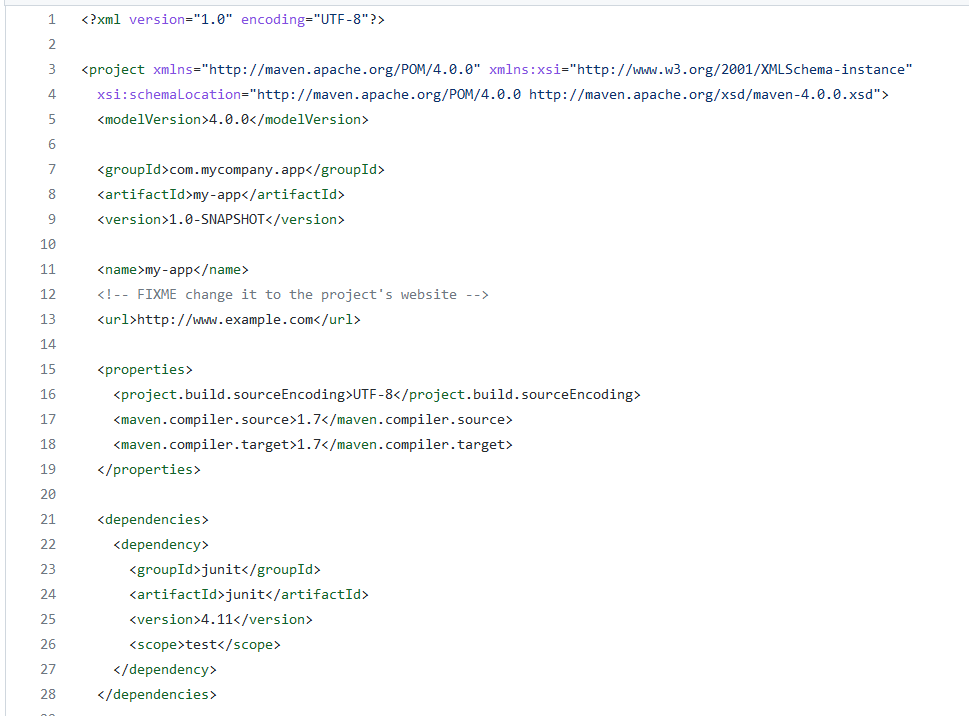
#4:Provide POM file for Maven Project in Jenkins
Now the most important part of our build is POM file, So in build section provide path of your projects pom file, Set clean and package as Goals and options.

#5:Upload Artifact to Nexus using Jenkins
Select Nexus artifact uploader in post build action, Enter Nexus Repository Manager details
Nexus Version:  NEXUS3
Protocol: HTTP/HTTPS
Nexus URL: Nexus_Server_IP:8081
Credentials: add the nexus user credentials to upload the artifacts
GroupId: ${POM_GROUPID}
Version: ${POM_VERSION}
Repository: maven-snapshots
ArtifactId: ${POM_ARTIFACTID}
Type: ${POM_PACKAGING}
File target/: ${POM_ARTIFACTID}-${POM_VERSION}.${POM_PACKAGING}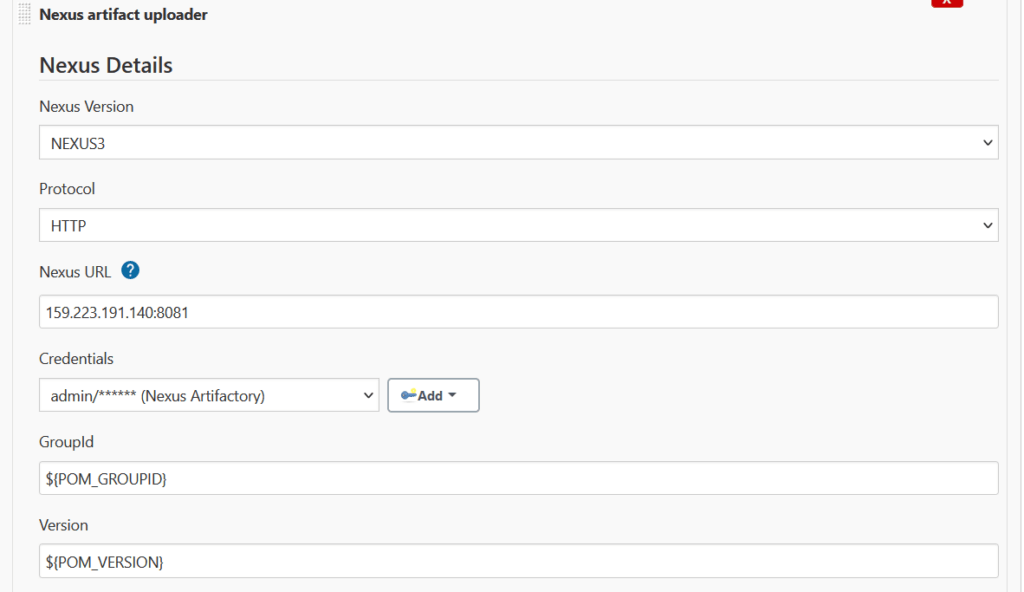
Enter the Java Project Artifact details
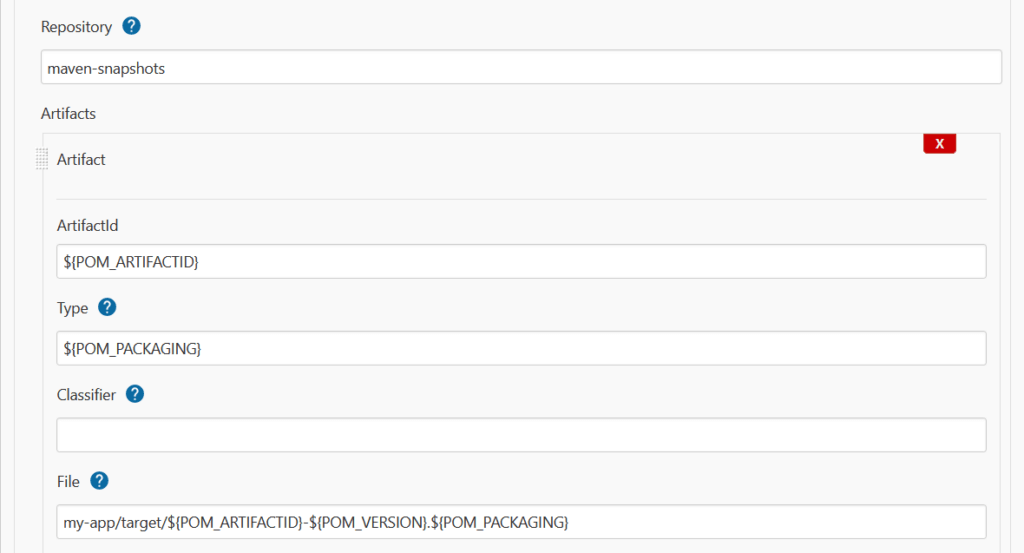
Values of above you can take from from pom.xml file.
Save and apply the build, Click on Build Now, you can see console output, artifact is uploaded to nexus.
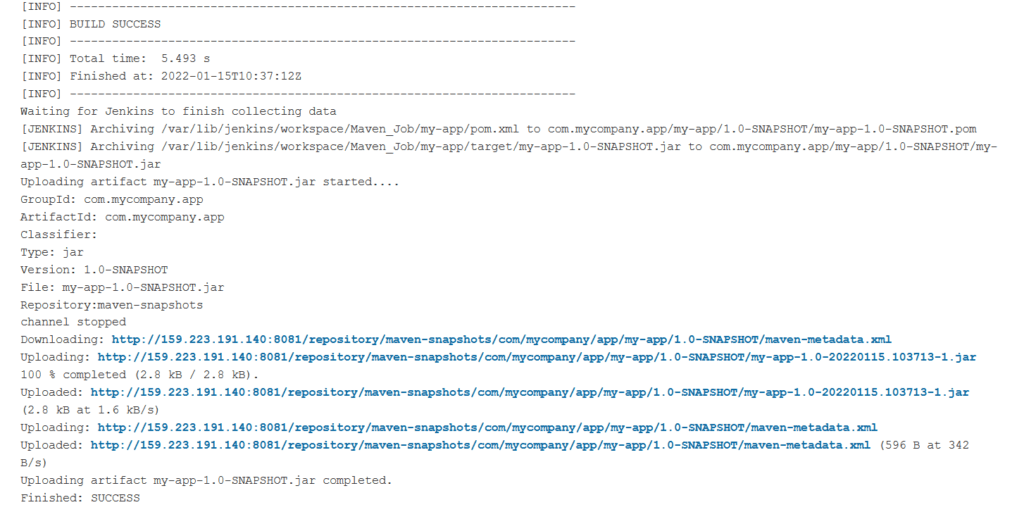
#6:Artifact uploaded to Nexus
Login to Nexus, you can see Java artifact is uploaded to Nexus Repository Manager.

Conclusion:
In this article we have covered How to Upload Artifact to Nexus using Jenkins.
Related Articles: