Table of Contents
Introduction
Java is a set of software and specifications developed at Sun Microsystems. There are two tyes of Java Platforms are JDK (Java Development Kit) and JRE (Java Runtime Environment). Both are helpful for deploying applications on servers and debugging, JVM monitoring,developing.Java 8 Features:
Java 8 provides following features,- ForEach() method
- Functional interfaces
- Base64 Encode Decode
- Parallel array sorting
- Nashorn JavaScript Engine,
- Parallel Array Sorting
- Type and Repating Annotations
- java.lang and java.util Packages
Prerequisites
- Ubuntu Server 18.04/16.04 LTS
- SSH access with sudo privileges
uname -aOR
cat /etc/os-releaseOutput:
cat /etc/os-release

NAME="Ubuntu"

VERSION="18.04.3 LTS (Bionic Beaver)"

ID=ubuntu

ID_LIKE=debian

PRETTY_NAME="Ubuntu 18.04.3 LTS"

VERSION_ID="18.04"

HOME_URL="https://www.ubuntu.com/"

SUPPORT_URL="https://help.ubuntu.com/"

BUG_REPORT_URL="https://bugs.launchpad.net/ubuntu/"

PRIVACY_POLICY_URL="https://www.ubuntu.com/legal/terms-and-policies/privacy-policy"

VERSION_CODENAME=bionic

UBUNTU_CODENAME=bionic
Follow the below steps to Install Oracle Java 8 on Ubuntu Manually using command line.
Step #1: Download Oracle Java 8
Generally Oracle will not allow to download directly without accepting their licences. We have to create one account in Oracle java website by your personal or official mail. After accepting licence download the application from browser to local machine. This link takes you to the Oracle home website Oracel Java SRE. Once you opened above link goto “JAVA SE Development Kit 8u241” section, download “jdk-8u251-linux-x64.tar.gz” setup for Ubuntu click on “Accept License Agreement” Check Box.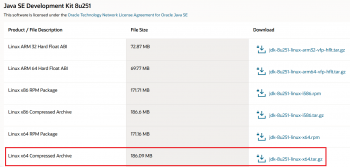 After downloading into local machine, using SCP/SFTP/FTP transfer the file from local machine to Ubuntu server.
Step #2: Copy downloaded Setup and Extract
Create a directory /opt/jdksudo mkdir -p /opt/jdkCopy the tar file from the directory copied from local machine to server to /opt/jdk folder and execute below command:
sudo cp -rf /home/sivasai/jdk-8u251-linux-x64.tar.gz /opt/jdk/
cd /opt/jdk/
sudo tar -zxf jdk-8u251-linux-x64.tar.gz
ls
Step #3: Install Oracle Java 8 on ubuntu with Alternatives
Use update-alternatives command to configure java on your system
sudo update-alternatives --install /usr/bin/java java /opt/jdk/jdk1.8.0_251/bin/java 100
After executing above command it shows below output:
Output:
update-alternatives: using /opt/jdk/jdk1.8.0_251/bin/java to provide /usr/bin/java (java) in auto mode
Step #4: Verify Update Alternatives
Enter below command shows output:
sudo update-alternatives --display java
Output:
$ sudo update-alternatives --display java

java - manual mode

 link best version is /usr/lib/jvm/java-13-oracle/bin/java

 link currently points to /opt/jdk/jdk-13.0.2/bin/java

 link java is /usr/bin/java

slave java.1.gz is /usr/share/man/man1/java.1.gz

/opt/jdk/jdk-12.0.2/bin/java - priority

/opt/jdk/jdk-13.0.2/bin/java - priority 1

/opt/jdk/jdk1.8.0_251/bin/java - priority 100

/usr/lib/jvm/java-13-oracle/bin/java - priority 1091

slave java.1.gz: /usr/lib/jvm/java-13-oracle/man/man1/java.1.gz
To change for alternative mode:
sudo update-alternatives --config java
It prompts for selecting by 0,1,2..so choose accordingly:
Output
There are 4 choices for the alternative java (providing /usr/bin/java).

  Selection    Path                                  Priority   Status

------------------------------------------------------------

  0            /usr/lib/jvm/java-13-oracle/bin/java   1091      auto mode

  1            /opt/jdk/jdk-12.0.2/bin/java           2         manual mode

* 2            /opt/jdk/jdk-13.0.2/bin/java           1         manual mode

  3            /opt/jdk/jdk1.8.0_251/bin/java         100       manual mode

  4            /usr/lib/jvm/java-13-oracle/bin/java   1091      manual mode

Press <enter> to keep the current choice[*], or type selection number: 3

update-alternatives: using /opt/jdk/jdk1.8.0_251/bin/java to provide /usr/bin/java (java) in manual mode
Step #5: Setting the JAVA_HOME and JRE_HOME Environment Variables
To define the enviroment variable:
sudo nano /etc/environment
Paste the below variable on the file:
/etc/environment
JAVA_HOME=/opt/jdk/jdk1.8.0_251
JRE_HOME=/opt/jdk/jdk1.8.0_251/jre
To check variables defined:
source /etc/environment
echo $JAVA_HOME
Output:
/opt/jdk/jdk1.8.0_251
sudo apt-get update
Step #6: Verify Java Version
To check the java version:
java -version
Output:
java version "1.8.0_251"
Java(TM) SE Runtime Environment (build 1.8.0_251-b08)
Java HotSpot(TM) 64-Bit Server VM (build 25.251-b08, mixed mode)
If you seeing output like above then we have successfully set up the Java 8 on Ubuntu.
Conclusion:
In this article, We have downloaded Oracle Java 8 from official site, installed using command line, configured JAVA_HOME and JRE_HOME, verified installed version.Related Articles:
- How to Install Oracle Java 8 on Ubuntu 20.04 LTS
- How to Download and Install JAVA SE JDK 8 on Windows 10
- How to Download and Install Oracle Java 8 on CentOS 7
- How to Download and Install Oracle JAVA 11 on Ubuntu 18.04/16.04 LTS
- How to Download and Install Oracle Java 12 on Ubuntu 19.04/18.04/16.04 LTS
- How to Download and Install Oracle Java 13 on Ubuntu 18.04/16.04 LTS
Thanks man! You’re live saver!
Excellent !
Very easy to apply ,this clear method.
It says “permission denied” (I’m on the sudo login) when I attempt to move the file to /opt/jdk
Hello Runkeish,
Thanks for following our article. Please give read, write,and group permissions to /opt/jdk directory. Then you can move the files.
$ sudo chmod -R 777 /opt/jdk
Let me know if you still facing the issue.
sudo update-alternatives –install /usr/bin/javac javac /opt/jdk/jdk1.8.0_231/bin/javac 100
You might need to add this as we need javac!
Hi,
Thanks for reading and replying back.
Yes you need to replace java with javac.
I have fallowed above all steps but still i am facing issue.
while running the “java -version”.It was not showing jdk version.Could you please help me.
Hi Ravinder,
This is working from our side. Please send us screenshot here.
Thank you
thanks bro. it worked
Thanks for following our articles.
Thanks! Clearest, most succinct reference I found after doing much Googling on the topic.
Thanks for your comment.
Thanks! Very helpful!
I have fallowed above all steps but still i am facing issue.
while running the “java -version”.It was not showing jdk version.Could you please help me.
Please share error screenshot.
Hello Shivdas,
/opt/jdk/jdk1.8.0_251# java -version
-su: /usr/bin/java: No such file or directory
but install
apt install libc6-i386
XXXX/opt/jdk/jdk1.8.0_251# java -version
java version “1.8.0_251”
Java(TM) SE Runtime Environment (build 1.8.0_251-b08)
Java HotSpot(TM) Server VM (build 25.251-b08, mixed mode)
and now it’s working
Thank you very much for your tutorial
Hello Moyanof,
Thanks for update.
Awesome !
Thanks bro.
thanks! worked seamlessly
Thanks for following article.
Thanks for this tutorial . Nice job
Thanks fro following blog.
I have scrounged a lot ultimately this solution worked . Thank You.
Thanks.
Thanks
Thanks for following our blog. Please share with your friends.
Really, a live saver blog.
Hello Khushbu,
Thanks for appreciating, Please share with your friends who need help.
Hi Sivasai Sagar,
Thanks for this clear cut procedure. I have followed and done commands with java, everything has gone well until the end. After that I have seen a comment and learnt that I need to use javac instead of java. now do I have to repeat the procedure till end with javac?
yes you can.