In this article, we explore how to leverage Boto3, the AWS SDK for Python, to read file content from S3 bucket using Python Boto3, enabling seamless data retrieval and manipulation in AWS environments.
Table of Contents
What is AWS S3 bucket?
An AWS S3 bucket is a cloud storage container provided by Amazon Web Services (AWS) to store and retrieve data objects such as files, images, videos, and databases.
Example; Suppose you have an S3 bucket named “my-example-bucket” where you store various files such as images, documents, and backups.
What is Boto3 in Python?
Boto3 is a Python library that serves as the official AWS SDK (Software Development Kit) for Python. It provides developers with an easy-to-use interface to interact with various AWS services directly from their Python code.
For example, if you want to create an S3 bucket, upload a file to it, or perform any other AWS operation, you can do so using Boto3. The library abstracts the complexities of AWS API calls and provides Pythonic methods and objects to manage AWS resources seamlessly.
Prerequisites
- AWS account: Ensure you have an AWS account before starting the tutorial.
- AWS CLI: Set up AWS CLI on your local machine to access AWS services.
Step-By-Step Guide to Read Files Content from S3 Bucket
Step#1:Update Packages on Ubuntu 24.04 LTS
Update packages on Ubuntu 24.04 LTS using below command
sudo apt update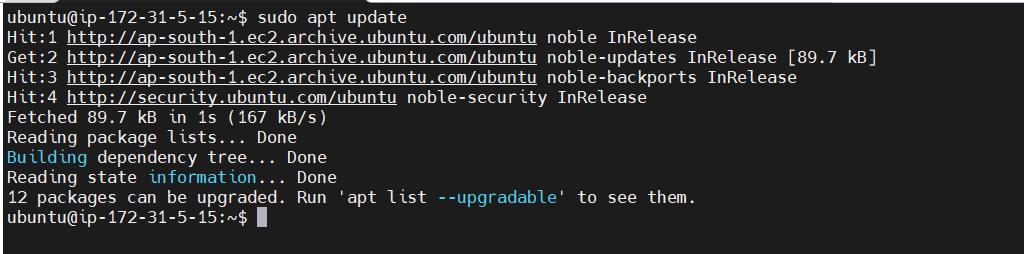
Step#2:Install Python 3 on Ubuntu 24.04 LTS
Python 3 comes preinstalled on Ubuntu 24.04 Installing Python on Ubuntu is a straightforward process. Use below command to install python 3 on Ubuntu 24.04 LTS
sudo apt install python3 
To check python version use below command
python3 --version 
Step#3:Install boto3 on Ubuntu 24.04 LTS using pip
To install the Boto3 library for Python on Ubuntu 24.04 LTS, you can use the package manager pip, which is the default Python package installer.
Boto3 is commonly used for interacting with Amazon Web Services (AWS) services. Follow these steps:
Install Boto3 using pip:
sudo apt install python3-pip

sudo apt install python3-boto3Verify the installation:
python3 -c "import boto3; print(boto3.__version__)"
This command checks if Boto3 is installed and prints its version.
Step#4:Create IAM User and Configure IAM user using AWS CLI
Before using Boto3, you need to set up authentication credentials for your AWS account using either the IAM Console or the AWS CLI. You can either choose an existing user or create a new one.
For instructions about how to create a user using the IAM Console, see Creating IAM users. Once the user has been created, see Managing access keys to learn how to create and retrieve the keys used to authenticate the user.
If you have the AWS CLI installed, then you can use the aws configure command to configure your credentials file:
To connect AWS using CLI we have configure AWS user using below command
aws configureit will ask AWS Access Key ID, AWS Secret Access Key, Default region name, Default output format AWS
Access Key ID [None]: *********7G

AWS Secret Access Key [None]: ***********************px

Default region name [None]: ap-south-1

Default output format [None]: json
Now you have connected your aws account using AWS CLI.
Alternatively, you can create the credentials file yourself. By default, its location is ~/.aws/credentials. At a minimum, the credentials file should specify the access key and secret access key. In this example, the key and secret key for the account are specified in the default profile:
[default]
aws_access_key_id = YOUR_ACCESS_KEY
aws_secret_access_key = YOUR_SECRET_KEY
You may also want to add a default region to the AWS configuration file, which is located by default at ~/.aws/config:
[default]
region=ap-south-1
Alternatively, you can pass a region_name when creating clients and resources.
You have now configured credentials for the default profile as well as a default region to use when creating connections. See Configuration for in-depth configuration sources and options.
Step#5:Using Boto3 with AWS S3
To use Boto3, you must first import it and indicate which service or services you’re going to use:
We can Create a S3 Bucket, Upload File, Download Files and also Read file from the S3 Bucket
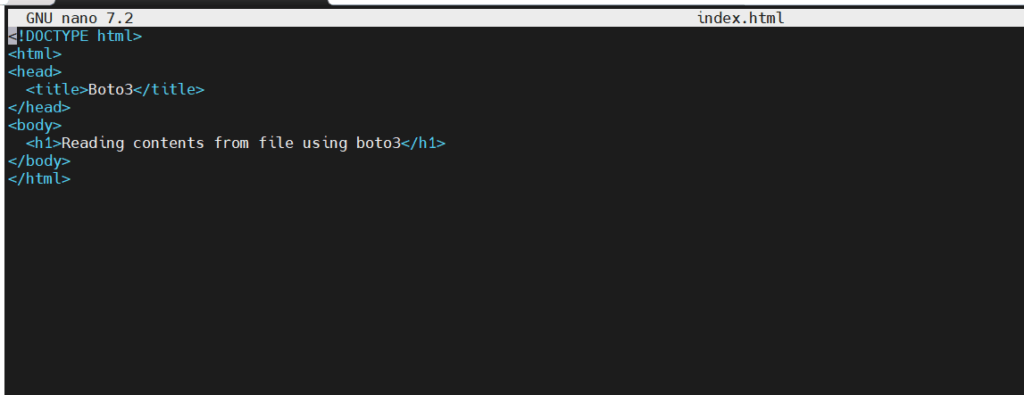
Create index.html in /opt directory and add content in it
index.html
<!DOCTYPE html>
<html>
<head>
  <title>Boto3</title>
</head>
<body>
  <h1>Reading contents from file using boto3</h1>
</body>
</html>
Below is python code
sudo nano aws-s3.py
import boto3

# Connect to AWS S3 through Boto3
s3 = boto3.client("s3")

# Specify a valid AWS region code
region = 'ap-south-1' # Example: Asia Pacific (Mumbai)- Importing Boto3 Library:
- import boto3: This line imports the Boto3 library, which provides an interface to AWS services in Python.
- Connecting to AWS S3:
- s3 = boto3.client(“s3”): Here, we create an S3 client object named
s3using boto3.client, allowing us to interact with S3 services.
- s3 = boto3.client(“s3”): Here, we create an S3 client object named
- Specifying AWS Region:
- region = ‘ap-south-1’: This line specifies the AWS region code. In this case, it’s set to ‘ap-south-1’, which corresponds to the Asia Pacific (Mumbai) region.

# Create S3 Bucket with region constraint
bucketResponse = s3.create_bucket(
    Bucket="mydevopshintbucket",
    CreateBucketConfiguration={'LocationConstraint': region}
)

# Get the bucket name from the response (Optional, not needed for upload/download)
BUCKET_NAME = "mydevopshintbucket"
- Creating an S3 Bucket:
- bucketResponse = s3.create_bucket(…): This line creates an S3 bucket named “mydevopshintbucket” with a region constraint specified by the CreateBucketConfiguration parameter. The LocationConstraint parameter ensures that the bucket is created in the specified AWS region (region).
- Optional: Getting Bucket Name:
- BUCKET_NAME = “mydevopshintbucket”: This line sets the variable BUCKET_NAME to “mydevopshintbucket”. While not explicitly needed for the upload or download operations in this code, it could be useful for future operations where the bucket name needs to be referenced.

# Upload Files to the S3 Bucket
filesPath = "/opt/"
fileToUpload = "index.html"
fileToS3 = filesPath + fileToUpload
s3.upload_file(fileToS3, BUCKET_NAME, fileToUpload)

print(f"S3 bucket '{BUCKET_NAME}' created successfully in region '{region}'")
Upload Files to S3:
- filesPath = “/opt/”: Path where the file is located.
- fileToUpload = “index.html”: Name of the file to upload.
- fileToS3 = filesPath + fileToUpload: Full path of the file.
- s3.upload_file(fileToS3, BUCKET_NAME, fileToUpload): Uploads fileToS3 to the S3 bucket named BUCKET_NAME with the name fileToUpload.
- print(f”S3 bucket ‘{BUCKET_NAME}’ created successfully in region ‘{region}'”): Prints a success message confirming the creation of the S3 bucket in the specified region.

Retrieve and Display Content of index.html
# Retrieve and Display Content of index.html
fileObj = s3.get_object(Bucket=BUCKET_NAME, Key=fileToUpload)
fileContent = fileObj['Body'].read().decode('utf-8')

print(f"S3 bucket '{BUCKET_NAME}' created successfully in region '{region}'")
print(f"Contents of '{fileToUpload}':\n{fileContent}")
- fileObj = s3.get_object(Bucket=BUCKET_NAME, Key=fileToUpload): This line retrieves the object (file) named index.html from the specified S3 bucket (BUCKET_NAME) using the get_object method of the s3 client object. The Bucket parameter specifies the bucket name, and the Key parameter specifies the object key, which is the file name in this case (fileToUpload).
- fileContent = fileObj[‘Body’].read().decode(‘utf-8’): Once the object is retrieved, this line reads the contents of the object’s body using the read() method. The .decode(‘utf-8’) part decodes the binary data of the file into a UTF-8 encoded string, assuming that the file is encoded in UTF-8 format. This string is then stored in the fileContent variable.
- print(f”S3 bucket ‘{BUCKET_NAME}’ created successfully in region ‘{region}'”): This line prints a success message indicating that the S3 bucket was created successfully. It includes the bucket name (BUCKET_NAME) and the AWS region (region) where the bucket was created.
- print(f”Contents of ‘{fileToUpload}’:\n{fileContent}”): Finally, this line prints the contents of the index.html file. It displays a header with the file name (fileToUpload) followed by a newline (
\n) and then prints the actual content of the file (fileContent).

Complete code for Read file content from S3 bucket with boto3
aws-s3.py
import boto3

# Connect to AWS S3 through Boto3
s3 = boto3.client("s3")

# Specify a valid AWS region code
region = 'ap-south-1'  # Example: Asia Pacific (Mumbai)

# Create S3 Bucket with region constraint
bucketResponse = s3.create_bucket(
    Bucket="mydevopshintbucket",
    CreateBucketConfiguration={'LocationConstraint': region}
)

# Get the bucket name from the response (Optional, not needed for upload/download)
BUCKET_NAME = "mydevopshintbucket"

# Upload Files to the S3 Bucket
filesPath = "/opt/"
fileToUpload = "index.html"
fileToS3 = filesPath + fileToUpload
s3.upload_file(fileToS3, BUCKET_NAME, fileToUpload)

print(f"S3 bucket '{BUCKET_NAME}' created successfully in region '{region}'")


# Retrieve and Display Content of index.html
fileObj = s3.get_object(Bucket=BUCKET_NAME, Key=fileToUpload)
fileContent = fileObj['Body'].read().decode('utf-8')

print(f"S3 bucket '{BUCKET_NAME}' created successfully in region '{region}'")
print(f"Contents of '{fileToUpload}':\n{fileContent}")

Executing the Python Code
python3 aws-s3.py
Output:

Conclusion
In conclusion, using Boto3 to read file content from an S3 bucket offers a straightforward and efficient way to access and manipulate data stored in AWS.
Reference:-
For reference visit the official website .
Any queries pls contact us @Fosstechnix.com.
Related Articles: