In the article, we will learn about the importance of managing system caches in Linux, and how to create a bash script that automates the process of purging these caches. Efficient memory management is crucial for maintaining optimal system performance, especially on servers with high workloads. We will explore a step-by-step method to clear cached memory, ensuring your system remains responsive and efficient.
Table of Contents
What are System Caches?
System caches in Linux are temporary storage areas that hold data likely to be reused, speeding up subsequent access to this data. While caching is beneficial for performance, over time, it can consume a significant amount of memory. In some cases, this may lead to decreased performance as other processes compete for limited resources. Manually purging caches can help free up memory and improve system responsiveness.
Prerequisites
- AWS Account with Ubuntu 24.04 LTS EC2 Instance.
- Basic knowledge of Shell scripting.
Step #1:Create a file in Ubuntu
Open the terminal and use the nano command to create a new file.
nano free_cache.sh
Step #2:Write Shell script for Cache Purging
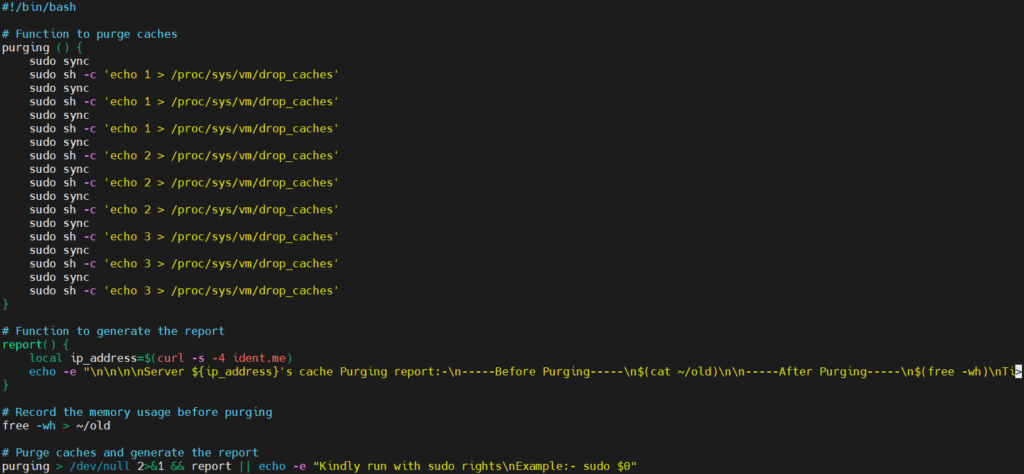
To streamline the process of clearing system caches, we will use a bash script that performs the following tasks:
- Record the current memory usage.
- Execute a series of commands to purge different levels of system caches.
- Generate a report comparing memory usage before and after the purge.
#!/bin/bash

# Function to purge caches
purging () {
    sudo sync
    sudo sh -c 'echo 1 > /proc/sys/vm/drop_caches'
    sudo sync
    sudo sh -c 'echo 1 > /proc/sys/vm/drop_caches'
    sudo sync
    sudo sh -c 'echo 1 > /proc/sys/vm/drop_caches'
    sudo sync
    sudo sh -c 'echo 2 > /proc/sys/vm/drop_caches'
    sudo sync
    sudo sh -c 'echo 2 > /proc/sys/vm/drop_caches'
    sudo sync
    sudo sh -c 'echo 2 > /proc/sys/vm/drop_caches'
    sudo sync
    sudo sh -c 'echo 3 > /proc/sys/vm/drop_caches'
    sudo sync
    sudo sh -c 'echo 3 > /proc/sys/vm/drop_caches'
    sudo sync
    sudo sh -c 'echo 3 > /proc/sys/vm/drop_caches'
}

# Function to generate the report
report() {
    local ip_address=$(curl -s -4 ident.me)
    echo -e "\n\n\n\nServer ${ip_address}'s cache Purging report:-\n-----Before Purging-----\n$(cat ~/old)\n\n-----After Purging-----\n$(free -wh)\nTimeStamp:- $(TZ='Asia/Kolkata' date)\n\n"
}

# Record the memory usage before purging
free -wh > ~/old

# Purge caches and generate the report
purging > /dev/null 2>&1 && report || echo -e "Kindly run with sudo rights\nExample:- sudo $0"
Save the file and exit the editor.
Explanation of the Script:
- Purging Caches: The
purgingfunction clears the caches by writing to/proc/sys/vm/drop_caches. This involves three steps:echo 1clears page cache.echo 2clears dentries and inodes.echo 3clears page cache, dentries, and inodes. Thesudo synccommand ensures that all pending disk writes are completed before purging.
- Generating the Report: The
reportfunction fetches the server’s public IP address and creates a report showing memory usage before and after the cache purge. The timestamp is adjusted to the ‘Asia/Kolkata’ timezone. - Recording Memory Usage: The script capture the current memory usage using the
free -whcommand and saves the output to a file namedoldin the home directory. - Executing the Script: The script attempts to purge caches and generate the report. If not executed with sudo rights, it prompts the user to rerun the script with the appropriate privileges.
Step #3:Make file executable
Change the file permissions to make it executable using the chmod command.
chmod +x free_cache.sh
Step #4:Run the script
Run the script by executing the following command.
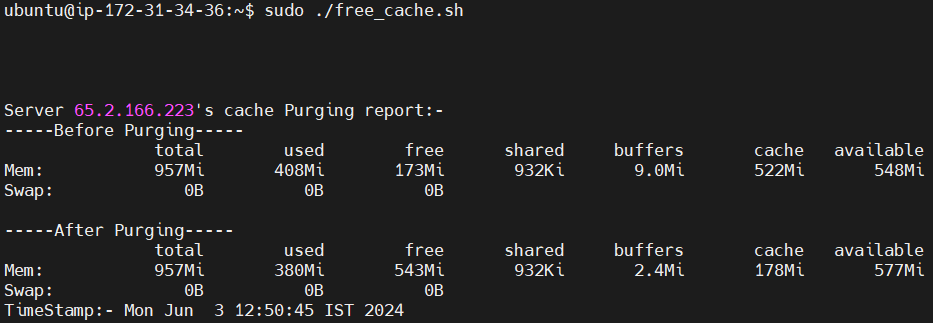
sudo ./free_cache.shThis will execute the cache purging process and generate a before-and-after report of the system’s memory usage.

Conclusion:
In conclusion, managing system caches is an essential aspect of maintaining Linux server performance. By using the provided bash script, you can automate the process of purging system caches, thereby freeing up memory and enhancing system responsiveness. Regularly clearing system caches can help mitigate performance issues caused by memory constraints, ensuring your server runs efficiently.
Related Articles:
MongoDB Database Backup using Shell Script
Reference:
