In this article, we will cover how to Set Up a 3-tier Architecture on AWS with EC2, RDS, and S3.
A 3-tier architecture is a well-established software pattern that separates the user interface, business logic, and data layers, offering scalability, maintainability, and security. In this article, we will build a robust 3-tier architecture on AWS using various services including VPC, EC2, IAM, S3, RDS, AWS Certificate Manager, and Route 53.
Table of Contents
Prerequisites
To set up a 3-tier architecture on AWS, you need:
- An AWS account with necessary permissions
- A registered domain name (for Route 53 and HTTPS)
- A VPC with public and private subnets
- An Internet Gateway and routing configured
- A key pair to access EC2 instances
- Security groups to control traffic between layers
- An SSL certificate via AWS Certificate Manager (ACM)
- An RDS database instance (e.g., Aurora or MySQL)
- An S3 bucket (optional, for static assets or backups)
- A Route 53 hosted zone for DNS resolution
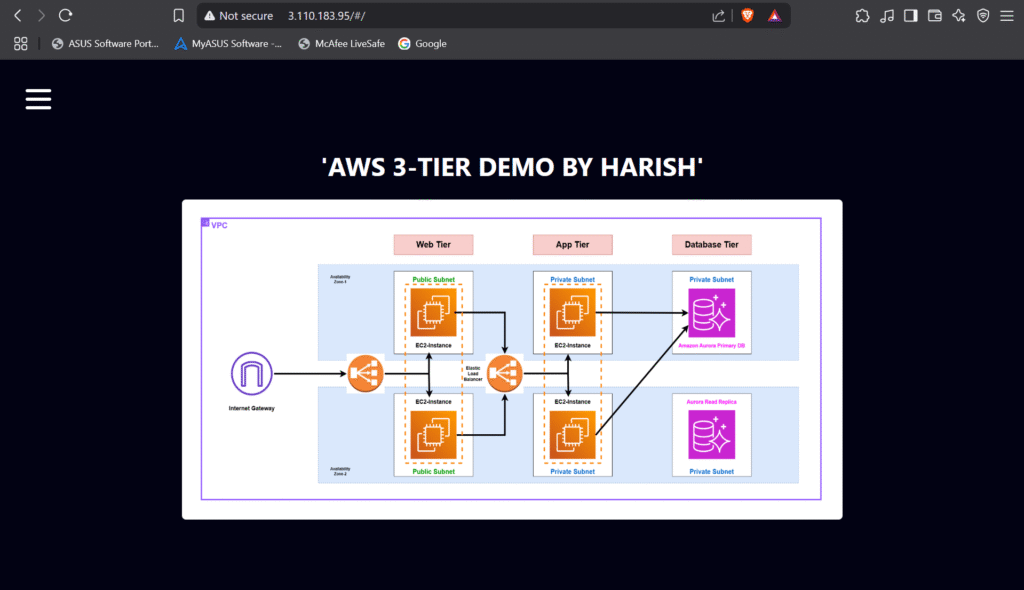
Overview of the 3-Tier Architecture
The architecture is divided into the following layers:
- Web Tier: Handles incoming traffic and serves the front-end.
- App Tier: Contains the business logic of the application.
- Database Tier: Manages persistent data storage.
We will implement this architecture using the following AWS services:
- Amazon VPC: To create isolated network environments.
- Amazon EC2: To host web and app servers.
- Amazon RDS (Aurora): For managed relational database services.
- IAM: To manage access and permissions.
- Amazon S3: For storing static assets.
- AWS Certificate Manager (ACM): To manage SSL/TLS certificates.
- Amazon Route 53: For DNS management and domain routing.
Architecture Diagram
Below is the visual representation of our 3-tier architecture:

1.Web Tier (Presentation Layer)
Components:
- Public Subnets in 2 Availability Zones for high availability.
- EC2 Instances acting as web servers.
- Elastic Load Balancer (ELB) for distributing traffic across instances.
- Internet Gateway for internet access.
- Route 53 to manage the domain and route traffic.
- Certificate Manager to provide HTTPS via an SSL certificate.
Features:
- Secure access using HTTPS (managed by ACM).
- Static files (CSS, JS, images) can be offloaded to Amazon S3.
- IAM policies restrict EC2 instance access to only necessary services.
2.Application Tier (Logic Layer)
Components:
- Private Subnets for isolation.
- EC2 Instances to host backend services like Node.js, Java, or Python apps.
- Internal Load Balancer for internal communication between web and app layers.
- IAM roles attached to instances to securely access services like RDS or S3.
Features:
- No direct internet access (inbound).
- Communicates with web tier and database tier.
- Logs can be shipped to CloudWatch or S3 for monitoring.
3.Database Tier (Data Layer)
Components:
- Private Subnets in multiple AZs for fault tolerance.
- Amazon Aurora (RDS) as the primary database.
- Aurora Read Replica for read scalability.
- Security Groups control access only from App Tier.
Features:
- Highly available and fault-tolerant with automatic backups.
- IAM Database Authentication can be enabled for secure access.
- Data is encrypted at rest and in transit.
Step By Step Guide
#1.VPC Creation
Design and implement a Virtual Private Cloud (VPC) to establish a secure, scalable, and highly available network infrastructure for the project. The VPC will serve as the core environment, hosting all application components while enforcing isolation, robust security controls, and optimized connectivity between resources.
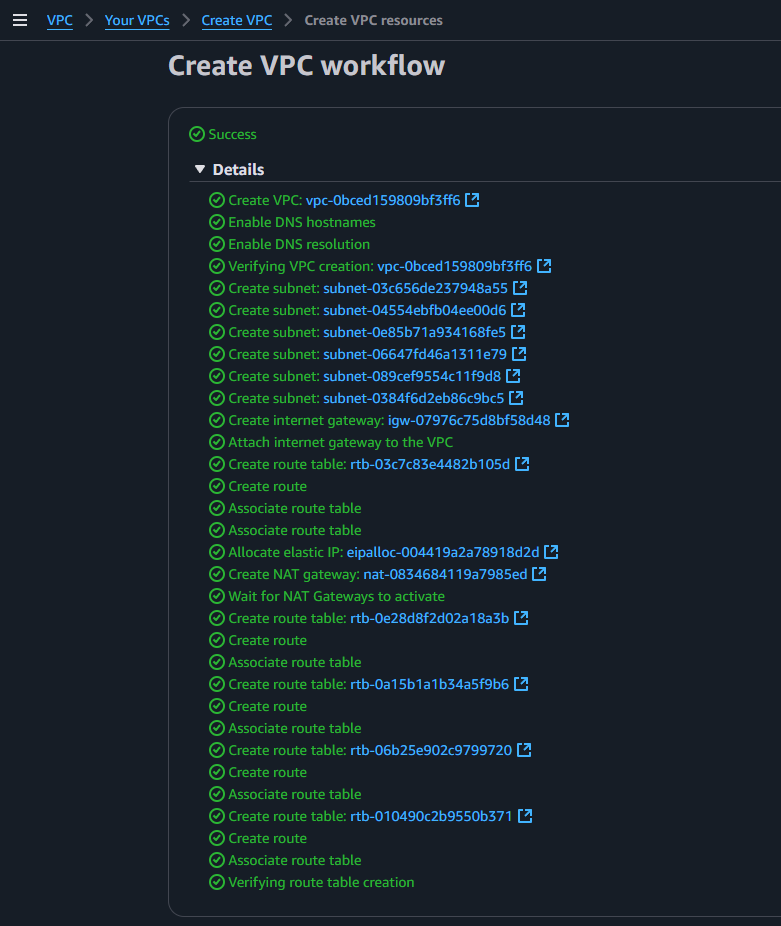
Click on Create VPC and select the options from the below screenshots:
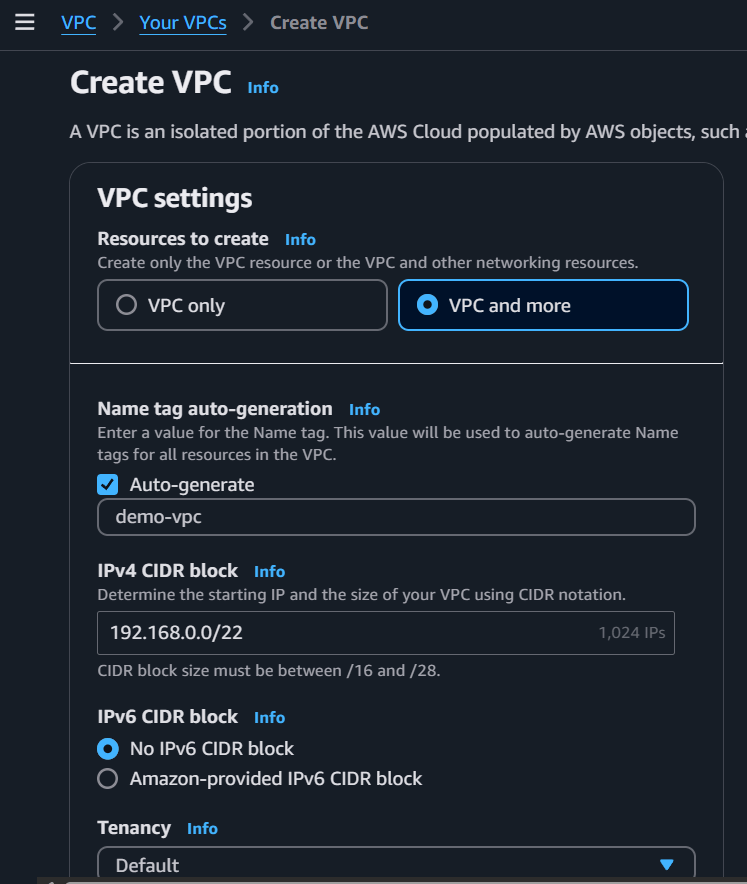
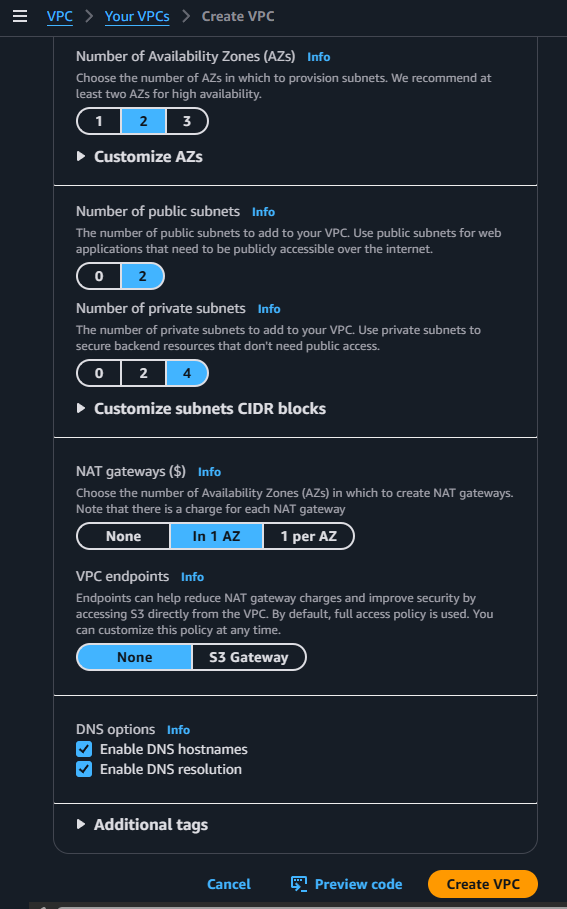
After selecting those options click on Create VPC
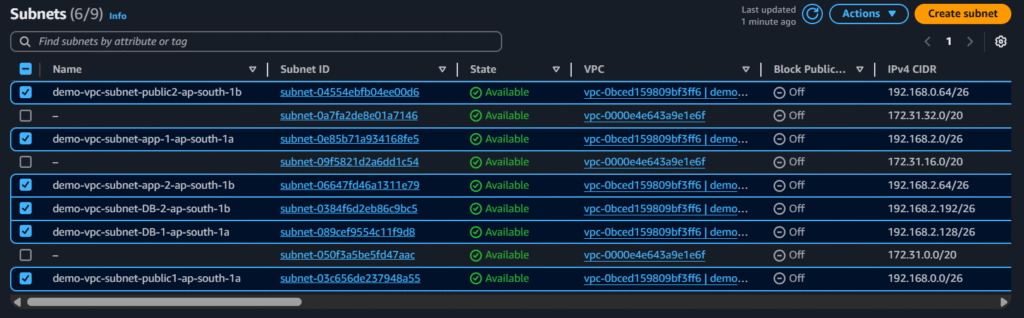
Now edit the names of the subnets as shown below:
#2.Security Group Creation
Create Security groups for Web-tier, Web-External-ALB, App-tier, App-Internal-ALB and RDS-tier:
Web-External-ALB:
Select the options from below screenshot and click on create security group:

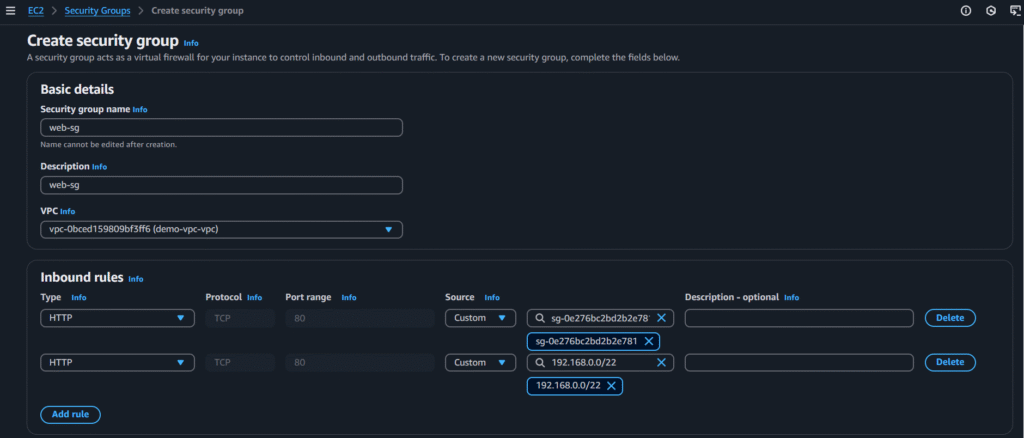
Web-tier:
Select the options from below screenshot and click on create security group:
App-tier:
Select the options from below screenshot and click on create security group:

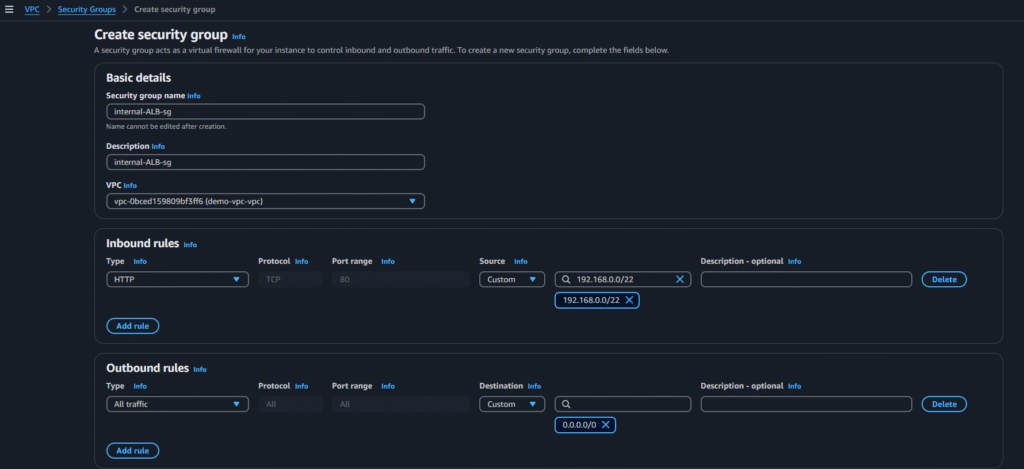
App-Internal-ALB:
Select the options from below screenshot and click on create security group:
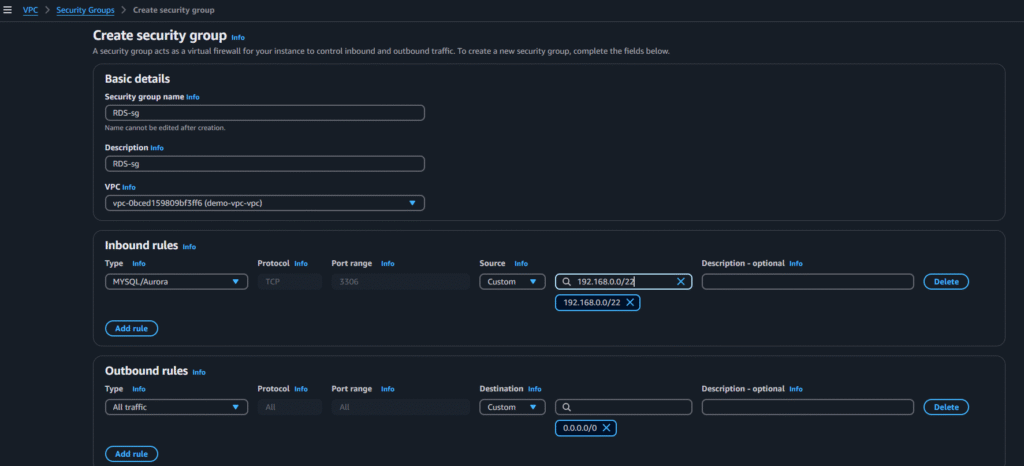
RDS-tier:
Select the options from below screenshot and click on create security group:
#3.S3 Bucket and IAM Role Setup
Create an S3 bucket and upload the application code:
Clone the code to local and upload into the bucket:
1. Create a bucket:

2. Upload the code into the bucket:

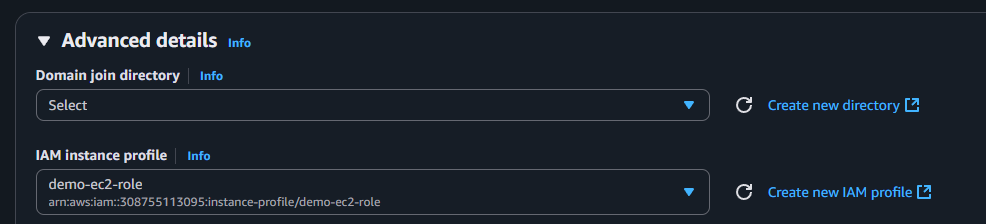
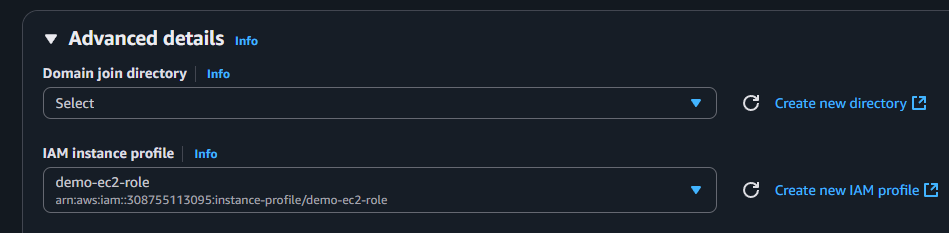
Set up an IAM role with the necessary permissions and attach it to the EC2 instance:
Go to IAM and click on Create Role
Now select the options from the below screenshots:

Now click on Next and select the permission policy:

Now click on Next and give the name for the Role and click on create Role:

#4.Database Configuration
Launch and configure an RDS instance to serve as the backend database.
Go to Aurora and RDS and create a subnet group first:

After selecting above options click on Create
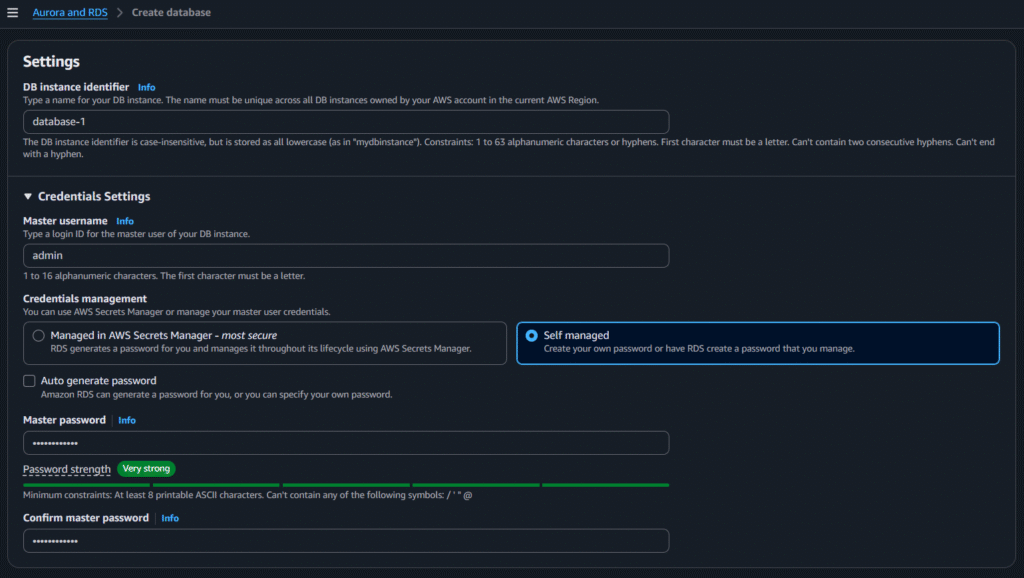
Now go to Databases and click on Create Database
Now select the below options:


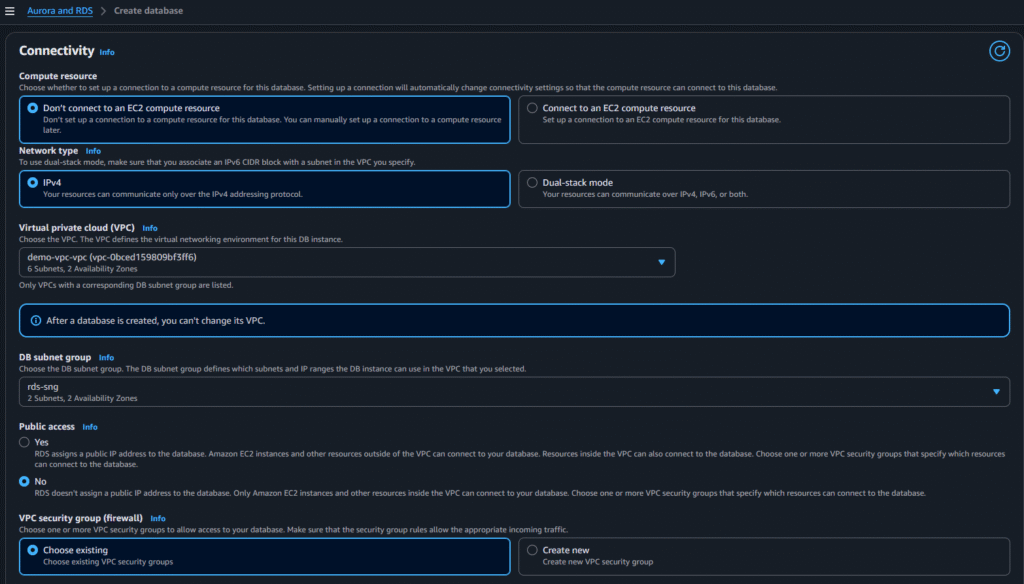
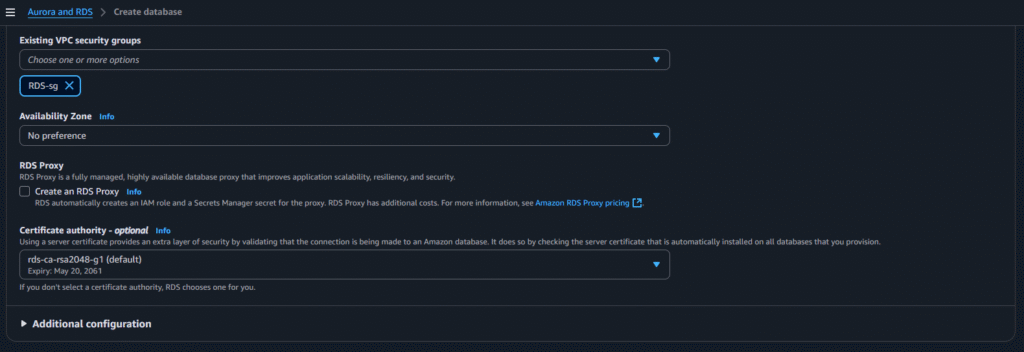
After selecting the above options click on create:
#5.Application Tier Setup
Deploy application-tier resources, including the configuration of an internal load balancer for traffic distribution within the tier.
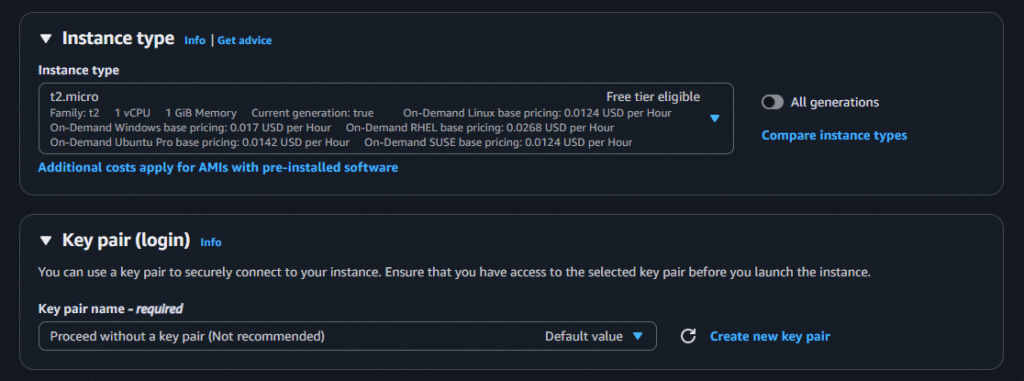
Creation of Instance and setup for App Tier

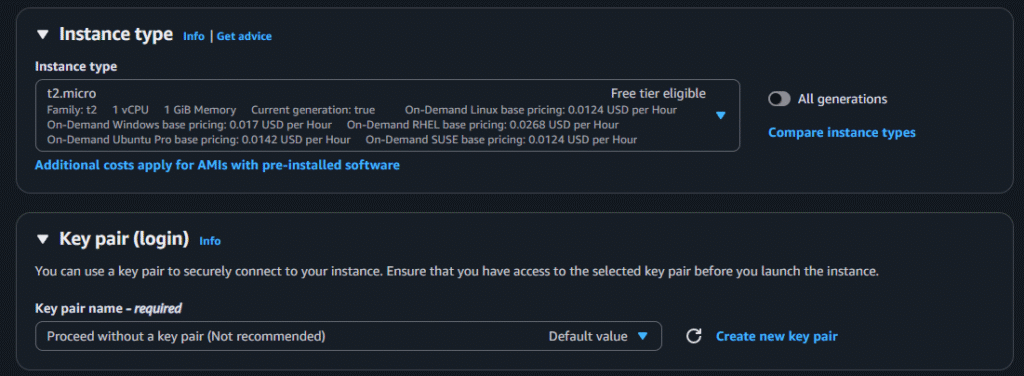
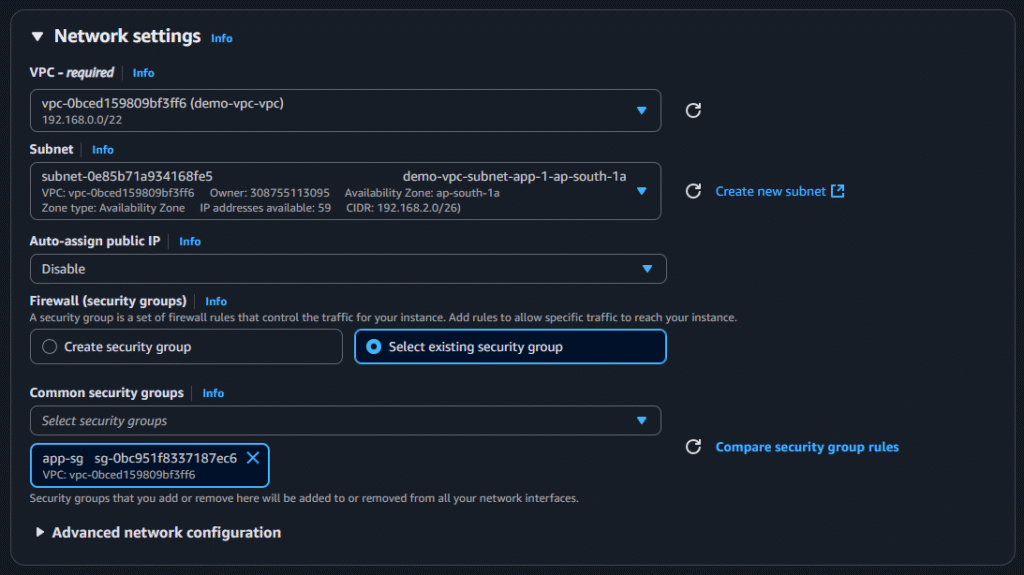
After selecting those options click on launch instance
In this instance we will do the App Server Setup and DB Server Configuration. Execute the below commands;
Now install mysql:
sudo yum install mysql -y
Configure MySQL Database:
Connect to the database and perform basic configuration: Replace below info with your DB information
mysql -h <database endpoint> -u admin -pand enter the password

Create a database:
CREATE DATABASE webappdb;
SHOW DATABASES;
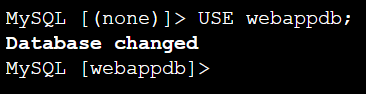
USE webappdb;You will see ‘Database changed’
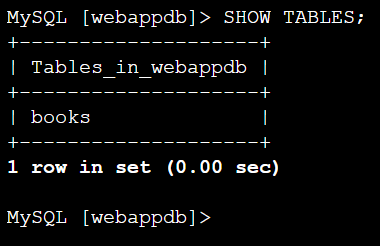
Execute the below code as a single code to create a table with the name ‘books’
CREATE TABLE IF NOT EXISTS books(
  id INT NOT NULL AUTO_INCREMENT,
  amount DECIMAL(10,2),
  description VARCHAR(100),
  PRIMARY KEY(id)
);
SHOW TABLES;use above command to verify
Lets insert some info into the table:
INSERT INTO books (amount, description) VALUES ('400', 'physics');To verify whether the entry is really created or not
SELECT * FROM books;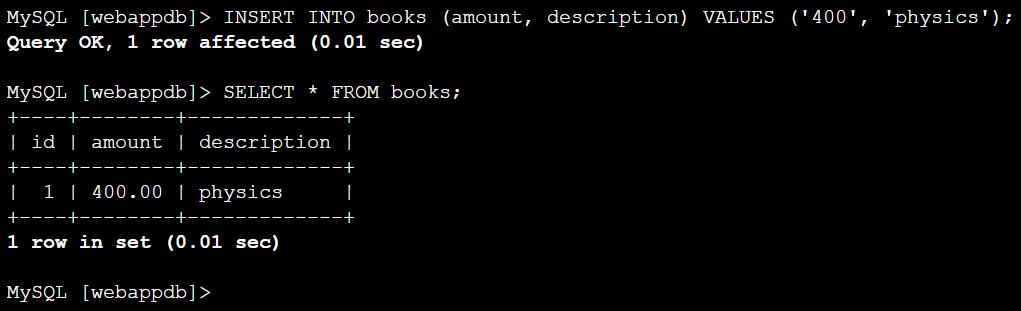
to come out of the database use:
exit
Update Application Configuration to with DB information:
Update the application-code/app-tier/DbConfig.js file with your database credentials.

Now update the DbConfig.js in the s3 bucket by uploading the DbConfig.js in the bucket:

Install and Configure Node.js and PM2:
curl -o- https://raw.githubusercontent.com/avizway1/aws_3tier_architecture/main/install.sh | bashsource ~/.bashrc
nvm install 16
nvm use 16 
To run node as a service, we will install pm2:
npm install -g pm2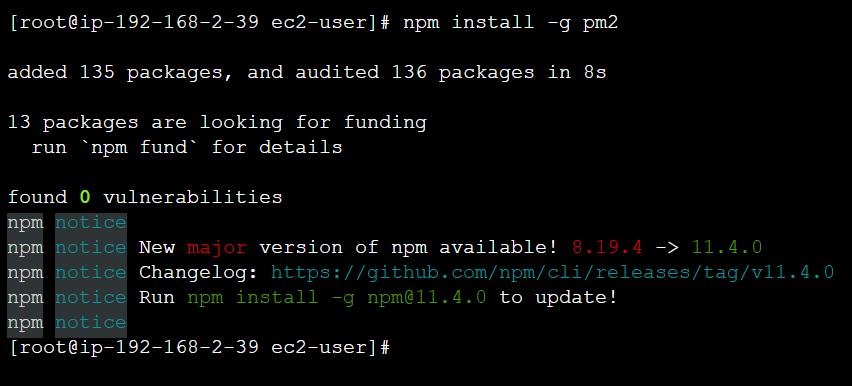
Now download application code from S3 and start the application:
cd ..
cd ..
cd ~/
Use the path of your code:
sudo aws s3 cp s3://<S3BucketName>/application.code/app-tier/ app-tier --recursivecd app-tier
npm install
ls —-> You will see ‘index.js’ file. We have to start that.
pm2 start index.js
You will see the status as ‘online’
Now use
pm2 startup
To save the configuration use:
pm2 save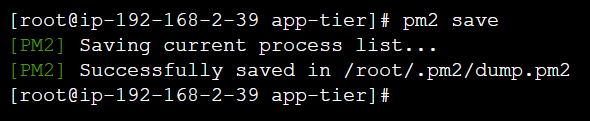
Verify that the application is running by executing
curl http://localhost:4000/healthIt should return: This is the health check.

With this we have completed the application configuration.
Creation of Internal Load Balancer for App Tier
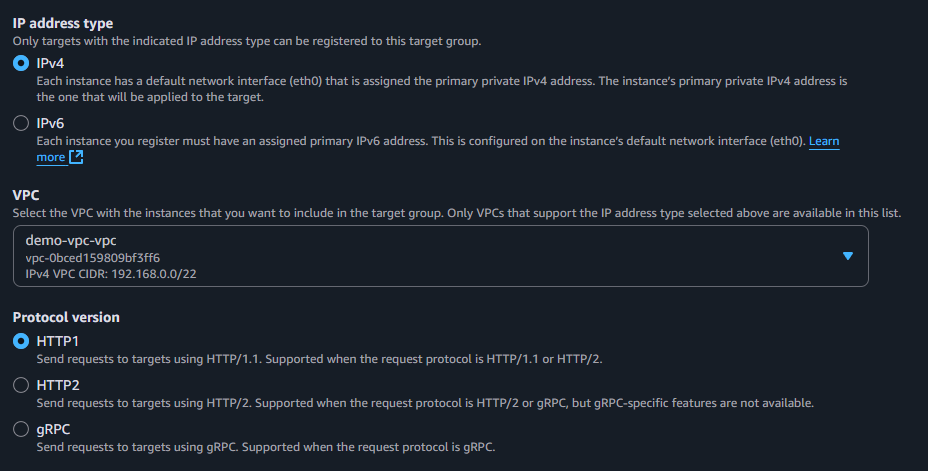
Go to EC2 > target groups and click on create target group
Select the below options:
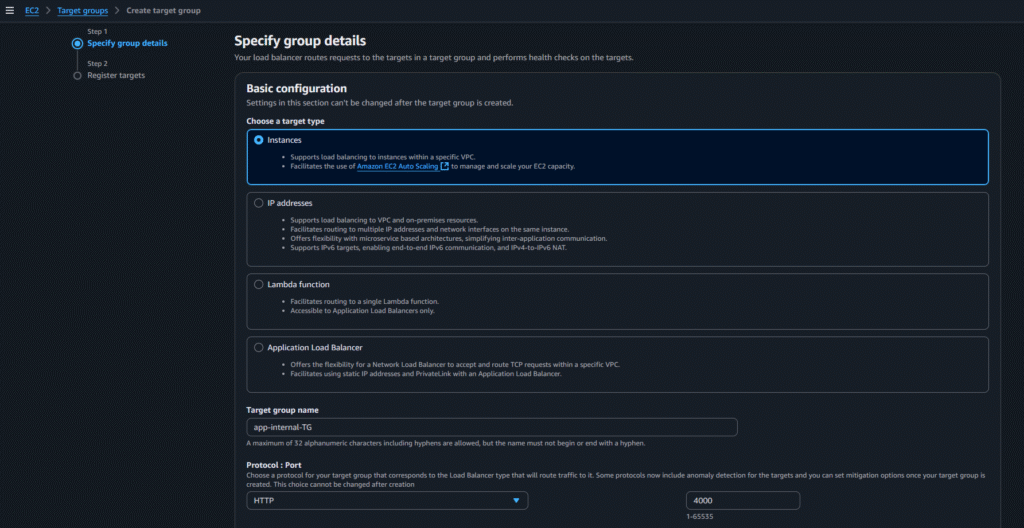

Then click on Next

Select the instance, click on include as pending below and then click on create target group
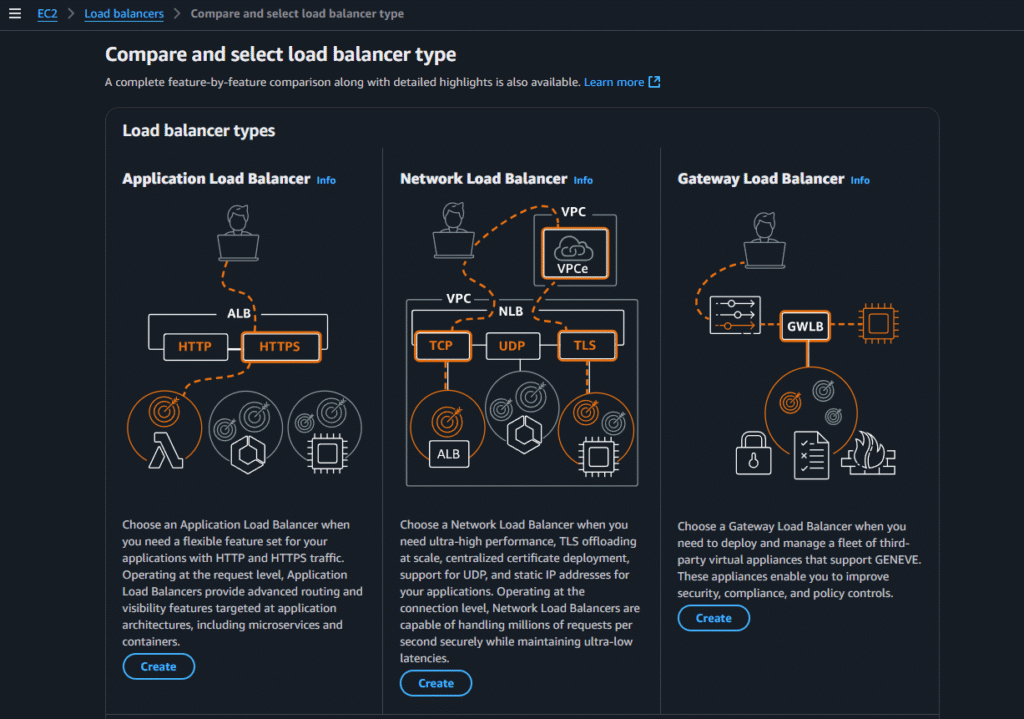
Now go to Load Balancers and click on create load balancer:
Select Application Load Balancer
Now select the following options:


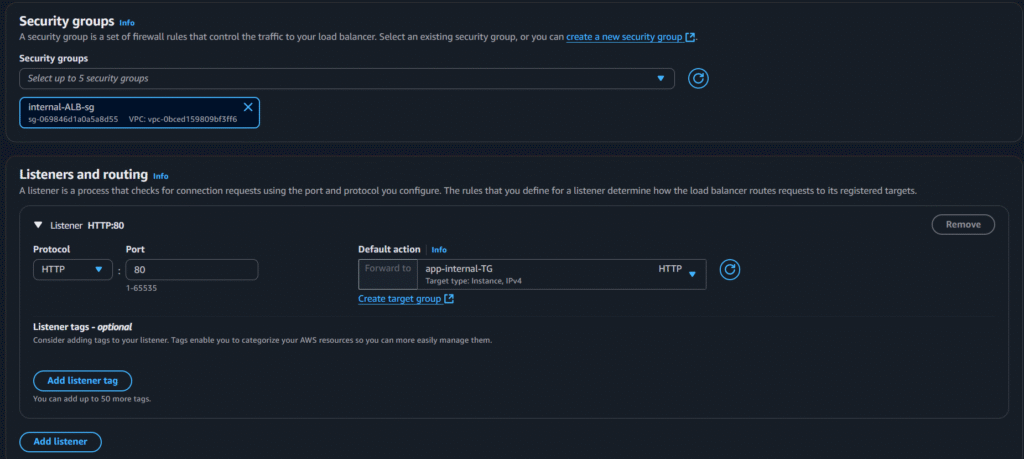
Now click on create load balancer
Goto the cloned code folder in local system —-> Open nginx.conf file and in the end of the file you will see something like below;
#proxy for internal lb
location /api/{
proxy_pass http://[REPLACE-WITH-INTERNAL-LB-DNS]:80/;
}
Replace the LB DNS in the above

Now upload the updated nginx.conf file to the S3 bucket:

#6.Web Tier Setup
Deploy Web-tier resources, including the configuration of an external load balancer
Creation of Instance and setup for Web Tier


After selecting those options click on launch instance
In this instance we will do the Web Server and Nginx Setup. Execute the below commands;
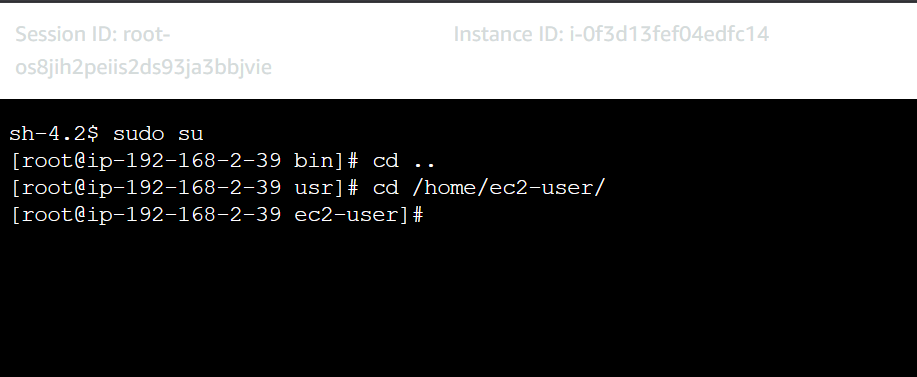
sudo -su ec2-user
cd /home/ec2-user
curl -o- https://raw.githubusercontent.com/avizway1/aws_3tier_architecture/main/install.sh | bash
source ~/.bashrc
nvm install 16
nvm use 16
Use the path of your code:
aws s3 cp s3://<S3 Bucker Name>/application.code/web-tier/ web-tier --recursivecd web-tier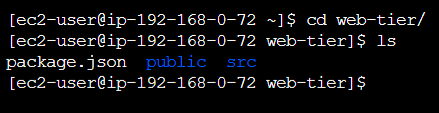
npm install
npm run build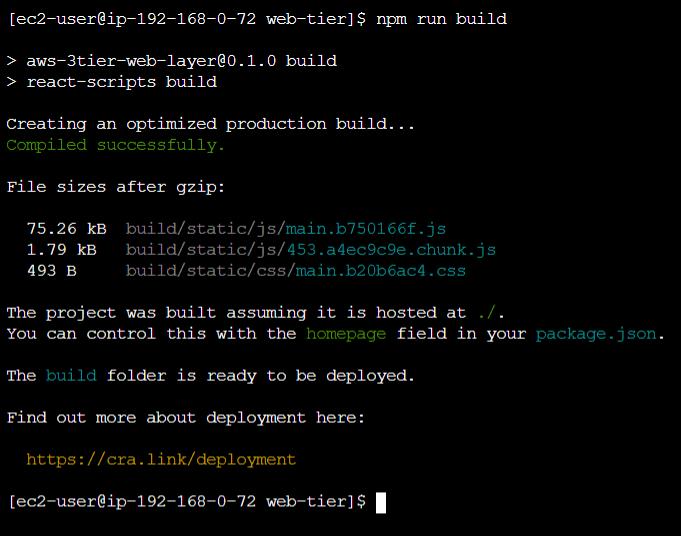
Install Nginx:
sudo amazon-linux-extras install nginx1 -y
Update Nginx configuration:
cd /etc/nginx
ls
Replace the nginx.conf file with the one we uploaded to the bucket
sudo rm nginx.confsudo aws s3 cp s3://<S3 Bucker Name>/application.code/nginx.conf .
Restart the nginx service:
sudo service nginx restart
chmod -R 755 /home/ec2-user
sudo chkconfig nginx on
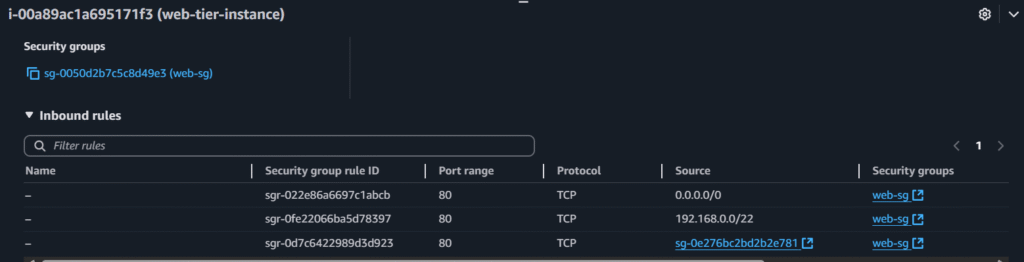
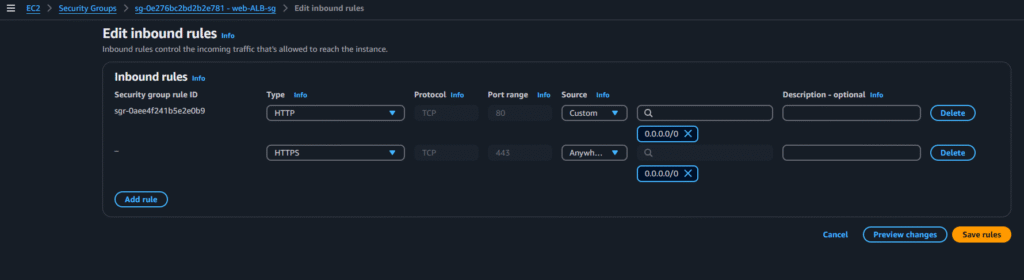
Add this inbound rule to the web-tier-instances’ security group to check whether the app is running or not:
Now paste the instances’ public ip in a browser to check the app
Creation of Internal Load Balancer for Web Tier
Go to EC2 > target groups and click on create target group
Select the below options:

Then click on Next

Select the instance, click on include as pending below and then click on create target group
Now go to Load Balancers and click on create load balancer:
Select Application Load Balancer
Now select the following options:


Now click on create load balancer
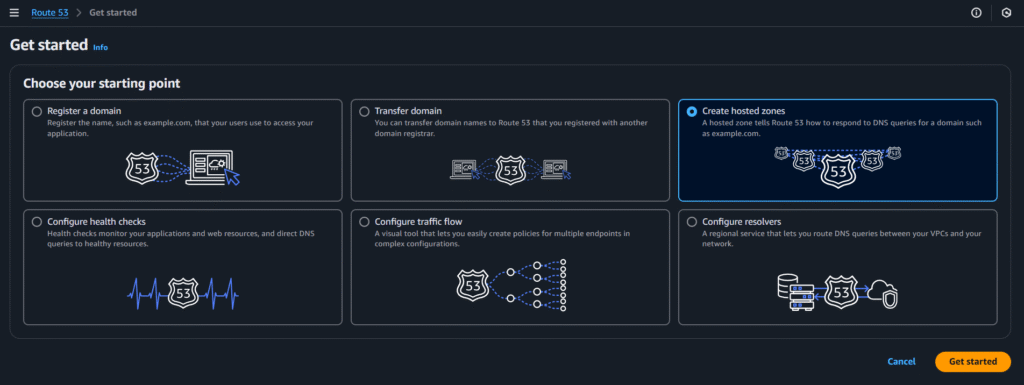
#7.Using Custom Domain Using Route 53
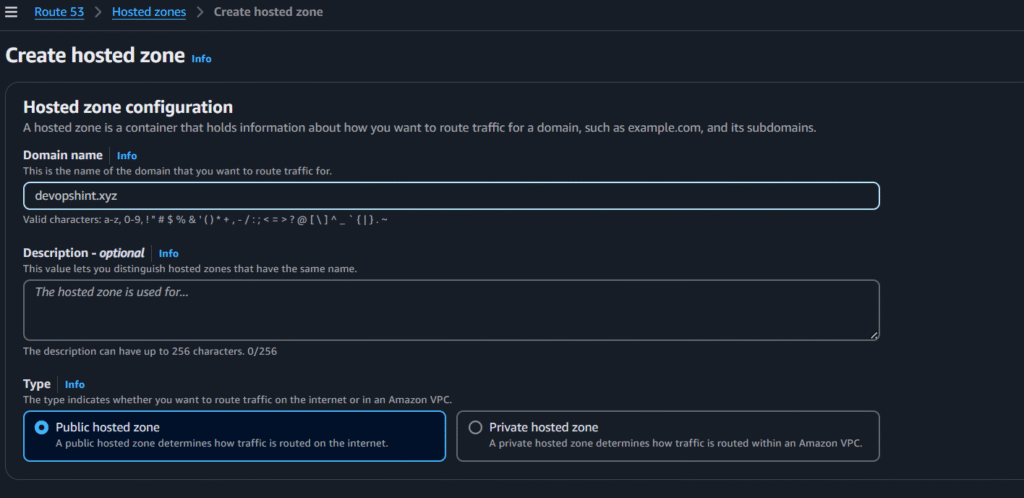
Click on Create Hosted Zones
Select below options and click on create:

Now copy and paste the NS values in your custom domain
Here i’m using godaddy

Now click on create record
select the below options and click on create records:

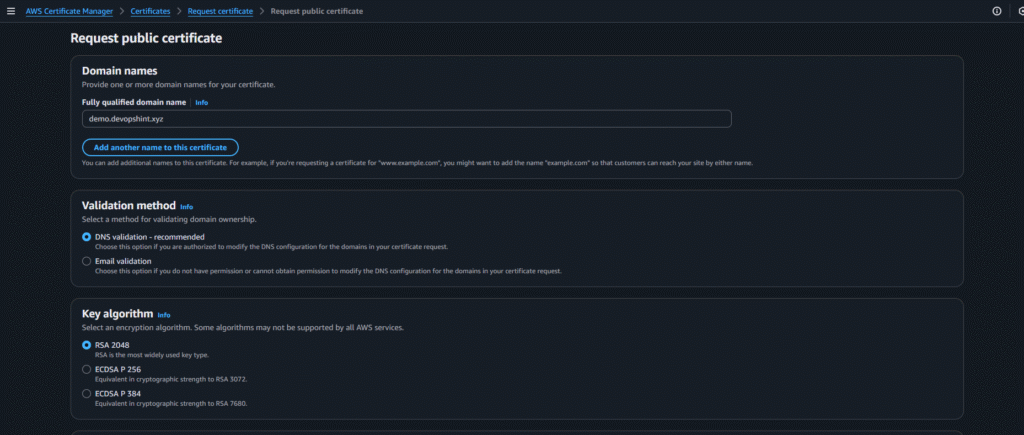
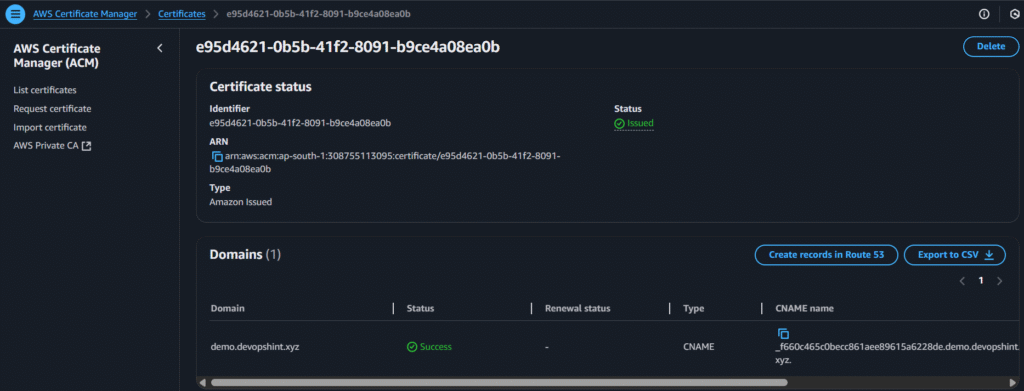
Now go to Certificate manager and click on request:


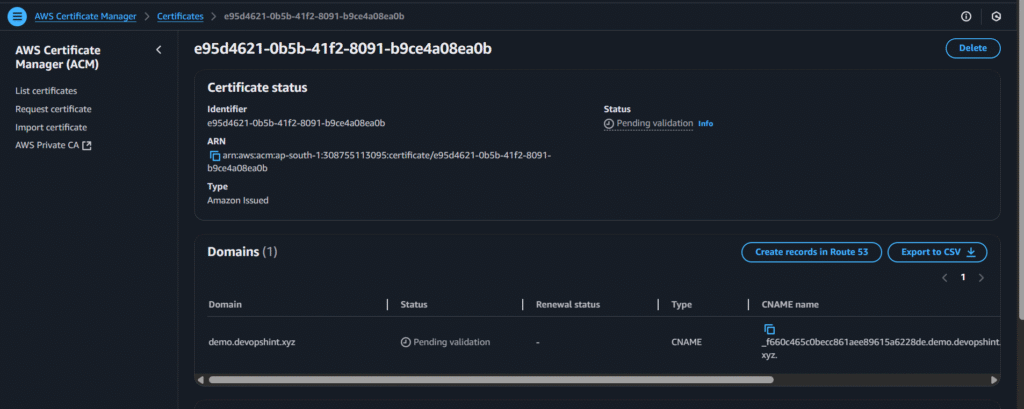
After creating click on create records in Route 53:
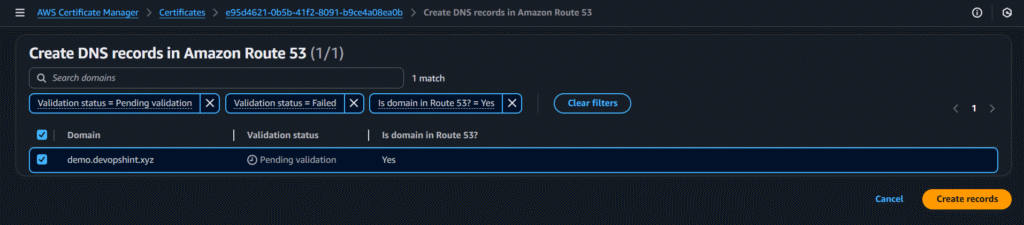
click on create records
After some minutes you’ll see the issued status
Now go to the web-external-load balancer and add the HTTPS rule in inbound rules:
Now go to web-external-load balancer and go to Listeners and Rules, click on add listener and add the below options and click on add:


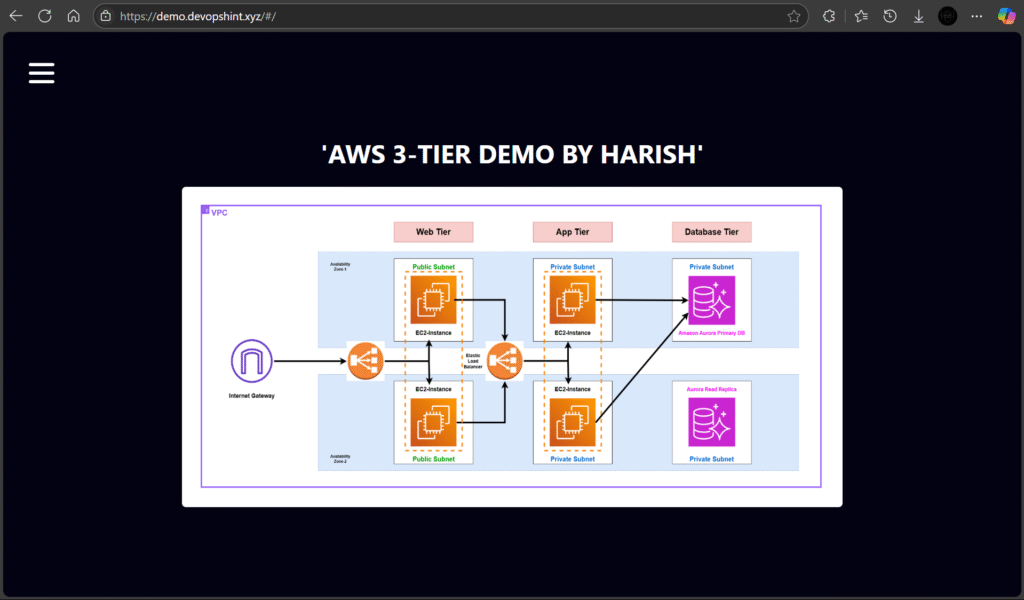
Now use the custom domain to access the application:
#8.Creating AutoScaling Group
Web-tier-ASG
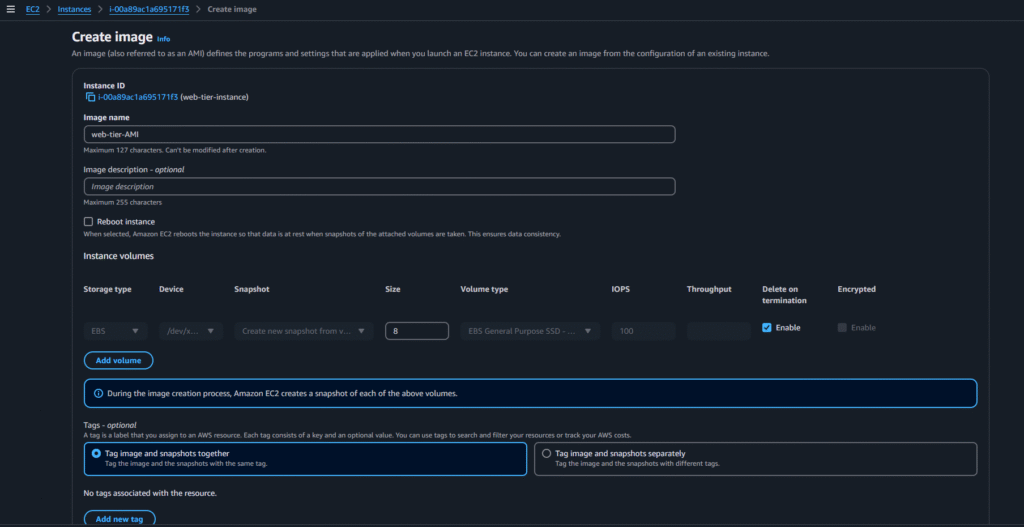
Select the web-tier instance > actions > images and templates > create image:

Select the below options and click on create AMI:
Now go to Launch Template and click on create launch template and select below options:


After selecting those options click on create launch template
Now go to Autoscaling group and click on Create Auto Scaling group and select below options:


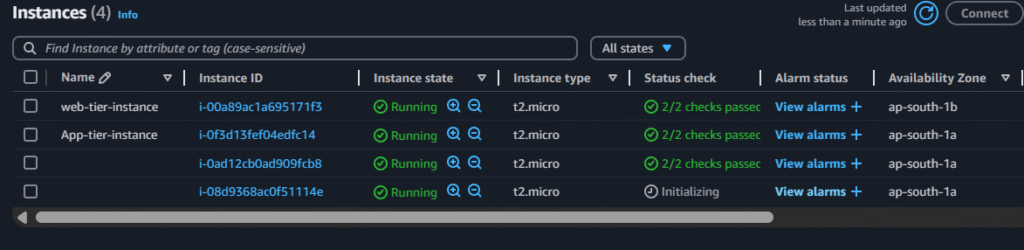
After creating Autoscaling group we can see a new instance got created as i gave the min desired capacity as 1:

Now do the same for the App-tier-ASG
App-tier-ASG
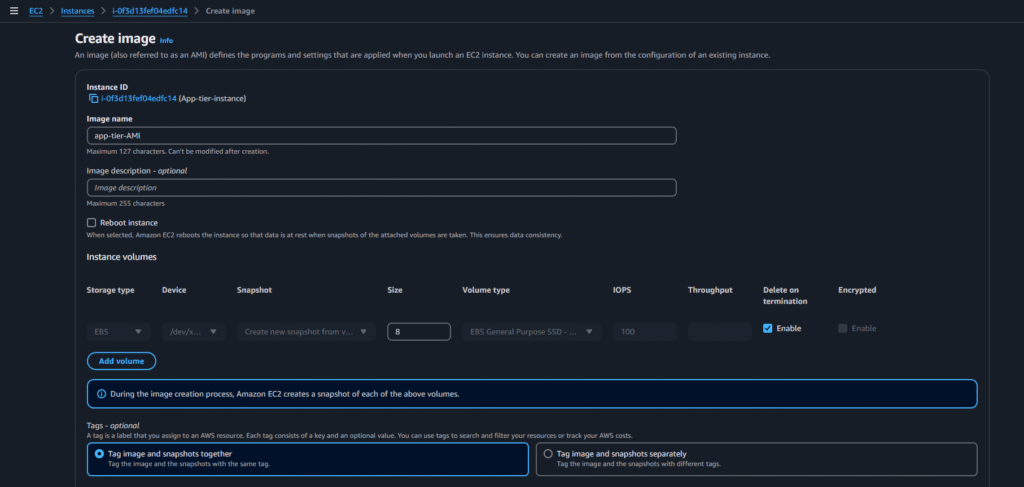
Select the app-tier instance > actions > images and templates > create image:
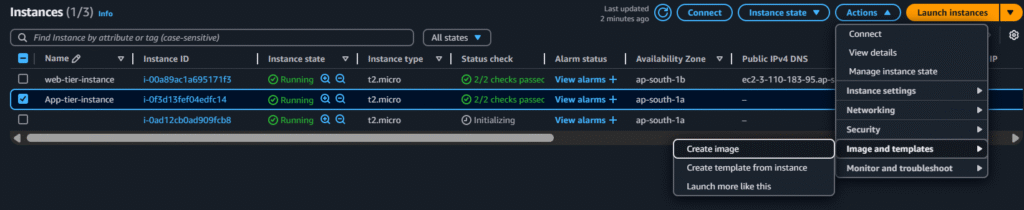
Select the below options and click on create AMI:
Now go to Launch Template and click on create launch template and select below options:
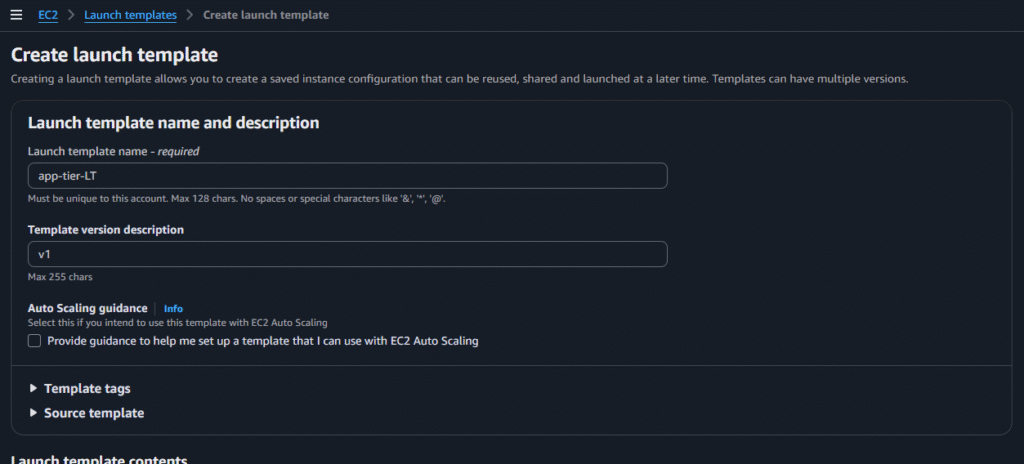


After selecting those options click on create launch template
Now go to Autoscaling group and click on Create Auto Scaling group and select below options:

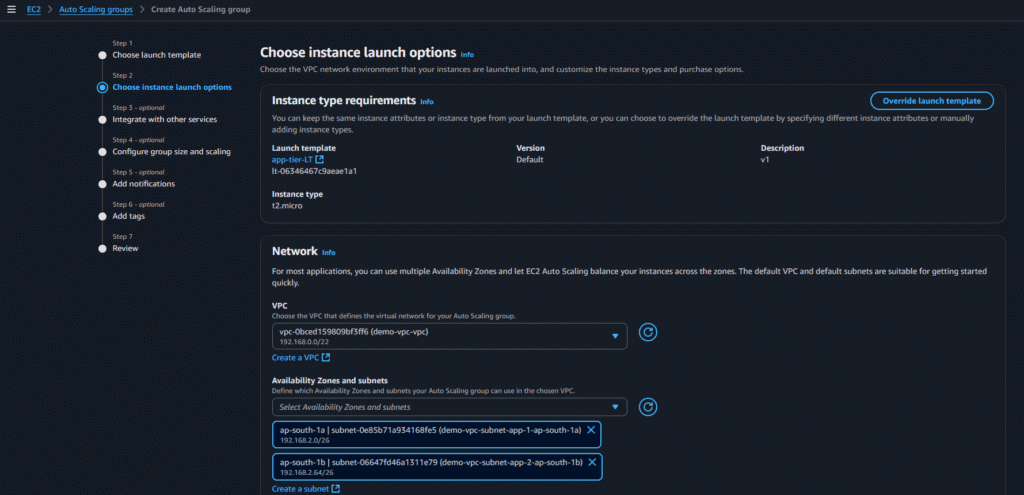


After creating Autoscaling group we can see a new instance got created as i gave the min desired capacity as 1:
Security Considerations
- IAM Roles and Policies: Used instead of hardcoding credentials in EC2 or applications.
- Security Groups & NACLs: Used to restrict access across tiers.
- ACM: Issues SSL certificates for secure communication.
- S3 Bucket Policies: Enforce secure access to web content and logs.
Scalability and High Availability
- EC2 Auto Scaling can be implemented in both Web and App tiers.
- Aurora supports read replicas and multi-AZ deployments.
- ELBs ensure fault-tolerant and balanced traffic distribution.
Conclusion:
By implementing a 3-tier architecture on AWS, you achieve a clean separation of concerns, scalability, and improved security. AWS provides all the necessary services—networking, compute, storage, DNS, certificates, and identity management—to build a production-ready application stack.
This architecture is ideal for web apps, SaaS platforms, and enterprise applications that require a modular, scalable, and secure setup.
Related Articles:
Multi Tier WebApp with Python Django and PostgreSQL
Reference: