In this article we are going to cover how to configure Postfix with Gmail on Ubuntu/How to Send alerts to mail inbox from Linux Server
Switch to root user using below command:
sudo su
Table of Contents
Step#1:Install Postfix on Ubuntu
Install Postfix using below command:
apt-get install libsasl2-modules postfix
There will be prompts asking General type of mail configuration. Select Internet Site:
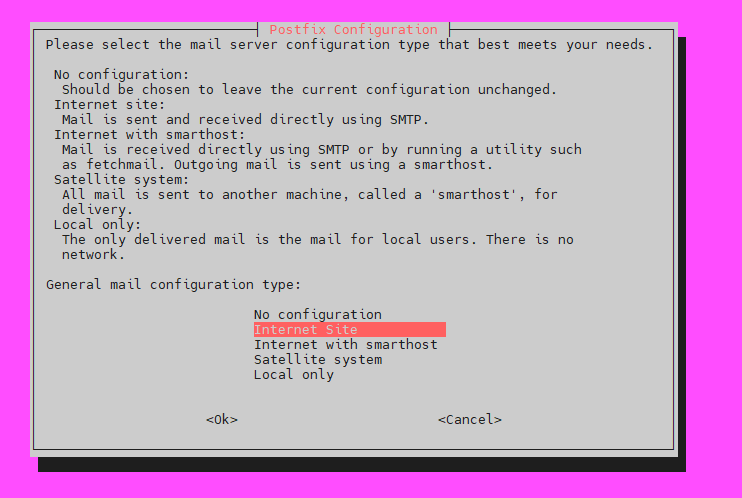
Enter the fully qualified name of your domain.
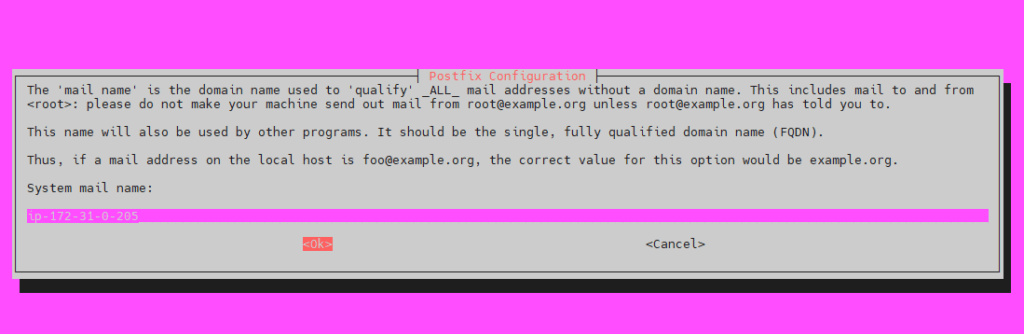
Step#2: Update Postfix main.cf file
After installation of postfix, ensure that the myhostname parameter is configured As shown below
root@ip-172-31-0-205:/home/ubuntu# cat /etc/postfix/main.cf | grep ^myhostname
Output:
myhostname = ip-172-31-0-205.ap-south-1.compute.internal
Step #3:Generate Google App Password for Postfix
We need to generate an App password
Log in to your email, then click the following link: Manage your account access and security settings.
Scroll down to “Signing into Google” and click 2-Step Verification. You may be asked for your password and a verification code before continuing. Ensure that 2-Step Verification is enabled.
Click the following link to Generate an App password for Postfix:
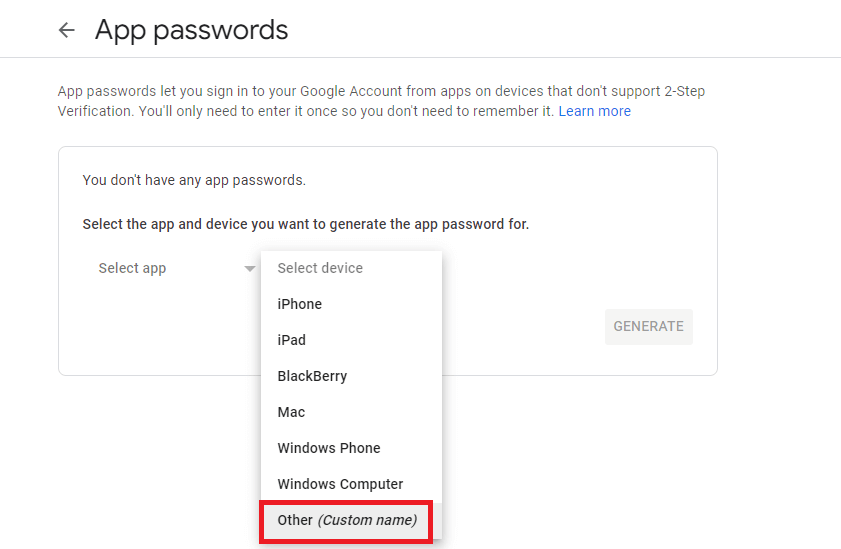
Click Select app and choose Other (custom name) from the dropdown. Enter “Postfix” and click Generate.
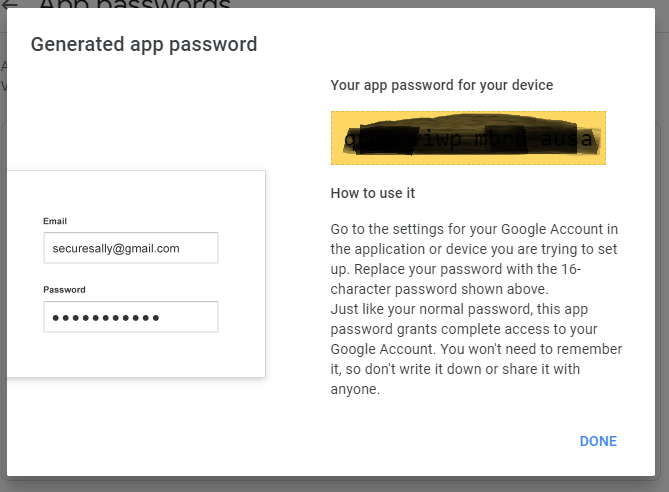
After generate password you will see like this save your password in secure place
Step #4:Add Gmail Username and App Password to Postfix configuration
You need to add your username and password in this file sasl_passwd to this directory /etc/postfix/sasl/
Create /etc/postfix/sasl/sasl_passwd file and add your gmail ID and password we have just created using below command
root@ip-172-31-0-205:/etc/postfix/sasl# sudo nano sasl_passwd
And add your gmail ID and password as shown in below
[smtp.gmail.com]:587 [email protected]:logwrbyaqcmwslqp
If you wants to check your gmail Id and password then run the below command:
root@ip-172-31-0-205:/etc/postfix/sasl# cat /etc/postfix/sasl/sasl_passwd
[smtp.gmail.com]:[email protected]:logwrbyaqcmwslqp
root@ip-172-31-0-205:/etc/postfix/sasl#
create the hash file for Postfix using the postmap command
postmap /etc/postfix/sasl/sasl_passwd
After execute postmap command you should have a new file named sasl_passwd.db in the /etc/postfix/.
root@ip-172-31-0-205:/etc/postfix/sasl# ls
sasl_passwd  sasl_passwd.db
root@ip-172-31-0-205:/etc/postfix/sasl#
Step #5:Secure Your Postfix Hash Database and Email Password Files
chown root:root /etc/postfix/sasl/sasl_passwd /etc/postfix/sasl/sasl_passwd.db
chmod 0600 /etc/postfix/sasl/sasl_passwd /etc/postfix/sasl/sasl_passwd.db
Step #6:Configure Relay Host postfix with gmail
Modify the main.cf file using below command:
sudo nano /etc/postfix/main.cf
Set the relayhost
relayhost = [smtp.gmail.com]:587
If yu want to check your relayhost set or not then run the below command and you will get output like this:
root@ip-172-31-0-205:/etc/postfix# cat /etc/postfix/main.cf | grep -i ^relayhost
relayhost = [smtp.gmail.com]:587
root@ip-172-31-0-205:/etc/postfix#
Step #7:Add Custom Configuration
Open main.cf file and this below line end on the file
sudo nano /etc/postfix/main.cf
# Enable SASL authentication
smtp_sasl_auth_enable = yes
# Disallow methods that allow anonymous authentication
smtp_sasl_security_options = noanonymous
# Location of sasl_passwd
smtp_sasl_password_maps = hash:/etc/postfix/sasl/sasl_passwd
# Enable STARTTLS encryption
smtp_tls_security_level = encrypt
# Location of CA certificates
smtp_tls_CAfile = /etc/ssl/certs/ca-certificates.crt
You need to restart your postfix
systemctl restart postfix
Step #9:Send Email using sendmail
Lets test whether our SMTP server
sendmail [email protected]
From: [email protected]
Subject: Test mail
Testing Email
.
In this article we have covered how to configure Postfix with Gmail on Ubuntu.
Related Articles:
How to Configure Sendmail to Relay Emails using Gmail SMTP on Ubuntu 18.04
Reference:
Just what I needed no effort worked right away
The meaning of the sender_canonical is missing in this tutorial.
I see automated email from systema like root@servername is refused by SMTP server.
The file sender_canonical makes the trick with lines like:
username@servername [email protected]
www-data@servername [email protected]
root@servername [email protected]
It needs to be postmapped.
Thank you so much, for the crystal clear steps.
Just what I needed
Wow excellent tutorial!!!
Thanks for your tutorial, works great 🙂
Nice! Dude, now yes i have SSL and send free email!
Thank you