In this article, We are going to cover How to Install Zabbix on Ubuntu 20.04/18.04/16.04 LTS
Table of Contents
Introduction
Zabbix is free and open source monitoring tools which is used to monitor the System resources, applications, Services, Databases,etc.,
Here we are installing Zabbix Server 5.0 Version.
Prerequisites
- Ubuntu Server with 20.04/18.04/16.04 LTS
- 1 CPU and 2 GB RAM
- Firewall Ports 10050, 10051, 80
1. Download and Add Zabbix Repository
Enter below command to download and add Zabbix repository as per your Ubuntu Version
Ubuntu 20.04 LTS
Run below commands to add Zabbix Repository on Ubuntu 20.04 LTS
sudo https://repo.zabbix.com/zabbix/5.0/ubuntu/pool/main/z/zabbix-release/zabbix-release_5.0-1%2Bfocal_all.deb
sudo apt update
sudo dpkg -i zabbix-release_5.0-1+focal_all.deb
Ubuntu 18.04 LTS
Run below commands to add Zabbix Repository on Ubuntu 18.04 LTS
wget https://repo.zabbix.com/zabbix/5.0/ubuntu/pool/main/z/zabbix-release/zabbix-release_5.0-1%2Bbionic_all.deb
sudo apt update
sudo dpkg -i zabbix-release_5.0-1+bionic_all.deb
Ubuntu 16.04 LTS
Run below commands to add Zabbix Repository on Ubuntu 16.04 LTS
wget https://repo.zabbix.com/zabbix/5.0/ubuntu/pool/main/z/zabbix-release/zabbix-release_5.0-1%2Bxenial_all.deb
sudo apt update
sudo dpkg -i zabbix-release_5.0-1+xenial_all.deb
2. Install Zabbix on Ubuntu
Install Zabbix on Ubuntu 20.04/18.04/16.04 LTS using below command
sudo apt update
sudo apt -y install zabbix-server-mysql zabbix-frontend-php zabbix-apache-conf zabbix-agent
3. Secure Database
Once prompted,answer the below questions.
- Enter current password for root (enter for none): Press Enter
- Switch to unix_socket authentication [Y/n] : Y
- Change the root password? [Y/n]: Y
- New password: Enter Passoword
- Re-enter new password: Repeat Password
- Remove anonymous users? [Y/n]: Y
- Disallow root login remotely? [Y/n]: Y
- Remove test database and access to it?: Y
- Reload privilege tables now? [Y/n]: Y
4. Create Database for Zabbix
Create database named zabbix
sudo mysql -uroot -p'password -e "create database zabbix character set utf8 collate utf8_bin;"
Grant privileges to zabbix user
sudo mysql -uroot -p'password' -e "grant all privileges on zabbix.* to zabbix@localhost identified by 'password';"
set InnoDB stirct mode off
sudo mysql -uroot -p'password' zabbix -e "set global innodb_strict_mode='OFF';"
Load the default schema into zabbix database
sudo su
zcat /usr/share/doc/zabbix-server-mysql*/create.sql.gz | mysql -uzabbix -p'password' zabbix
5. Update Zabbix Configuration
Open the Zabbix configuration file
sudo nano /etc/zabbix/zabbix_server.conf
Update the below configuration
  DBHost=localhost
  DBName=zabbix
  DBUser=zabbix
  DBPassword=password
Restart and Enable Zabbix Server and Zabbix agent
sudo systemctl restart zabbix-server zabbix-agent
sudo systemctl enable zabbix-server zabbix-agent
6. Add Firewall Rule for Zabbix
Add http, 10050,10051 port in firewall
sudo firewall-cmd --permanent --add-service=httpsudo firewall-cmd --permanent --add-port=10050/tcpsudo firewall-cmd --permanent --add-port=10051/tcp
Reload the firewall rule
7. Setup Zabbix using Web Installer
Setup Zabbix using Web installer using below steps
Open your favorite browser and type the below URL
http://<ip>/zabbix
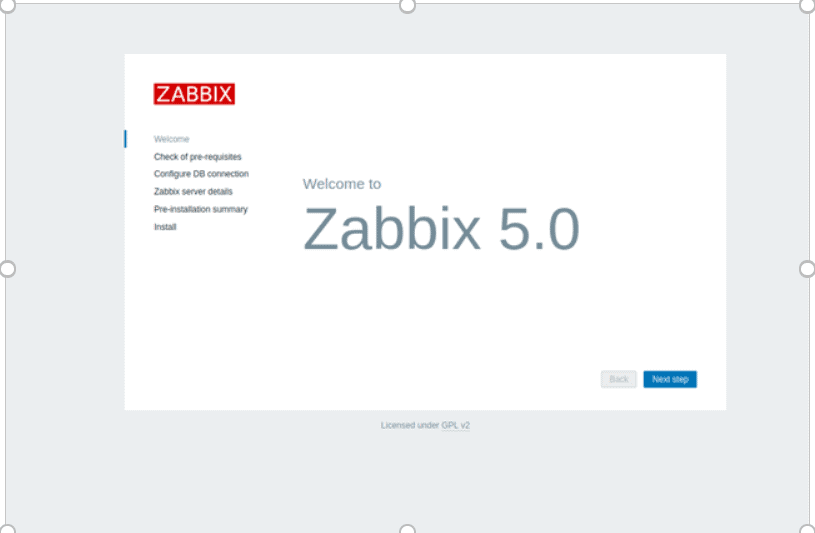
Click on Next Step
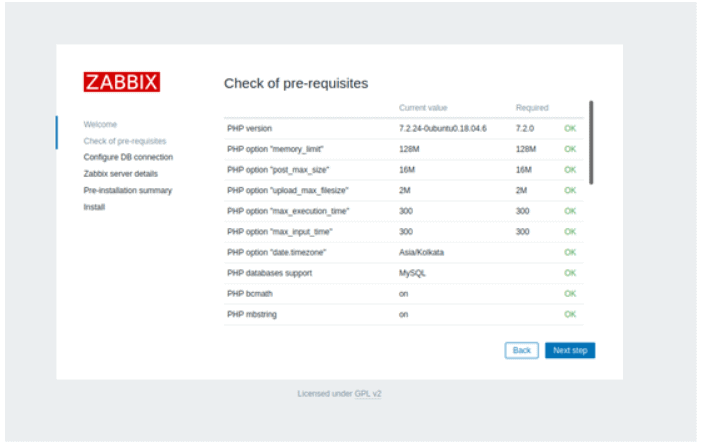
Click on Next step
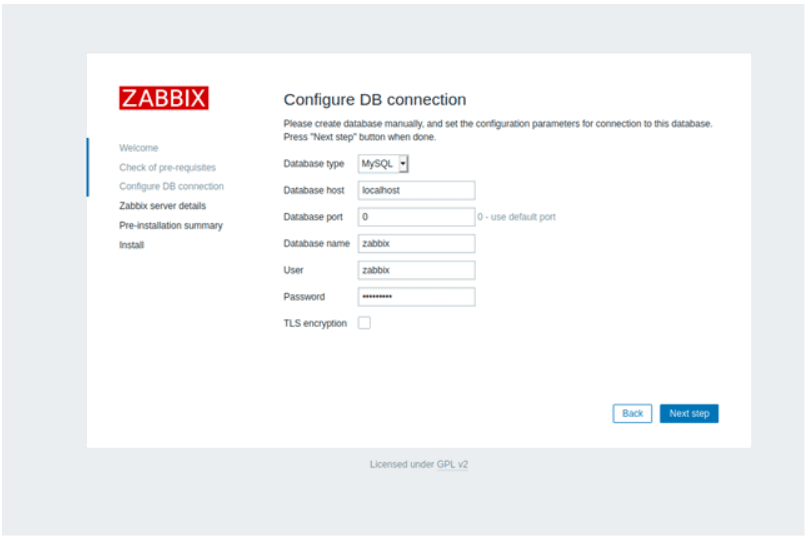
Enter the Zabbix Database Name, user and Password and click on Next Step
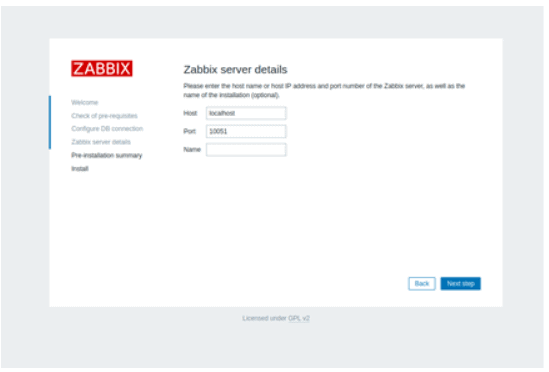
Enter Zabbix Host, port , Name and click on Next step

You will see Pre-Installation as shown and click on Next Step
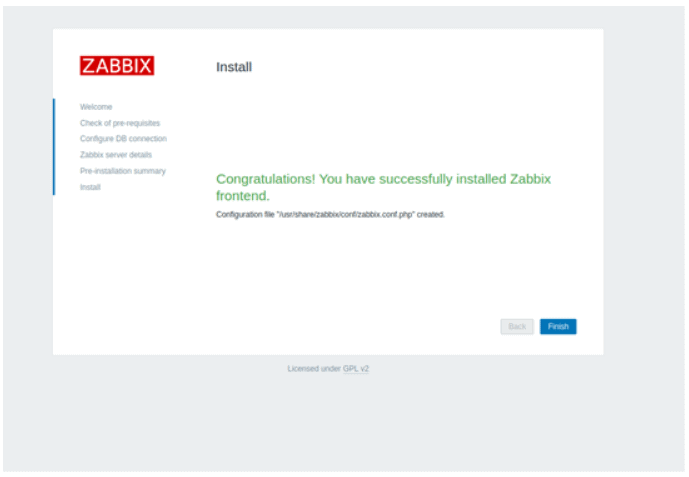
Click on Finish.
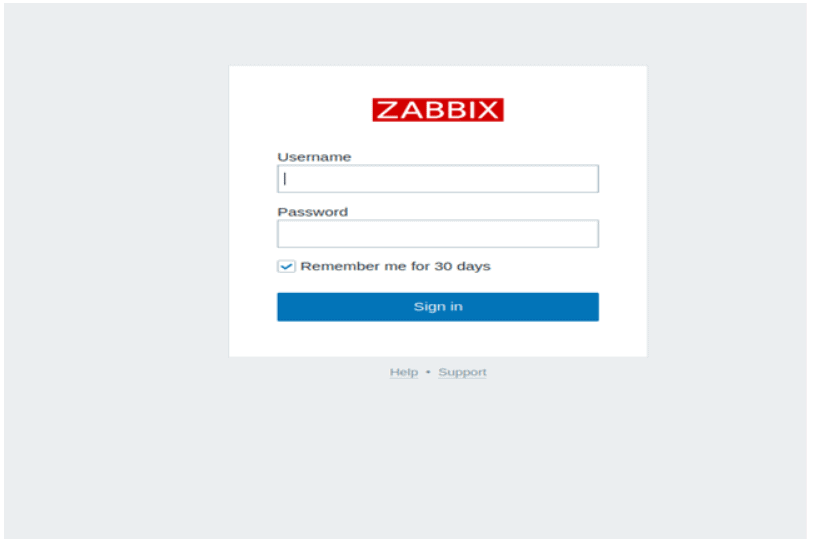
8. Access Zabbix
you will be redirected to Zabbix login page and prompts to enter Username and password to login. Use below username and password to login.
Username: Admin
Password: zabbix
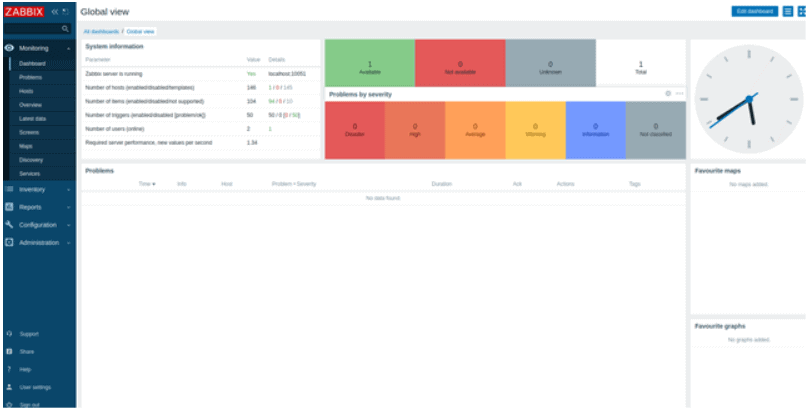
Once login Successful you will see like below Zabbix Dashboard
We have successfully covered Install Zabbix on Ubuntu
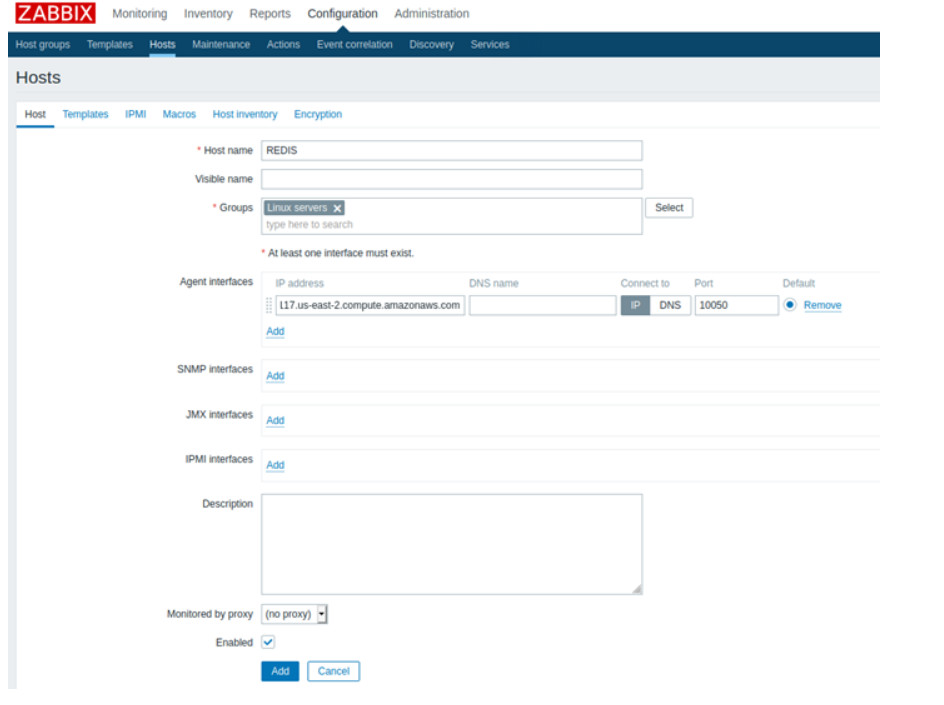
9. Add Redis in Zabbix to Monitor
Lets add Redis in Zabbix to Monitor, Go to Configuration tab then click on Hosts
Then click on create Host

In Groups choose Linux server ,add IP address and port Number
Conclusion
We have covered, Install Zabbix on Ubuntu 20.04/18.04/16.04 LTS, Configure Zabbix Server, setup Zabbix using web installer and Add Redis in Zabbix
Related Articles:
How to Install Netdata on Ubuntu 20.04 LTS
How to Install Netdata on CentOS 7
How to download and Install Nagios on Ubuntu 18.04/16.04 LTS
How to Install Netdata using Ansible Playbook on Ubuntu 18.04/16.04 LTS.
How to Install ELK Stack on Ubuntu
How to Install Splunk on Ubuntu 18.04/16.04 LTS
How to Install Splunk Enterprise on CentOS 7
Reference