In this article we will learn Secure SFTP Setup Using AWS Transfer Family. AWS Transfer Family offers fully managed support for Secure File Transfer Protocol (SFTP), enabling easy and secure file transfers directly into and out of Amazon S3. This article walks through setting up an SFTP server using AWS Transfer Family, covering everything from IAM configuration to user isolation, file transfers, and log verification.
Table of Contents
Prerequisites
- An active AWS Account.
- IAM permissions to create S3 buckets, roles, and AWS Transfer Family resources.
- FileZilla installed on local system.
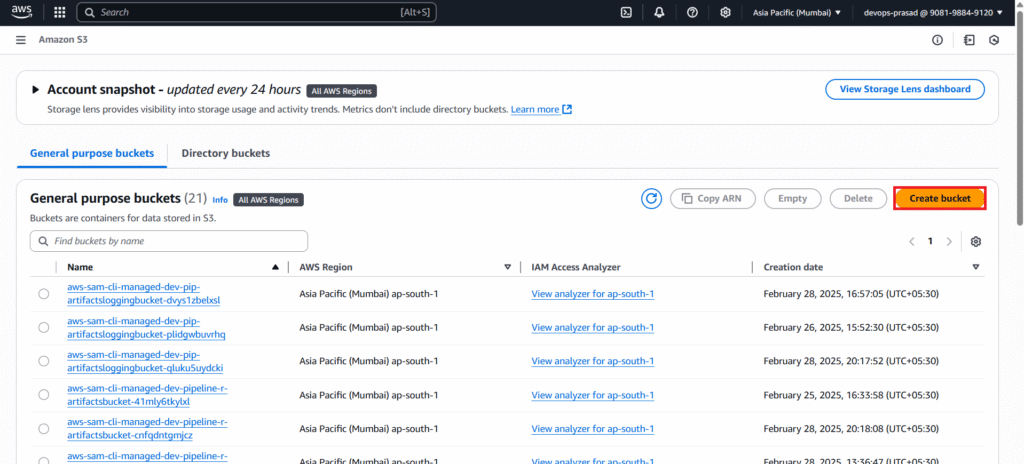
Step #1:Create an Amazon S3 Bucket
This S3 bucket will serve as the storage location for all files transferred via your SFTP server. Go to Amazon S3 and click on Create bucket.
Select Bucket type – General purpose. Enter the Bucket name you like my-sftp-transfer-bucket.

Keep default settings as it is and click on Create bucket.

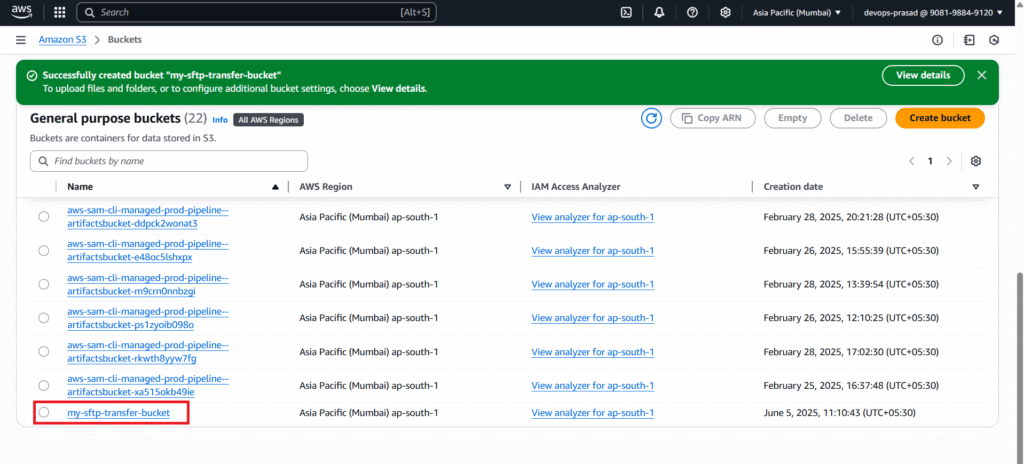
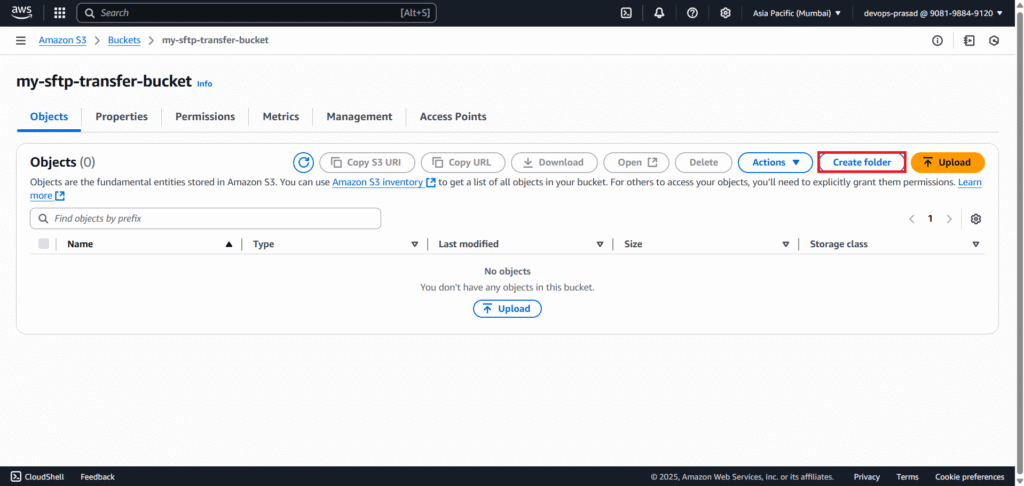
As you can see our my-sftp-transfer-bucket is created successfully. Now go inside the bucket.
Click on Create folder to create a folder in a bucket.
Give the Folder name like Public Folder and click on Create folder.

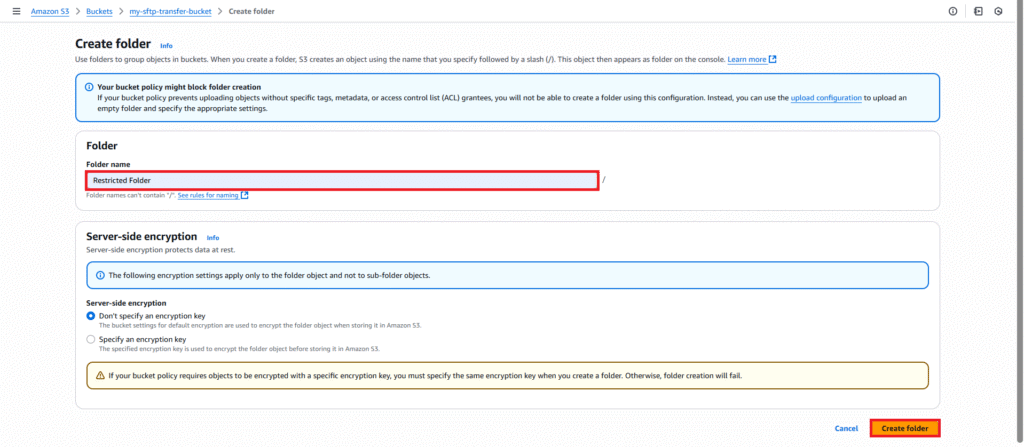
You can see our folder is created. Follow the same procedure to create another folder.

Enter the Folder name like Restricted Folder and click on Create folder.
Now both of our folders are created.

Step #2:Create an IAM Role for AWS Transfer Family
This IAM role is crucial. It allows the AWS Transfer Family service to access your S3 bucket on behalf of the connecting SFTP user.
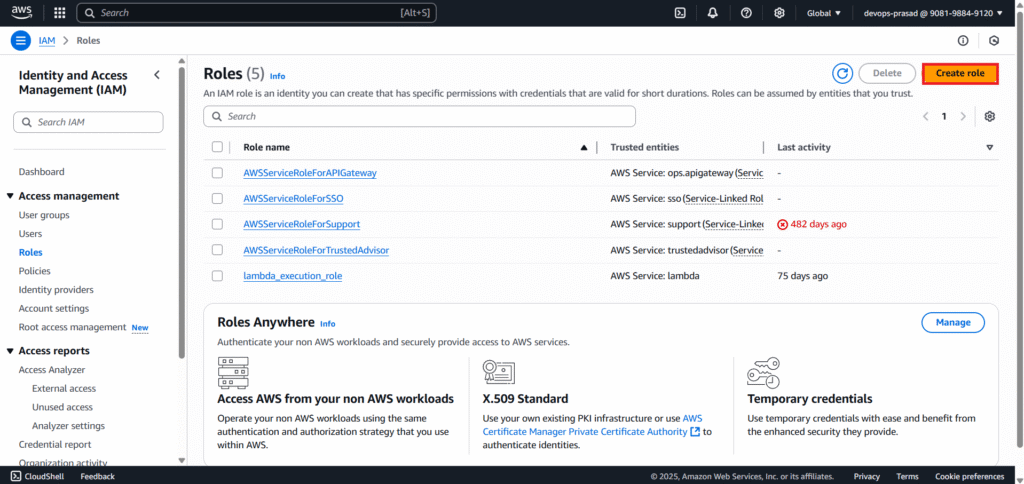
Navigate to IAM. And Go to Roles.

Click on Create role.
In Select trusted entity choose AWS service. Under Use case, find and select Transfer as a Service or use case. Click Next.

Search AmazonS3FullAccess and add it to policy. Click Next.

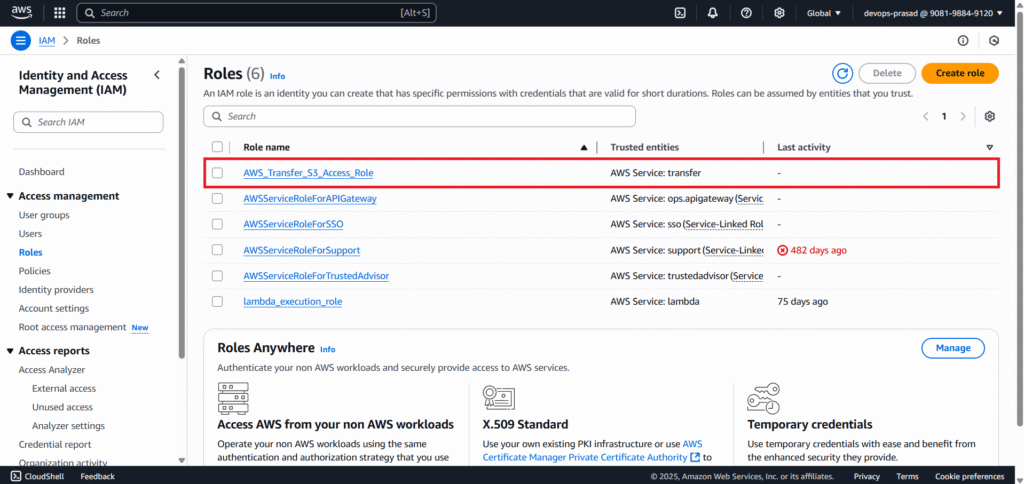
For Role name, enter AWS_Transfer_S3_Access_Role. (Optional) Add a description. Click Create role.

Now our role is created. You can see it below.
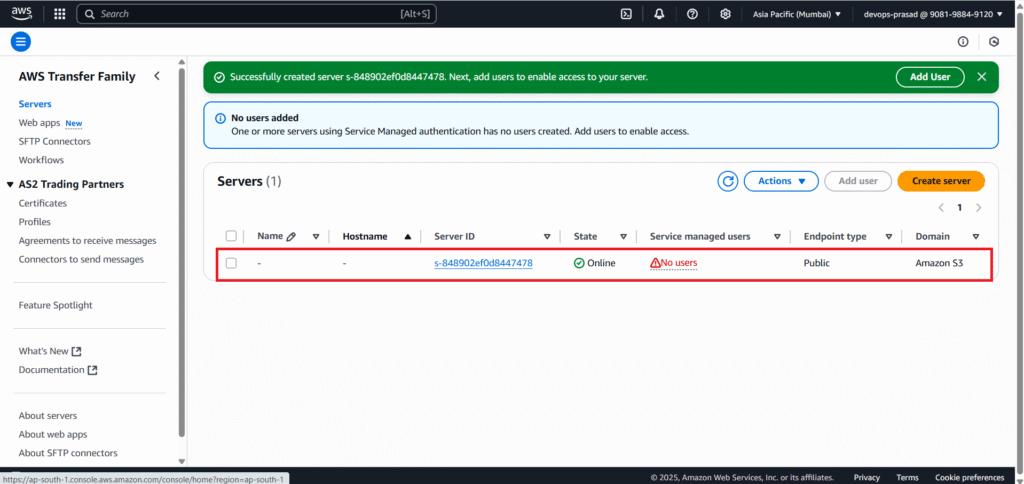
Step #3:Create the SFTP-Enabled Server in AWS Transfer Family
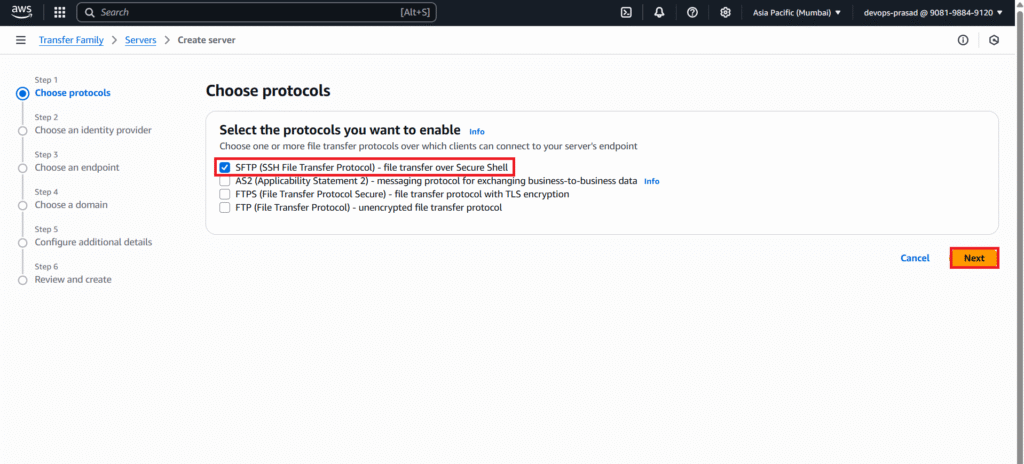
This creates the actual SFTP endpoint that your users will connect to. Navigate to AWS Transfer Family in the AWS Management Console.Click Create server.

Choose protocols:
- Select SFTP.
- Click Next.
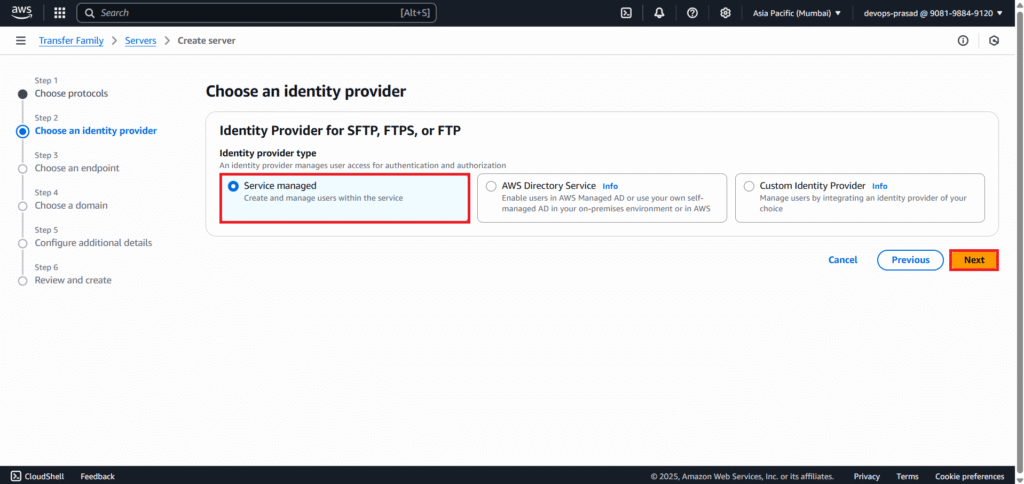
Choose an identity provider:
- Select Service managed. (This means AWS Transfer Family will store your user identities and SSH keys directly).
- Click Next.
Choose an endpoint:
- Select Publicly accessible.
- Click Next.

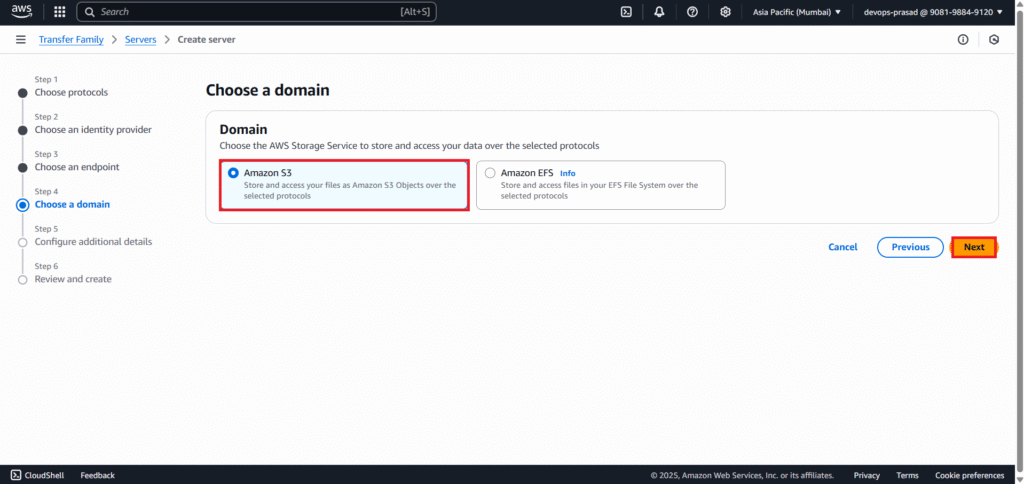
Choose a domain:
- Select Amazon S3.
- Click Next.
Configure additional details:
- Under CloudWatch logging, choose “Create a new role” or “Select an existing role” and allow it to auto-generate a log group. (This is highly recommended for monitoring). We have choosen Create a new role.
- You can leave other options as default for this setup.
- Click Next.

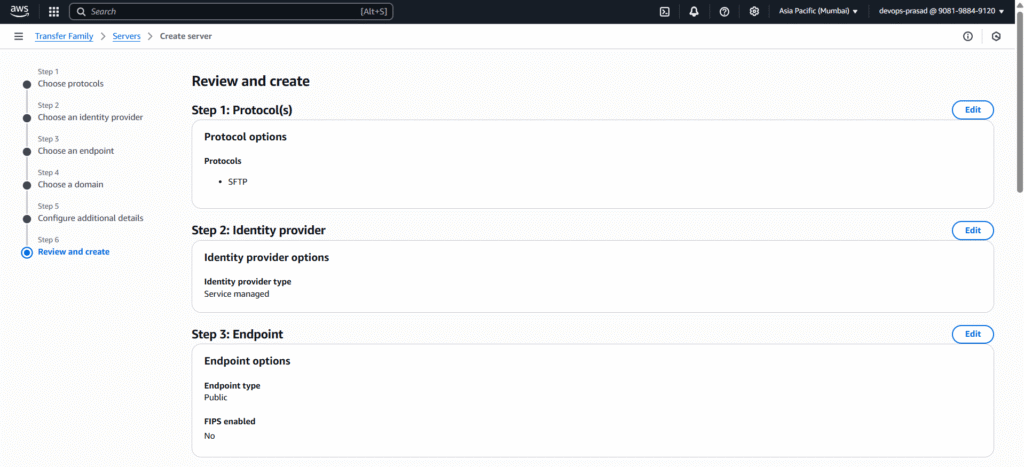
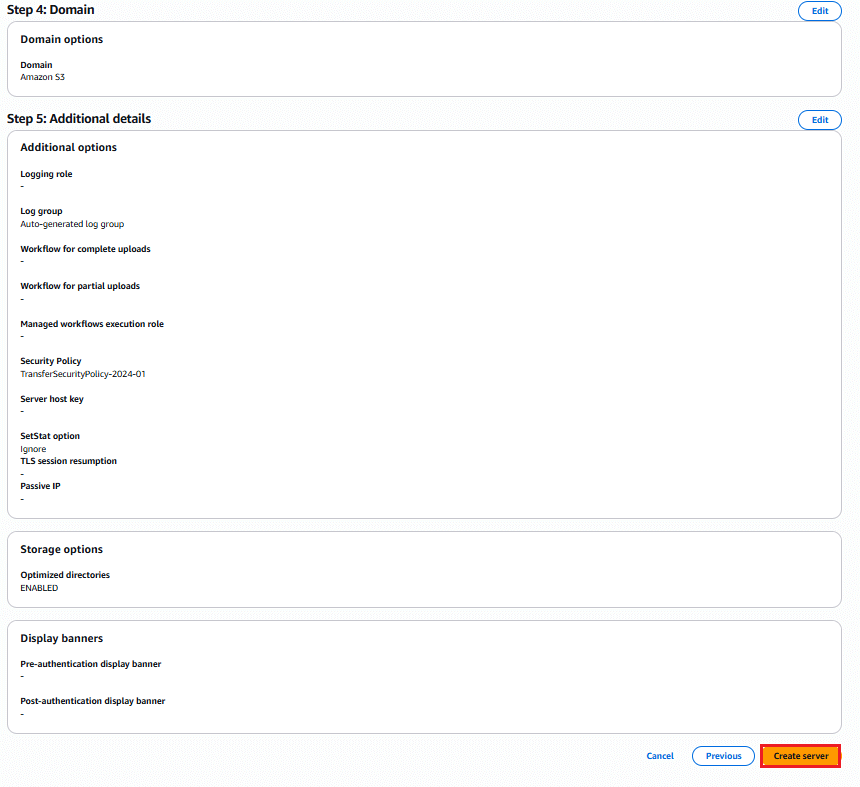
Review and create:
- Review all your selections.
- Click Create server.
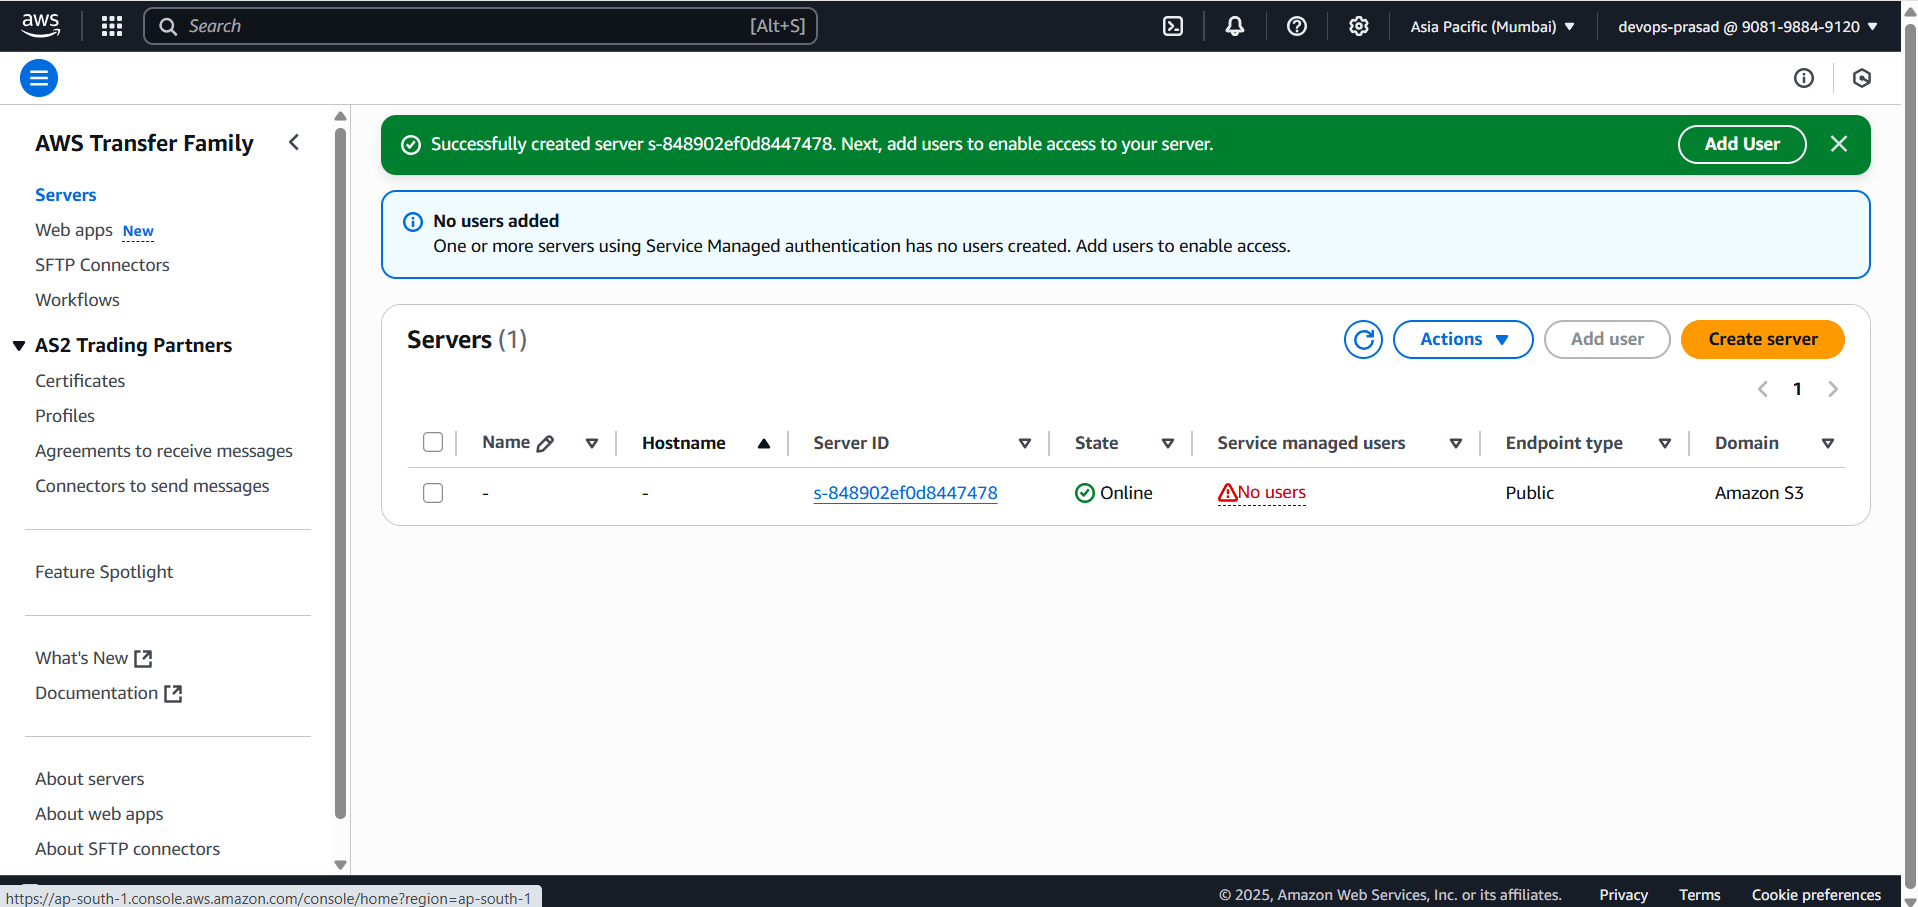
The server will take a few minutes to provision and show “Online“.
Step #4:Generate SSH Key Pair
If you don’t already have an SSH key pair, you need to generate one. This key pair is used for secure authentication to the SFTP server. You can use Powershell or VS Code terminal.
If you don’t have aws cli configured then configure it by running following command.
- AWS Access Key ID: Your_Access_key
- AWS Secret Access Key: Your_Secret_Key
- Default region name: Your_AWS_Region
- Default output format: json
aws configure
Verify if its configured or not.
aws sts get-caller-identity
Create the .ssh directory in your user profile if it doesn’t exist
Navigate to C:\Users\YourWindowsUsername\ (replace YourWindowsUsername with your actual username, e.g., Dell). Create a new folder named .ssh inside this directory.
mkdir .ssh
Generate the key pair. Press Enter for the passphrase twice
ssh-keygen -t rsa -b 2048 -f C:\Users\YourWindowsUsername\.ssh\sftp_transfer_key
You will find two files created:
- C:\Users\YourWindowsUsername\.ssh\sftp_transfer_key (Your private key – keep this secret!)
- C:\Users\YourWindowsUsername\.ssh\sftp_transfer_key.pub (Your public key)
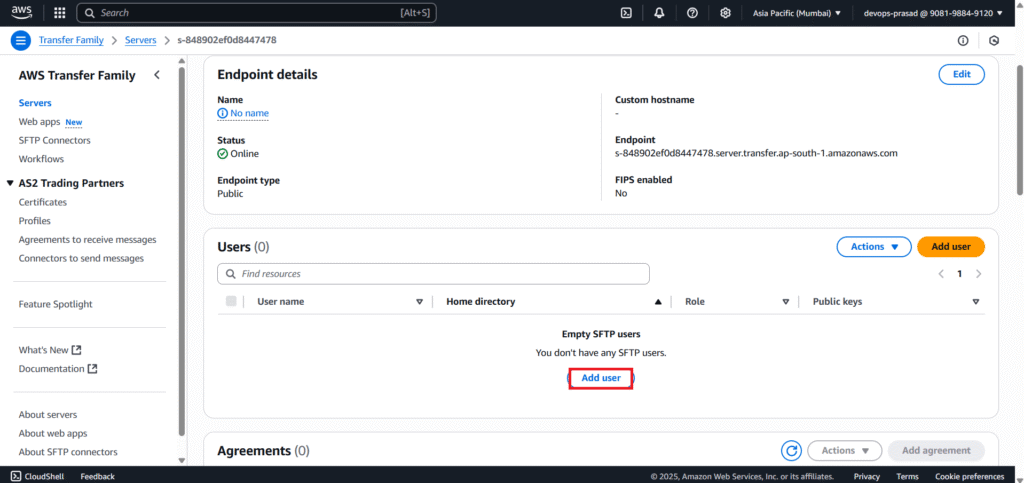
Step #5:Add a User to the SFTP Server
This step creates the SFTP user login associated with your S3 bucket and SSH key.
In the AWS Transfer Family console, select your SFTP server.
Click Add user.
User configuration:
- Username: Enter a desired username (e.g., devopshint).
- Role: Select AWS_Transfer_S3_Access_Role (the IAM role you created in Step 2).
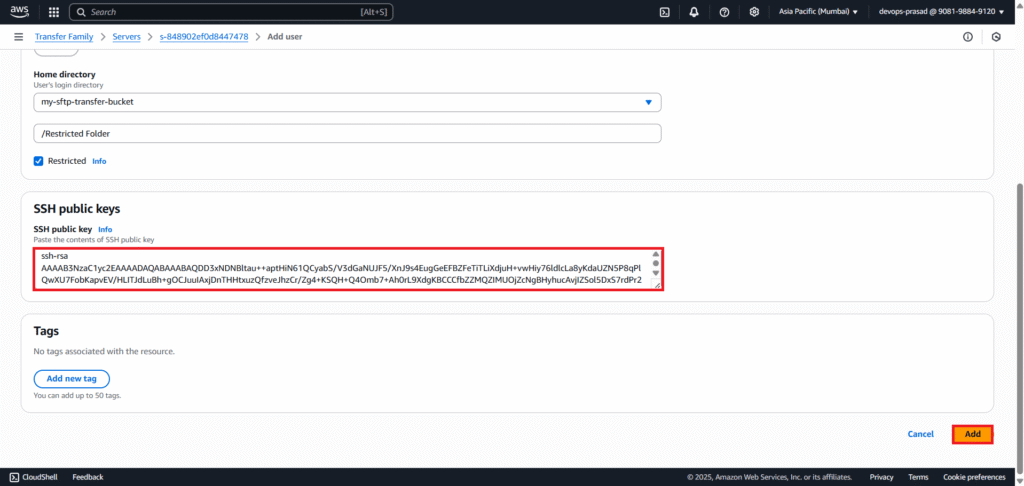
- Home directory:
- Select your S3 bucket: my-sftp-transfer-bucket.
- In the “Home folder” text box, type the path to the folder you want to restrict the user to:
/Restricted Folder(assuming you created this folder in S3).
- Restricted: Crucially, check the “Restricted” checkbox. This ensures the user cannot navigate outside
Restricted Folder.

Open your public key file using following command.
Get-Content C:\Users\YourWindowsUsername\.ssh\sftp_transfer_key.pub
Copy the entire content of the public key string. Paste it into the “Paste the contents of SSH public key” text area. Click Add.
Step #6:Connect and Test File Transfers
Get Server Endpoint:
- In the AWS Transfer Family console, select your SFTP server.
- Copy the Endpoint URL

Open the terminal and run the following command. Type yes when prompted about the host’s authenticity. You should see the sftp> prompt upon successful connection.
sftp -i C:\Users\YourWindowsUsername\.ssh\sftp_transfer_key devopshint@YOUR_SFTP_ENDPOINT
Create a dummy file locally (e.g., test_upload.txt in C:\Users\YourWindowsUsername\)

Upload it using following command. And See your uploaded file using ls command.
put C:\Users\YourWindowsUsername\test_upload.txt
ls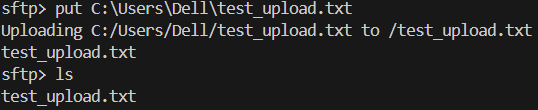
Now lets try using FileZilla. Connect with FileZilla

Open FileZilla. Go to File > Site Manager.

Click New site.
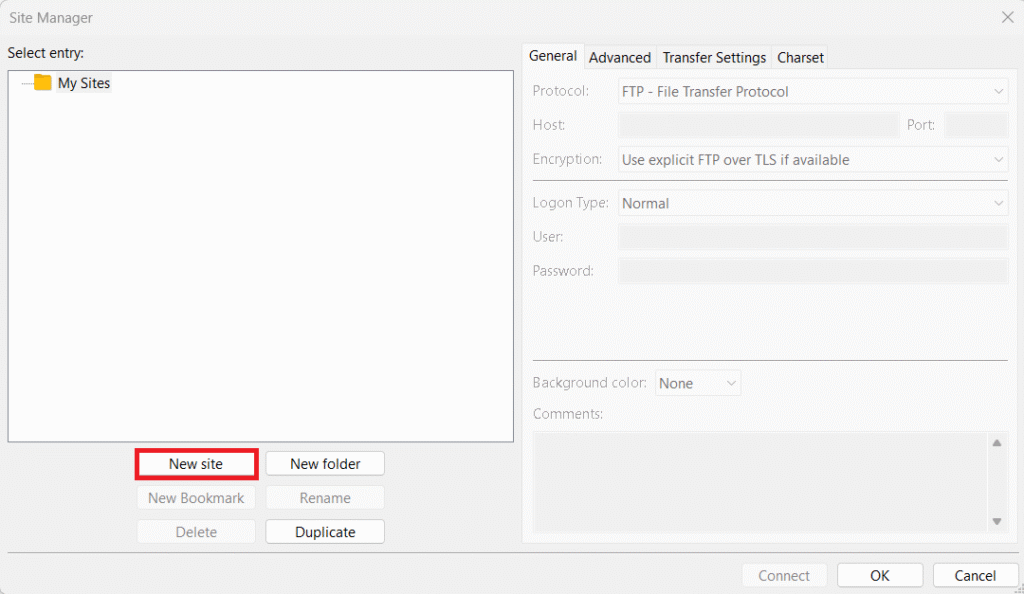
You can change site name e.g. AWS SFTP Transfer.
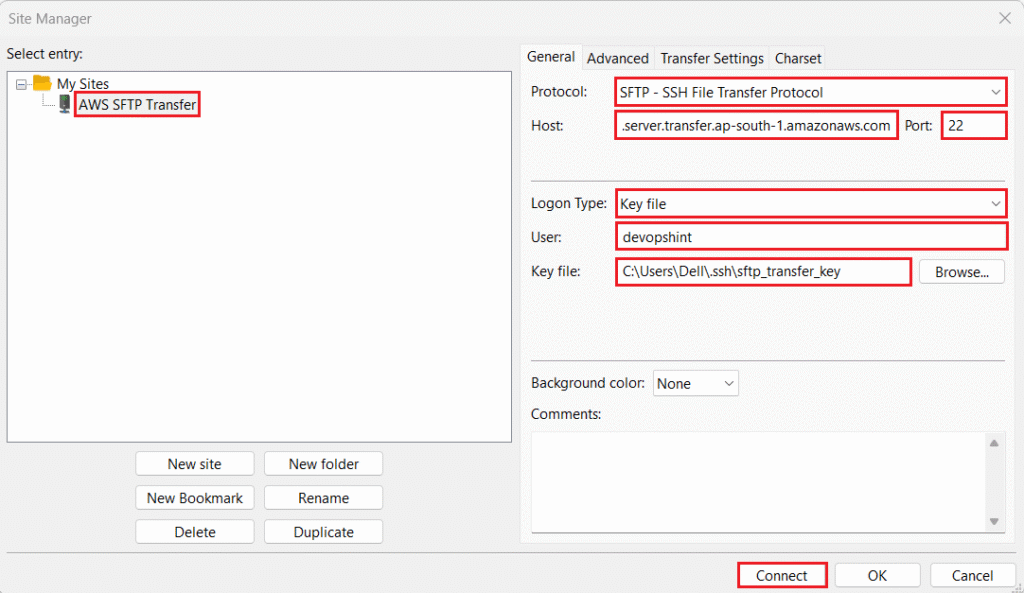
- Protocol: SFTP – SSH File Transfer Protocol.
- Host: Your server endpoint.
- Port:
- Logon Type:
- User:
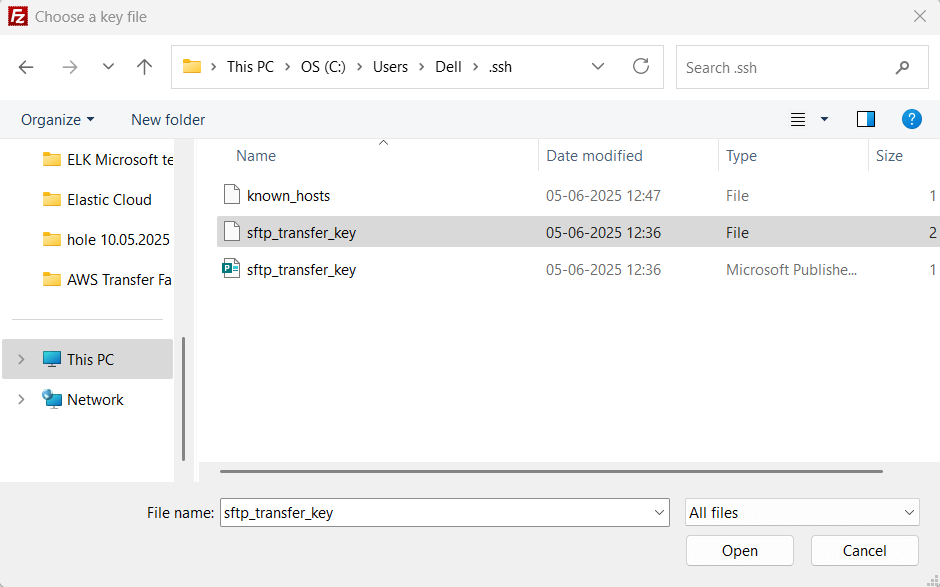
devopshint. - Key file: Browse to C:\Users\YourWindowsUsername\.ssh\sftp_transfer_key (your private key). Click Connect.
You should see test_upload.txt in the remote pane. Drag and drop files from Local site to Remote site to test transfers.

You can verify that files are transferred to S3 Bucket. Go to S3 bucket > Restricted Folder.

Step #7:Verify Access Restriction
This is crucial to ensure your security settings are working.
From the sftp> prompt, try to navigate to the root directory or parent directory.
cd ..
ls
cd /
ls
the ls command should still only show the contents of Restricted Folder/ (e.g., test_upload.txt), indicating you cannot escape the confined home directory.

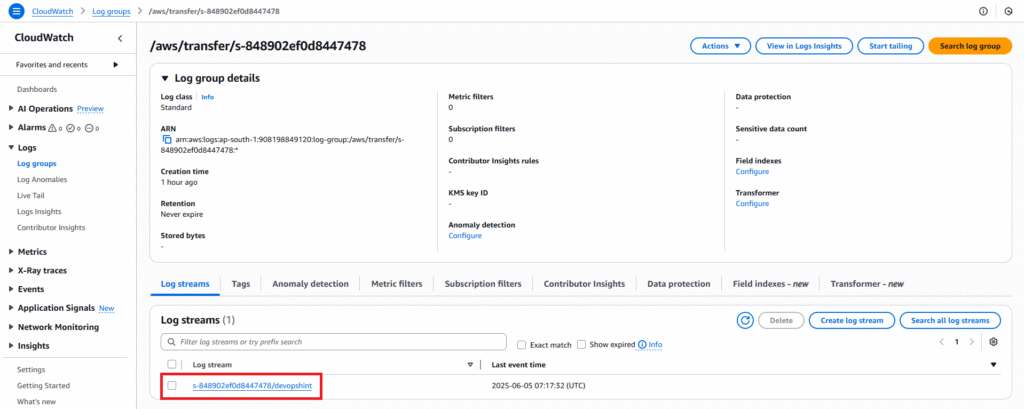
Step #8:Monitor Logs in CloudWatch
AWS Transfer Family integrates seamlessly with CloudWatch Logs, providing valuable insights into your SFTP server’s activity.
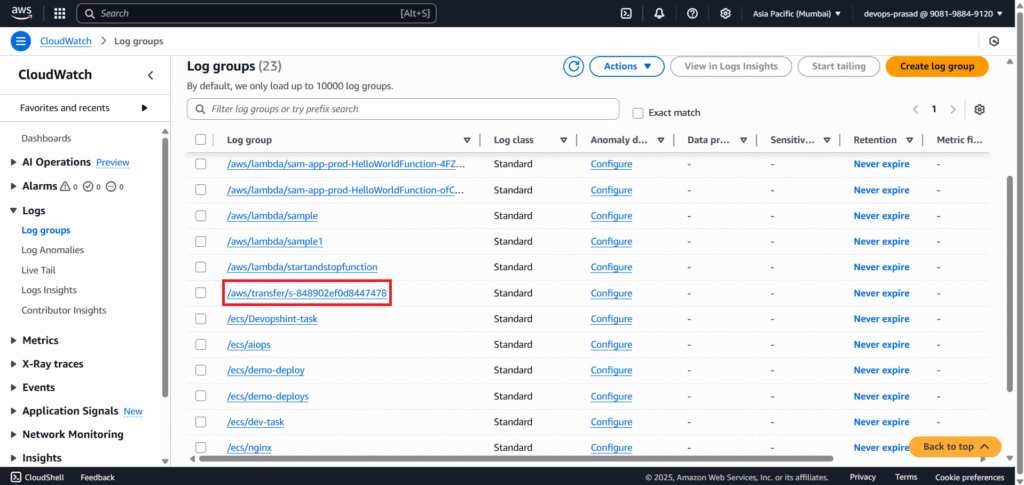
Navigate to CloudWatch in the AWS Management Console. In the left navigation pane, click Log groups under “Logs”.

Look for a log group starting with /aws/transfer/s-. This is the auto-generated log group for your SFTP server (the s- ID matches your Transfer Family server ID). Click on the log group name.
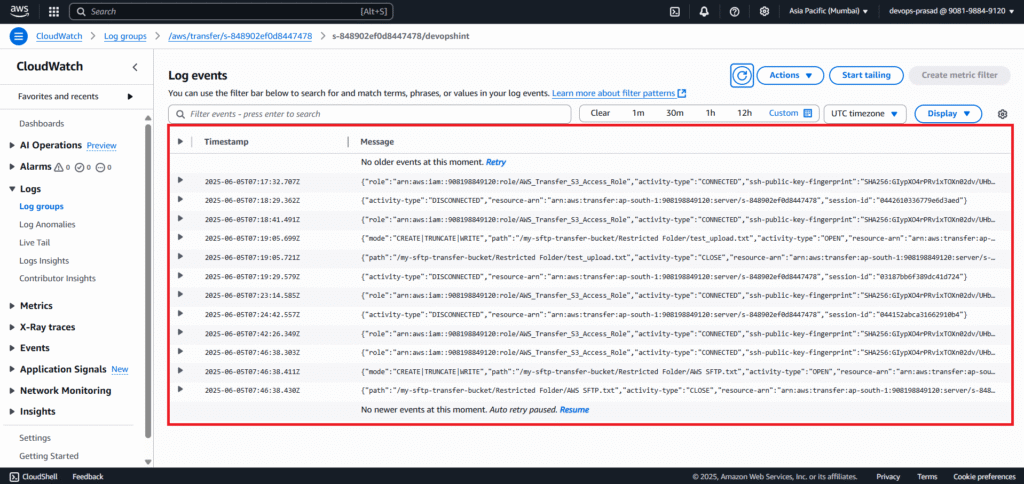
You will see one or more Log streams. Click on the latest log stream to view recent log events.
You’ll see entries for successful SSH authentication. File transfer operations (PUT, GET, DELETE). Connection attempts. Any errors or warnings related to your SFTP server.
Conclusion:
You have now successfully set up a secure and fully managed SFTP server using AWS Transfer Family. By leveraging this service, you’ve avoided the complexities of managing server infrastructure, benefiting from AWS’s scalability, reliability, and security features. Files are securely transferred directly into your Amazon S3 bucket, user access is precisely controlled and restricted to specific folders, and you can monitor all activity through CloudWatch Logs. This provides a robust and efficient solution for your file transfer needs.
Related Articles:
Send alerts to Microsoft Teams Using Elastic Stack
Reference: